Chromebooks are loaded from top to bottom with accessibility tools and features, all geared toward creating a sustainable user experience for ChromeOS users. Out of all the different apps and programs coded into a Chromebook, the in-built file manager called “Files” is an indispensable tool with hidden features.
In this guide, we’ll explore “Files” on ChromeOS by walking you through the entirety of the application in an easy-to-follow format while discussing the file manager’s various functionalities, both apparent and hidden. Read through the end of the guide for the best results.
What is the in-built file manager feature on ChromeOS?
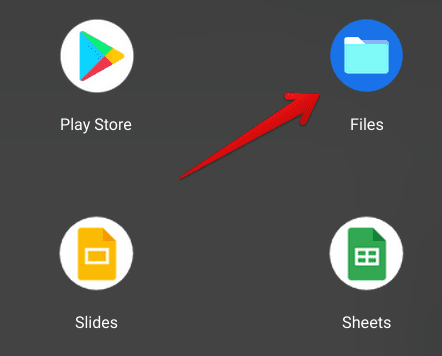
Opening the “Files” system app
Chromebooks have multiple pre-installed native applications, such as Camera, Settings, Gallery, and Files. Being one of the essential facets of the operating system, the “Files” section deals with locally stored data on the device, allowing users quick access to their files, images, videos, and other documents on the go.
The app’s user interface is minimal, with a sidebar on the left side of the window for swift switching between different sections. These include “My files,” a general area comprising all the other sections of the Files app, Downloads, Camera, Play files, Android, and Linux files.
As the name of each of the subsections depicts, these different folders are built to accommodate specific types of files. In “Downloads,” you’ll find all the content downloaded on your Chromebook, mostly from Chrome or another internet browser like Opera, Brave Browser, or, perhaps, Edge.
The “Android” area stores all Android-centric files, such as APKs, saved data of your installed Android games and apps, and game files. “Camera” will keep the pictures you snap from the built-in Camera app on your Chromebook, and “Play files” will hold relevant Google Play Store data, such as the particulars revolving around photos, music, and movies.
Lastly, the “Linux files” section is substantial for holding Linux files. Here, you’ll be filling the folder, not the other way around. If you wish for your Chromebook’s Crostini Linux terminal to read a specific file, you must first transport it to the Linux files folder via the simple copy-and-paste strategy.
That’s the gist of it, but there’s still much to delve into here. In the next section, let’s take a better look at the Files app on ChromeOS.
Using the “Files” app on a Chromebook
Given the minimal user interface of Chromebooks that stretches across their whole operating system, the Files app is no different from the usual ease of use associated with these sleek devices. We recommend that you pin the built-in file manager to your Chromebook’s shelf if you haven’t already for an even smoother experience while working with the app.
To do that, head to the launcher area by clicking the circle-shaped icon in the bottom-left corner of the ChromeOS interface and hovering over the Files app. Then, right-click on the app, equivalent to tapping with two fingers on your Chromebook’s trackpad, and select “Pin to shelf.”
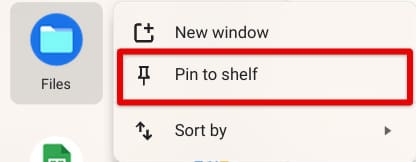
Pinning the “Files” app to the shelf
The basics of the Files app
That should do the trick in the future. Now, launch the file manager and take a moment to understand its basic UI. On the left side of the screen, you’ll find a resizable column acting as a go-to shortcut for the main relevant sections of the file manager. Each of these sections retains a distinct type of file. Getting used to that shouldn’t be an issue.
If you focus on the top-right corner of the screen, you’ll find additional features to supplement your working experience with the in=built ChromeOS file manager. These include a search option to help you dig up files that you’ve left deep within Files somewhere and don’t remember the pathway to them anymore, a toggle to alter the view, and sort options too.
Currently, the “Files” app comprises two view types—thumbnail and list. We recommend using the former for an enlarged visualization of pertinent files in folders with a ton of content. On the other hand, the “list” view works excellently when you need to copy items off the folder.
Your sort options include “Name,” “Size,” “Type,” and “Data modified.” To view the most recently stored items, use “Date modified” for the best results. It’s also possible to resize the side column by clicking and dragging the provided option in the left or right directions, depending on your preference.
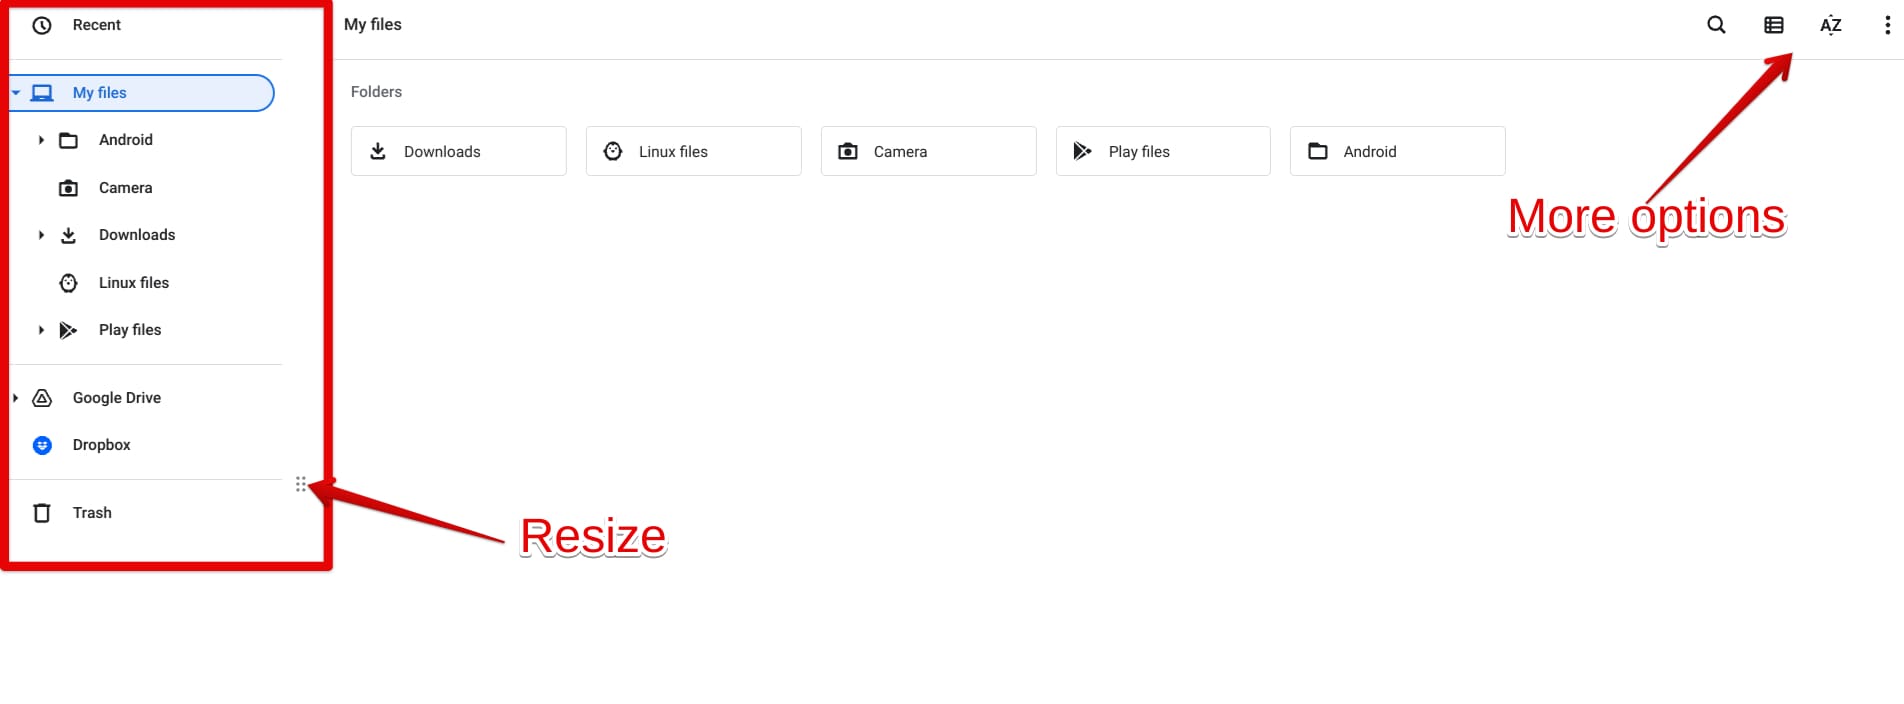
Explaining the Files app’s interface
Lastly, the three vertical dots spaced together are more options concerning the file manager. Interestingly, these consist of advanced and essential features that users can get into, starting with creating a new folder using the “Ctrl” and “E” shortcut key combo and opening a new Files app window to speed up your productivity.
The “Recent” area in Files
That said, if you wish to look at all the items that have been added to the Files app as of late, click the “Recent” button in the top-left section of the screen for a slew of content mixed with audio, images, documents, and videos. In this area, you can also view a specific type of file, say pictures, by tapping the relevant button.

The “Recent” section in the ChromeOS file manager
Creating a new folder in Files
It’s also reasonably simple to create new folders in the Files app. Right-click on any empty area and choose “New folder.” Once done, a blank folder will surface on the screen, allowing you to rename it and move to any available file manager section, such as Linux files, Android, and even Camera.
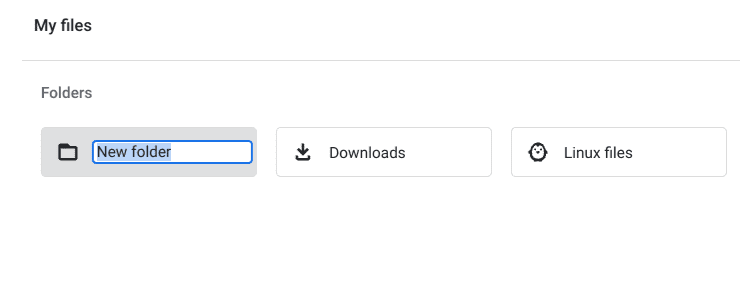
Creating a new folder in the Files app
Deleting items in the Files app
Deleting items in Files is also relatively painless and can be done in multiple ways. The standard way is to select a file and either right-click it to choose “Delete” or tap the “Delete” icon in the upper-right corner of the Files app interface to get the job done.
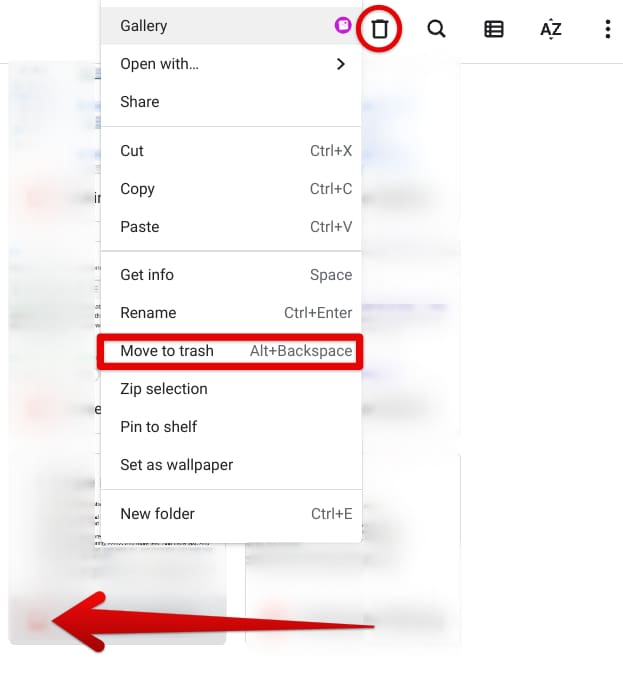
Deleting an item in the Files app
A quick and easy way to delete a group of different files is to first switch to the list view mode, select one file that you wish to get rid of, and use the “Shift” key followed by pressing the “Up” or “Down” arrow key to auto-select files in the respective direction. Once your selection is in order, use the “Alt” and “Backspace” shortcut keys to delete selected items instantly.
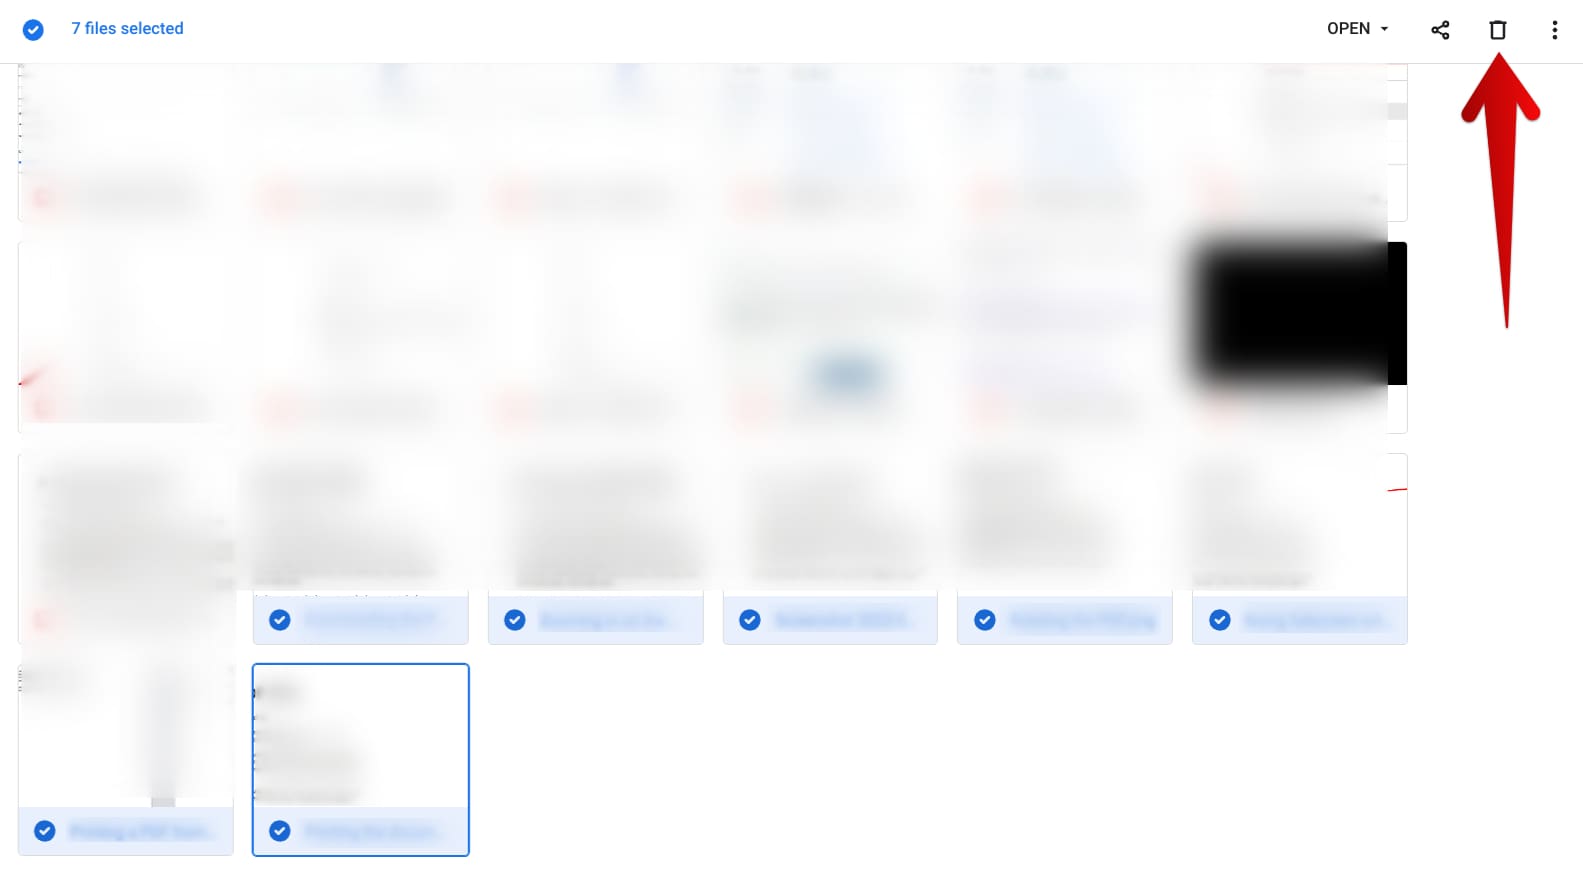
Mass-deleting files in the file manager
The ChromeOS file manager doesn’t always have a separate “Trash” section for deleted files, similar to the “Recycle Bin” on Windows PCs. The feature and a handful of other additions were added to Chromebooks in ChromeOS 108. Therefore, whenever you delete items in the Files app, they first go to “Trash,” which has to be emptied.
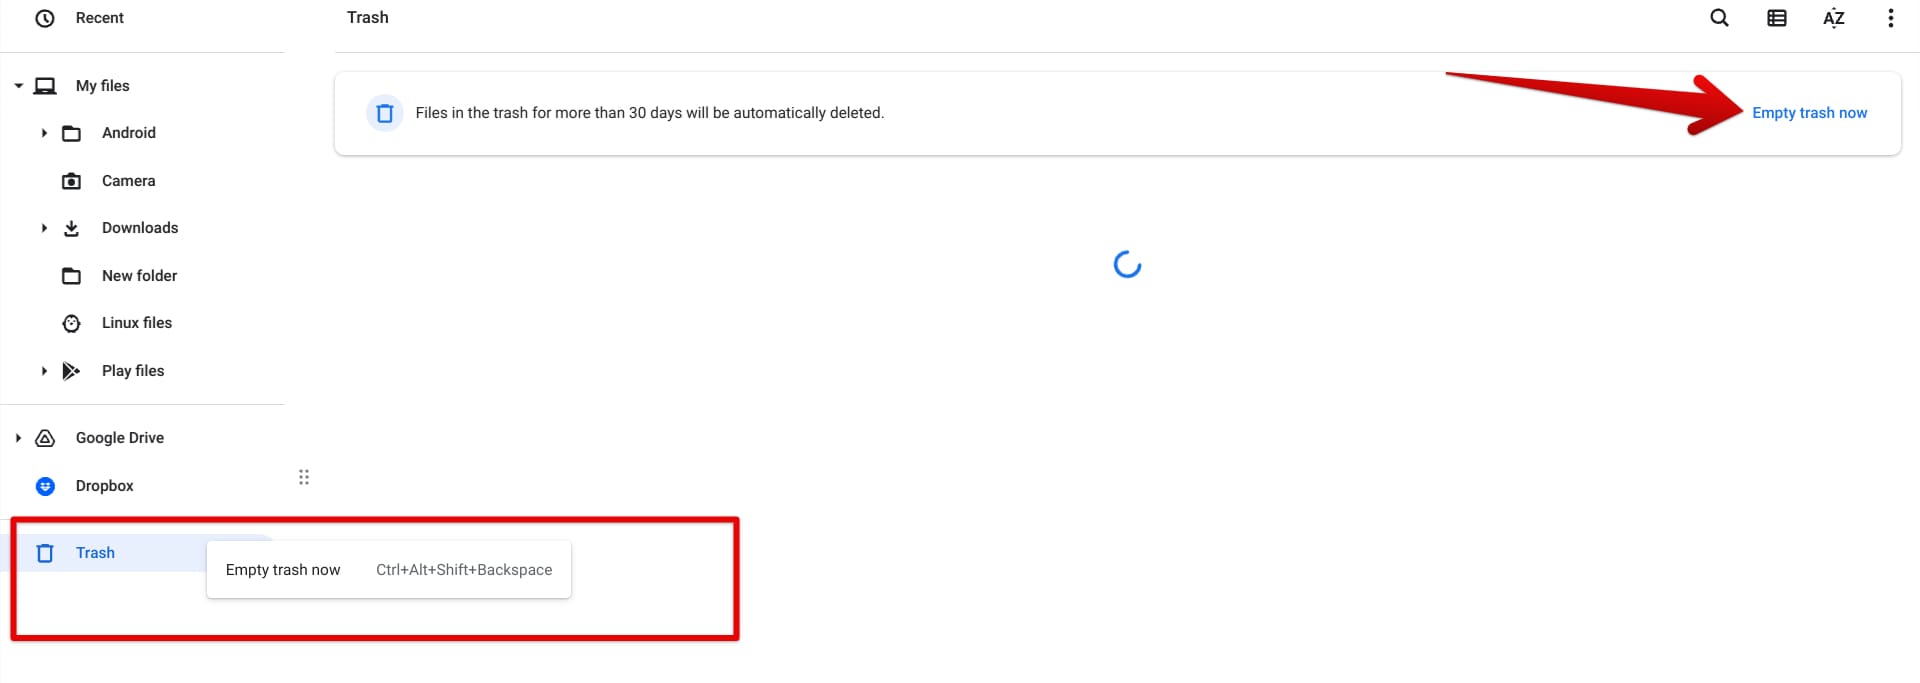
Emptying the trash
Other tips and tricks
If you must copy items in bulk, press “Ctrl” and “A” together to mass-select files. You can then use “Ctrl” and “C” to copy whatever you’ve selected in a flash, not to mention pasting it with similar convenience using “Ctrl” and “V.” The “Show hidden files” option does exactly that if toggled on while “Files settings” takes you to a specific section in the “Settings” app.
At the end of the dropdown menu, you can also glance at your Chromebook’s available storage. All of the above is what beginners will mainly be concerning themselves with, but if you’re a power user, check out “Manage Linux sharing” and “SMB file share,” which rests within the “Services” subsection for added functionality.
“Manage Linux sharing” is simple and only relates to the files and folders you’ve shared with your Linux terminal using the file manager for the command-line terminal to access and read the content. However, the “SMB file share” tool is a different beast and revolves around connecting to server programs for file read and write purposes.
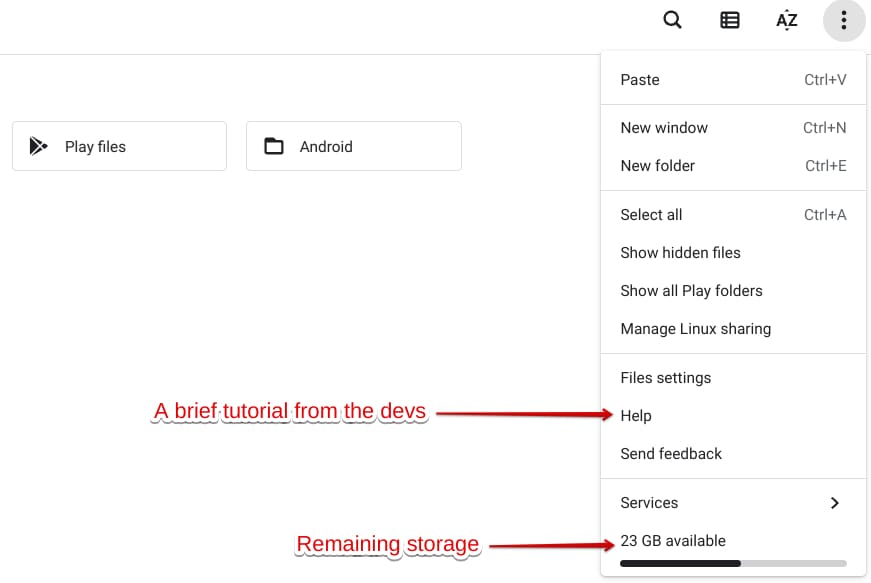
Additional Files app actions
Google Drive and the built-in ChromeOS file manager
Being a proponent of effective simplicity, ChromeOS readily integrates with one of the world’s most buzzing cloud storage platforms—Google Drive. From being able to work offline to offering easy organization techniques to its users, Drive is a program to rely on in today’s digitally interconnected world.
It’ll comfort you to discover that the Files app in Chromebooks has a specialized “Google Drive” located on the left side panel that allows lightning-fast access to your cloud-stored items. Tap on it to get to the next step and reveal subfolders relating to Google Drive.
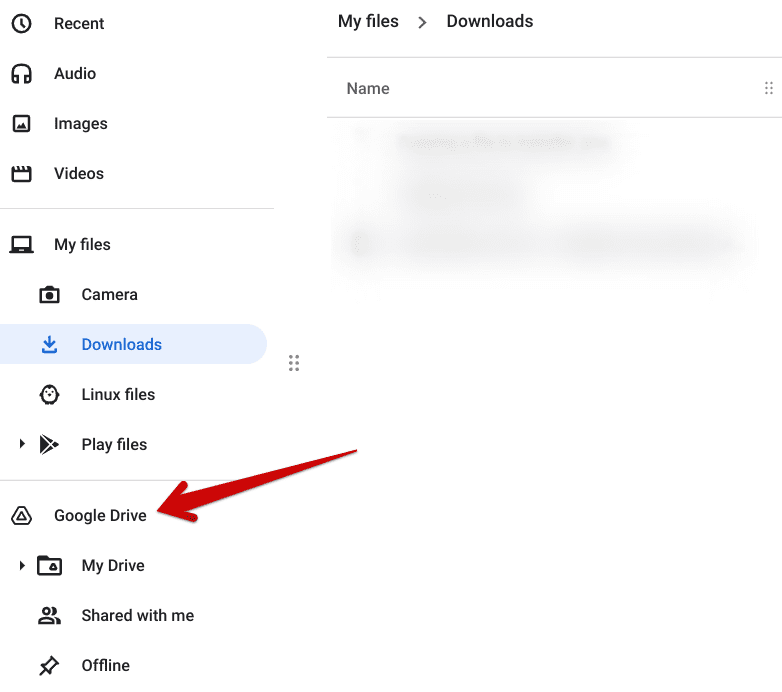
Clicking on the “Google Drive” folder
You’ll now be taken to the same “My Drive’ area on your Chromebook as the web handle of your Google Drive account, comprising all of the files that are a part of your profile. Feel free to surf through your content, download any file you want locally, or start working on a Docs, Sheets, or Slides document immediately on the web with just a couple of clicks.

Google Drive on ChromeOS
If you can’t find this section on your side of things, ensure you haven’t disconnected your Drive account from your Chromebook. To confirm this, head over to the “Settings” app, followed by choosing “Files” on the side panel using the “Advanced” dropdown bar.
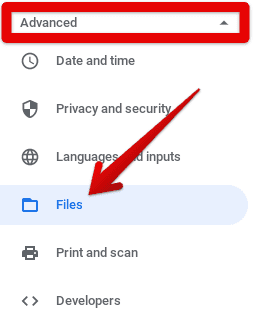
Accessing the “Files” section
You should now be able to visualize an option called “Disconnect Google Drive account” and a toggle beside it. Check that the feature isn’t currently active. If it is, tap on the toggle to disable it right away. Head back to the file manager, and you’ll now be able to find the “Google Drive” folder.
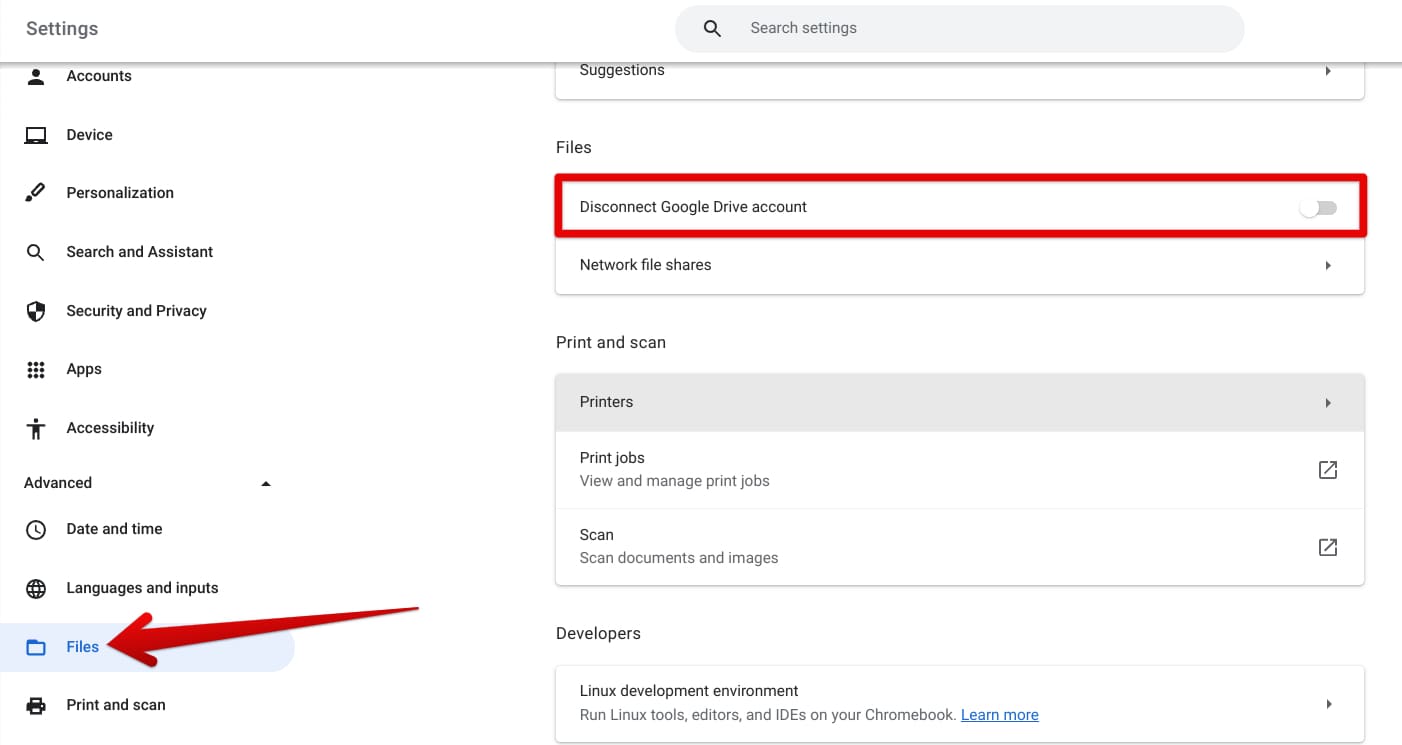
Disabling the “Disconnect Google Drive account” feature
Integrating Dropbox with the Files app
It’s no secret that Google Drive is a high-quality cloud-based storage platform, but it’s not the only one out there. Another big player that goes by the name of Dropbox can work directly with Chromebooks too, and we think you should take advantage of it, given the app’s direct integration with the ChromeOS file manager.
To get started, you must download the Dropbox app from the Google Play Store. For the uninitiated, the popular Android app storefront is built within modern-day Chromebooks. Still, if you’re sporting a dated model, you must confirm the Play Store feature’s availability first.
For those already aware, fire up Google Play on your end and search for Dropbox using the in-app search bar. Once you find it, tap on the “Install” button to commence the download. The app should be installed on your end in a matter of minutes.

Installing Dropbox on ChromeOS
As soon as the application installs on your end, launch it immediately and sign in with your account. After completing the initial set-up, head back to the Files app, and you’ll find the app already integrated with your Chromebook’s file manager.
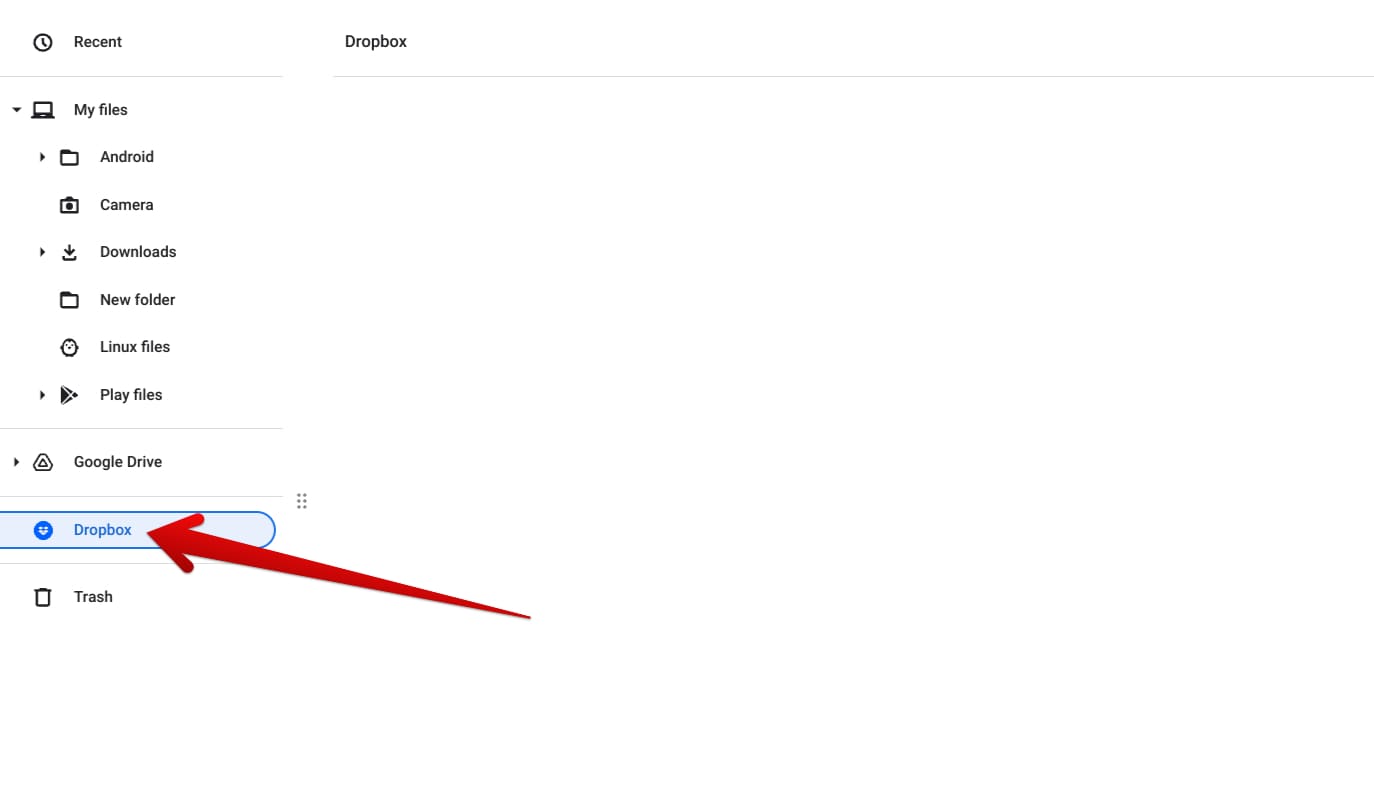
Dropbox integrated with ChromeOS
This is yet another use case that the built-in Chromebook Files app can offer to its users, so you shouldn’t indeed turn a blind eye toward it if you find yourself storage-strapped all the time anyway. For a more detailed guide on installing Dropbox, we recommend checking out our complete guide.
Conclusion
Chromebooks have seen many improvements over the years as the developers have pushed out updates consistently. Out of all the refinements ChromeOS has been receiving, the built-in file manager is among the apps getting the most attention now that it’s faster, more functional, and features a design overhaul.
In this comprehensive guide, we’ve talked about the system app down to the last-minute detail, including how you can use your Drive and Dropbox accounts and benefit from painless productivity. Let us know in the comments ahead if there’s any tip or trick we’ve missed talking about.
Chrome Ready wishes you good luck!

1 comment
I absolutely detest the fact that they believe they have done a good job at designing the files app. The UX is terrible and there are no distinctive colors, font weights and sizes/shapes to easily identify objects your eyes are scanning for. Why on earth can we not customize the “files” app further? Everything looks and feels the same no matter where you are in the app. Chromebooks limitations on customizations is one of the things that drives me absolutely mad, if there are any hacks to fix these issues I would love to read about it.