Visuals are essential to documents and presentations, helping to convey complex information appealingly and engagingly. Google Drawings, a part of the Google Workspace suite of productivity tools, offers a powerful and user-friendly platform for creating a wide range of visuals, from diagrams and flowcharts to banners and infographics.
For students, professionals, or anyone looking to create visually compelling visuals for documents and presentations, mastering Google Drawings can be a valuable skill. In this article, we will delve into how to create visuals using Google Drawings, exploring its tools, features, customization options, collaboration capabilities, advanced tips, and a lot more. So get ready to unlock your creative potential and elevate your visual communication to new heights.
Getting started with Google Drawings
Google Drawings is a web-based application part of the Google Workspace suite of tools, including popular applications such as Docs, Sheets, and Slides. Google Drawings provides a powerful visual creation platform, from simple diagrams to complex infographics.
Accessing Google Drawings: To access Google Drawings, go to the Google Workspace homepage and sign in with your Google account. Once logged in, you can access Google Drawings by clicking on the “Apps” icon in the upper right corner of the page, then selecting “Drawings” from the list of available applications.
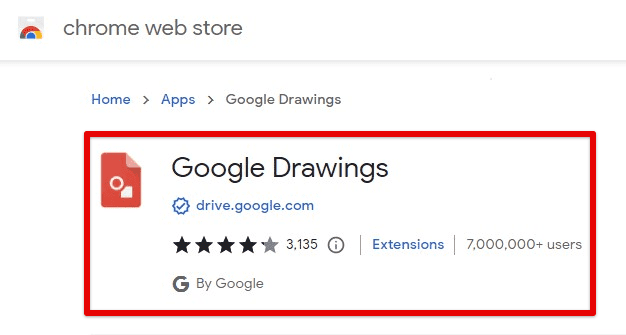
Accessing Google Drawings
Creating a new drawing: Once in Google Drawings, you can create a new drawing by clicking on the “Blank” option under the “Start a new drawing” section. This will open a blank canvas where you may start creating the visual.
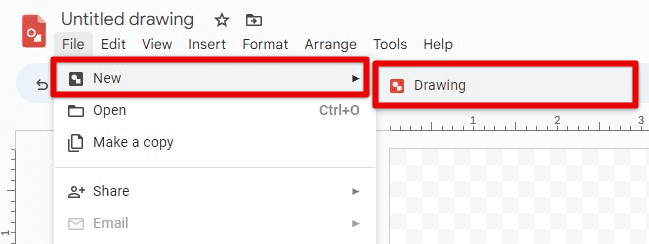
Creating a new drawing
Understanding the user interface: Google Drawings has a simple and intuitive user interface that consists of several key components:
Menu bar: The menu bar is located at the top of the Google Drawings window and contains various menus, including “File,” “Edit,” “Insert,” “Arrange,” “Format,” and “Help.” These menus provide various tools and features for creating and customizing your visuals.
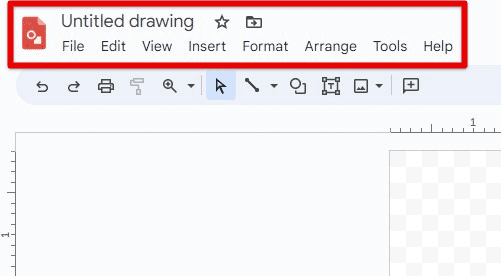
Menu bar
Toolbar: The toolbar is located below the menu bar and contains icons for various drawing tools, such as shapes, lines, text boxes, images, and more. Select these tools to add or edit objects in your drawing.
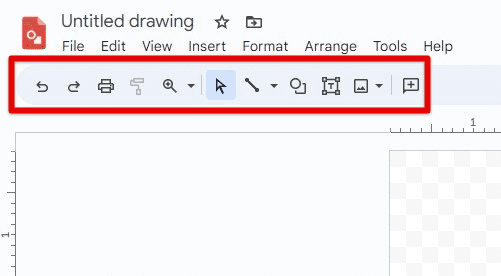
Toolbar
Canvas: Canvas is the main working area where you create and manipulate visuals. It is a blank white space where adding shapes, lines, text, images, and other objects is possible.
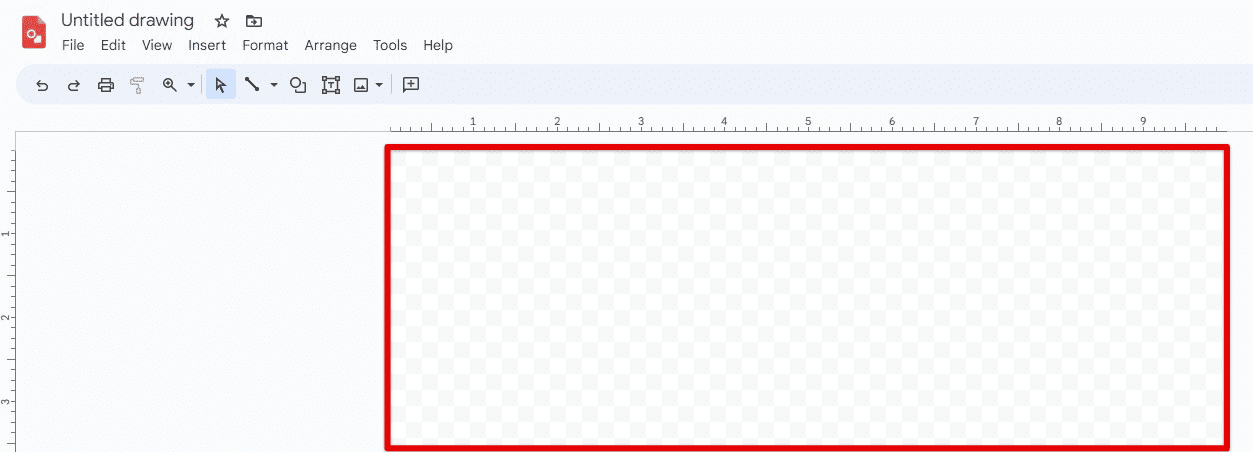
Canvas
Properties panel: The properties panel is located on the right side of the Google Drawings window and provides options for customizing the selected object’s properties, which include size, position, color, and transparency. You can use the properties panel to fine-tune the appearance of your drawings.
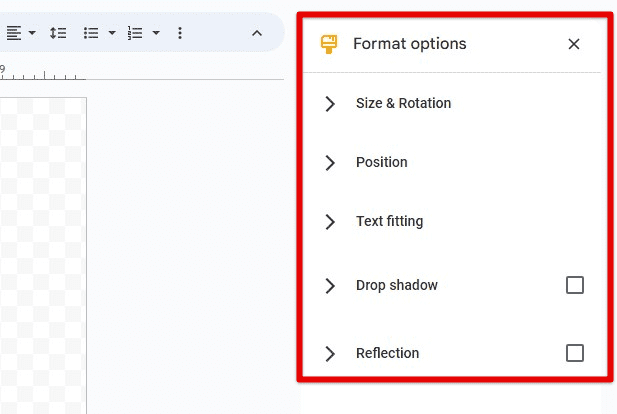
Properties panel
Sidebar: Sidebar is located on the right side and provides access to additional tools for adding images from Google Drive, inserting a background image, and managing layers.
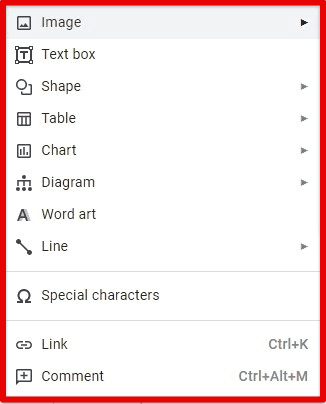
Sidebar
By familiarizing yourself with these key user interface components, you can quickly start creating visuals for all sorts of documents and presentations. In subsequent sections, we will explore various tools and features of Google Drawings in more detail.
Understanding tools and features
Google Drawings provides various tools and features to create visually appealing and engaging drawings. Following is an in-depth overview of different objects and tools available in Google Drawings and how to use them effectively.
Shapes: There is a variety of shapes that you can use to create diagrams, flowcharts, banners, and more. To add a shape, click on the “Shape” icon in the toolbar, and choose from rectangles, circles, arrows, and more. Once you’ve selected a shape, click and drag on the canvas to create it. Resize, rotate and change the color and style of the shape using the properties panel. You may also add text to shapes to label them or provide additional information.
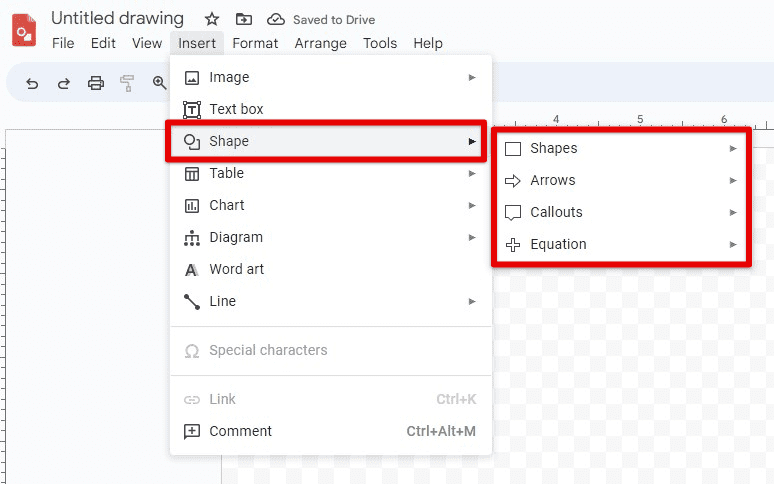
Shapes
Lines: It is possible to add different types of lines as well. To add a line, click on the “Line” icon in the toolbar, and select from straight, curved, arrows, and connectors. Click and drag on the canvas to create the line, and use the properties panel to customize its color, thickness, and style.
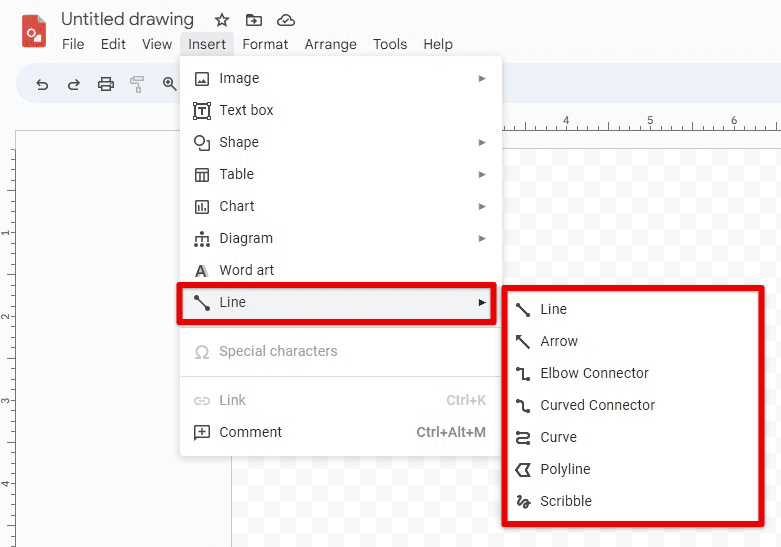
Lines
Text boxes: Text boxes allow you to add text to your visuals. For adding a text box, click on the “Text box” icon in the toolbar, and then click on the canvas where you want to add that text. Next, please type or paste the text into the box and use the properties panel to customize its font, size, color, alignment, and other formatting options. You can also resize and reposition the text box to fit the layout.
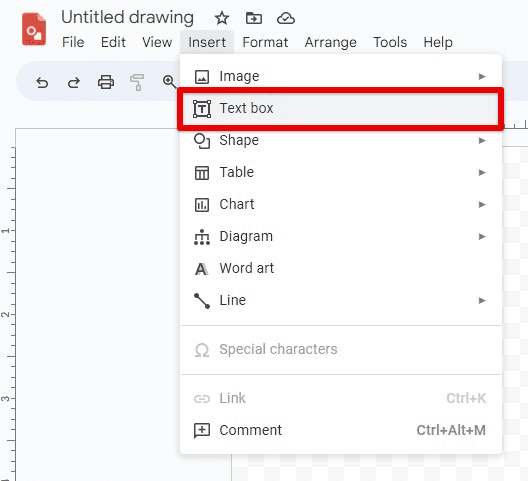
Text boxes
Images: Google Drawings allows you to add images from Google Drive or the web. Click on the “Image” icon in the toolbar, and choose from one available option: uploading an image from your computer, searching for an image on the web, or inserting an image from Google Drive. Once the image is added, you may resize, crop, and rotate it using the handles and the properties panel to adjust its brightness or contrast.
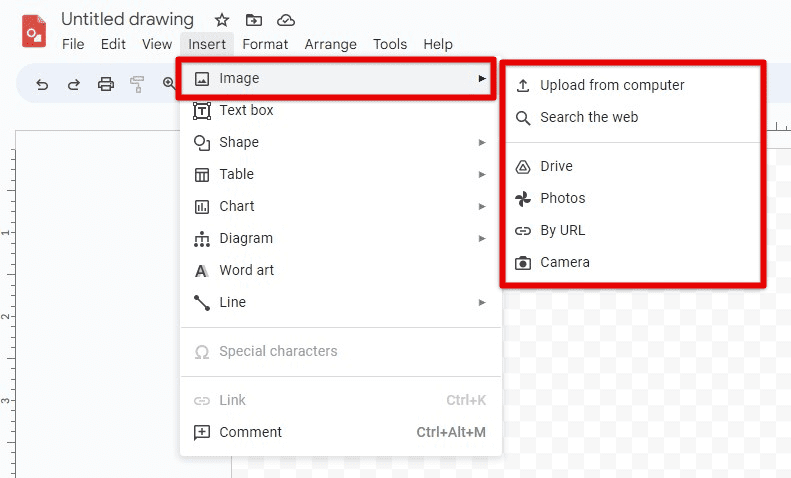
Images
Fill and stroke: Several options exist to customize the fill and stroke properties of shapes, lines, and text boxes. Use the properties panel to change the color, transparency, and gradient of the fill, as well as the stroke’s color, thickness, and style. Customizing the fill and stroke properties can help you create appealing designs that match your branding or presentation theme.
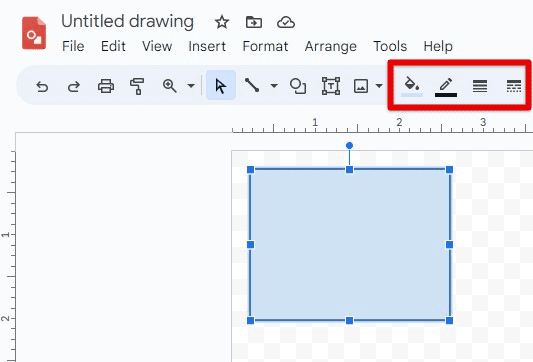
Fill and stroke
Alignment and Positioning: Google Drawings lets you align and position objects precisely on the canvas. You can use the alignment options in the toolbar to align objects relative to each other or the canvas, align objects vertically or horizontally, distribute objects evenly, and align them to the center, top, bottom, left, or correct. The properties panel specifies objects’ exact positions in terms of X and Y coordinates.
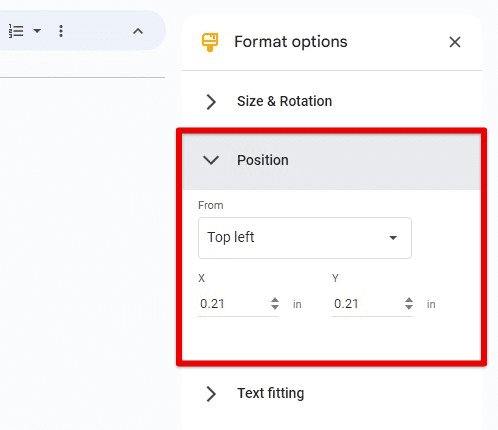
Alignment and positioning
Layers: The layering feature allows you to organize objects in different layers, similar to how you would use layers in image editing software. It is used to control objects’ order, group them together, and hide or show them as needed. Access the layers panel in the right sidebar, drag and drop objects to different layers or use the “Arrange” menu in the main toolbar to rearrange the layering order.
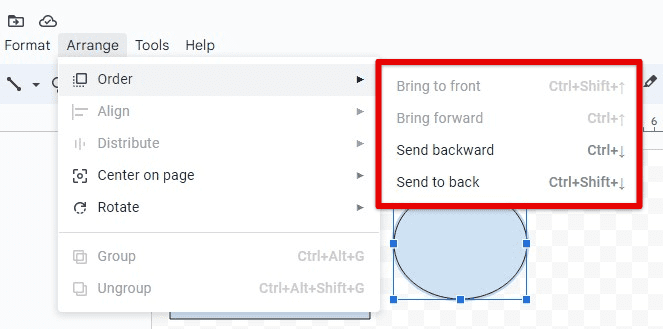
Layers
Customizing visuals
Google Drawings provides several options for customizing visuals to create polished and professional-looking drawings. A detailed overview of how you can customize visuals in Google Drawings follows.
Size: Adjust the size of objects, such as shapes and images, to fit your visual’s layout. To resize an object, click on it to select it, then click and drag one of the corner handles to resize it proportionally. Also, click and drag one of the sides handles to resize the object non-proportionally. Alternatively, you can use the properties panel to specify that object’s exact width and height.
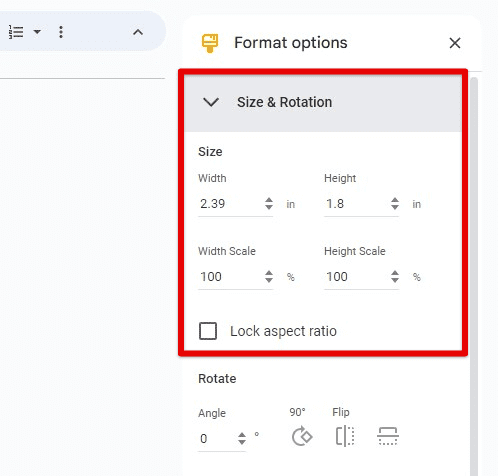
Size
Color and transparency: You get options for customizing the color and transparency of shapes and images. To change the color of a shape or an image, select it and use the fill color option in the toolbar or properties panel to choose a new color. Make use of the transparency option in the properties panel to adjust the transparency of that object, making it more or less opaque.
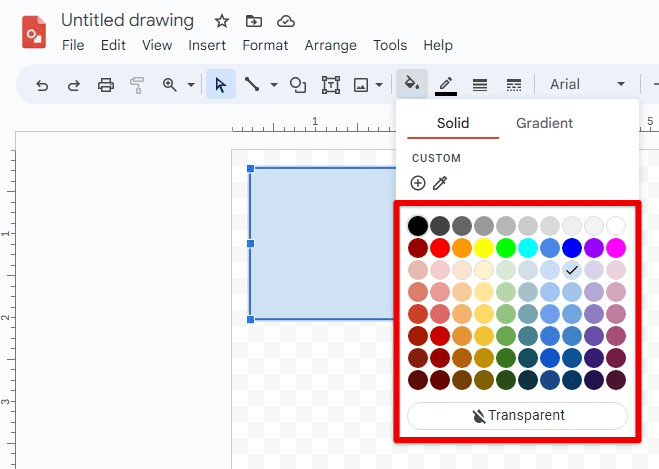
Color and transparency
Effects: It is possible to apply various effects to objects to add visual interest to your drawing. To do so, select the object and use the “Effects” option in the toolbar or properties panel to pick from shadows, reflections, and glows. You can customize the effect’s properties which include but are not limited to color, size, and opacity. You can achieve the desired visual effect by knowing how to control them precisely.
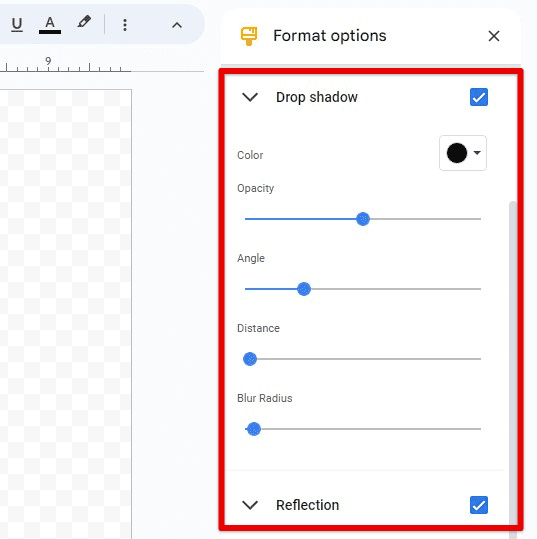
Effects
Grouping objects: Grouping objects together makes moving, resizing, and applying effects to multiple objects as a single unit easier. Select the things you want to group by holding down the “Shift” key while clicking on them, and then right-click and select “Group” from the context menu. You can also use the “Group” option in the toolbar or the “Arrange” menu in the menu bar to do the same. This helps you maintain objects’ relative positions and alignments while applying changes or effects.
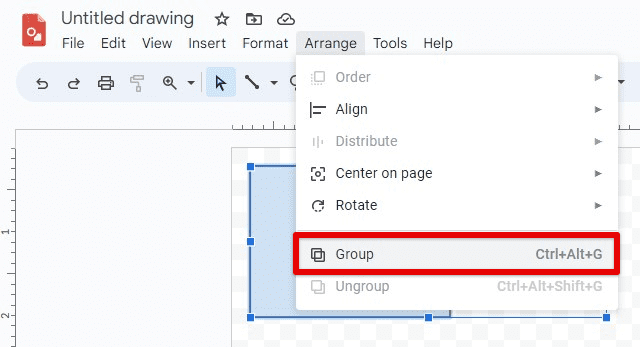
Grouping objects
Grids and guides: There are grids and guides for aligning and distributing objects precisely on the canvas. You can enable the grid and guides from the “View” menu in the menu bar. The grid consists of evenly spaced lines that help you align objects horizontally and vertically, while guides are movable lines for positioning and aligning objects to specific locations.
Collaborating and sharing
With Google Drawings, you can access robust collaboration and sharing features that allow you to work seamlessly with others and share your visuals quickly.
Collaboration: Google Drawings lets you collaborate in real-time with others, making it easy to work together on a drawing project. Click on the “Share” button in the top right corner of the interface. Then, invite others to edit or view your drawing by entering their email addresses or sharing a link. Set permissions for each collaborator, allowing them to edit, comment, or view only your illustration. Collaborators can make changes simultaneously, making their edits visible to all other members in real time.
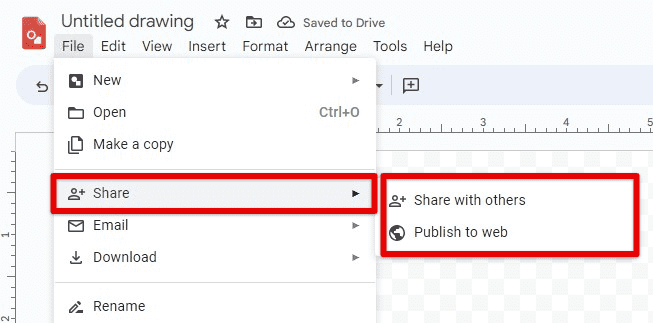
Collaboration
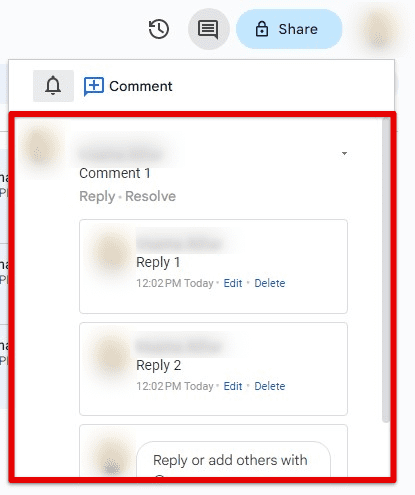
Comments: Users can leave comments on specific objects or the canvas itself, making it convenient to provide feedback or discuss changes. To leave a comment, right-click on an object or the canvas, and choose the “Comment” option from the context menu. Enter your comment in the comment panel, and it will be visible to all collaborators simultaneously. You can also reply to comments by others, resolve these, or delete them as needed, helping you streamline the communication and feedback process.
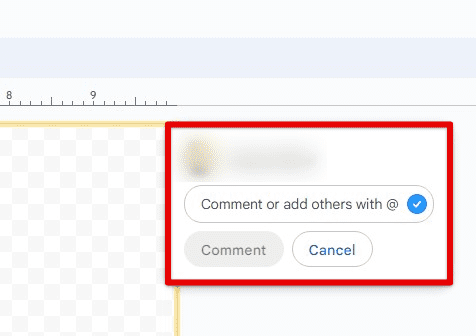
Comments
Chat: Google Drawings provides a built-in chat feature for chatting with your collaborators while working on a drawing. Click on the chat icon in the bottom right corner of the Google Drawings interface. You can then send messages, emojis, or images in the chat, which are visible to all other editors. The chat feature provides a convenient way to communicate and collaborate with your team members during a drawing session.
Chat
Sharing: Various options are available for sharing your visuals. You can embed your drawing in other Google Workspace applications by copying and pasting the drawing or using the “Insert” menu in the respective app. It is also possible to share your drawing as a standalone link that anyone worldwide can access, or you may publish your drawing to the web and share the published link afterward. Google Drawings lets you download the file in different formats, such as PNG, JPEG, SVG, or PDF, making it easy to share these visuals across the web.
Collaborating and sharing in Google Drawings lets you work effectively with others, gather feedback, and share your designs with different audiences. Irrespective of whether you are working on a team project or just sharing your visuals for presentations, Google Drawings provides a seamless and efficient way to collaborate and share your work.
Advanced tips and tricks
Many advanced features and design techniques are already established that help you create visually stunning designs and drawings.
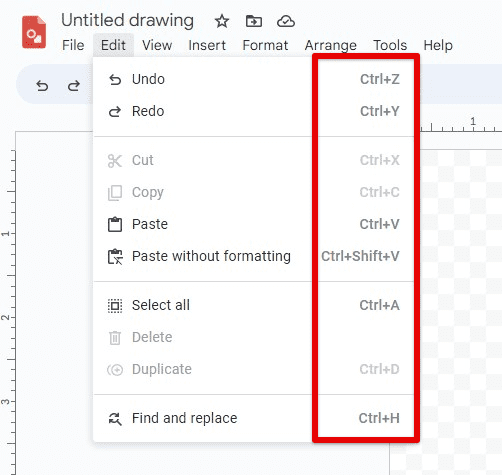
Keyboard shortcuts: Keyboard shortcuts help you navigate and work efficiently in the application. For example, you can use Ctrl/Cmd + C to copy an object, Ctrl/Cmd + V to paste an object, Ctrl/Cmd + Z to undo an action, and Ctrl/Cmd + Y to redo an action. Similar shortcuts exist for duplicating an object and grouping objects. Familiarizing yourself with these shortcuts can significantly speed up your workflow and enhance your productivity in Google Drawings.
Keyboard shortcuts
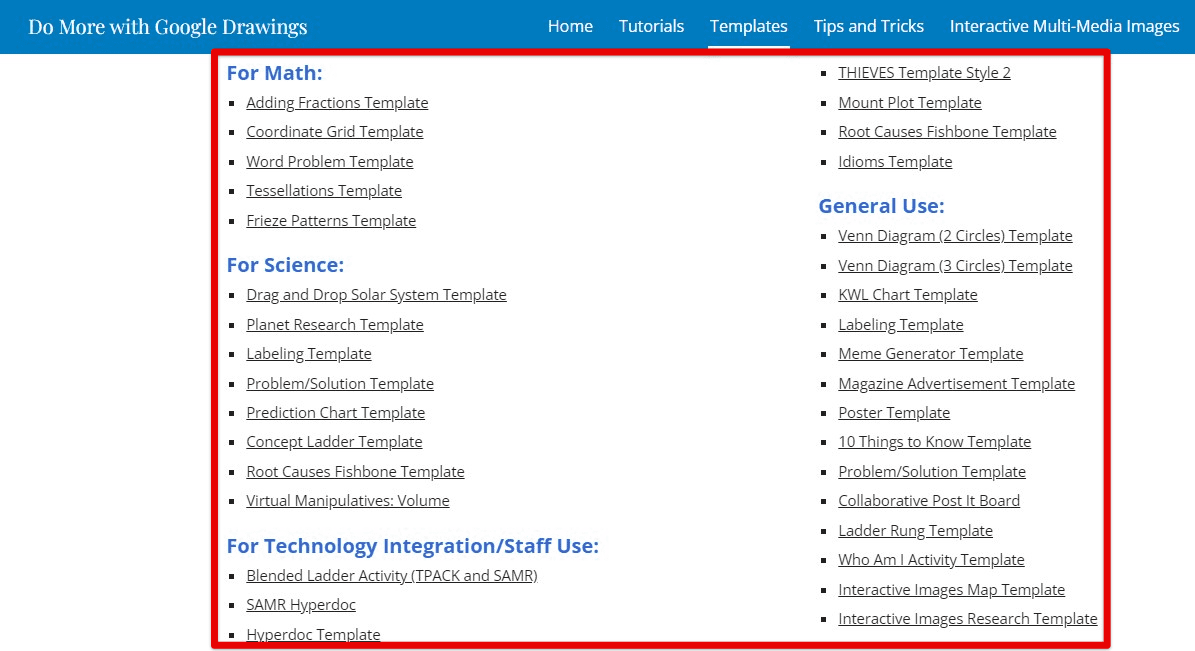
Templates: Templates are pre-designed drawings that can be customized to suit your specific needs. You may also create your templates by designing a drawing and saving it as a template. Similarly, you can access many templates from the existing template gallery. They are a great time-saving tool by providing a starting point for your drawings.
Templates
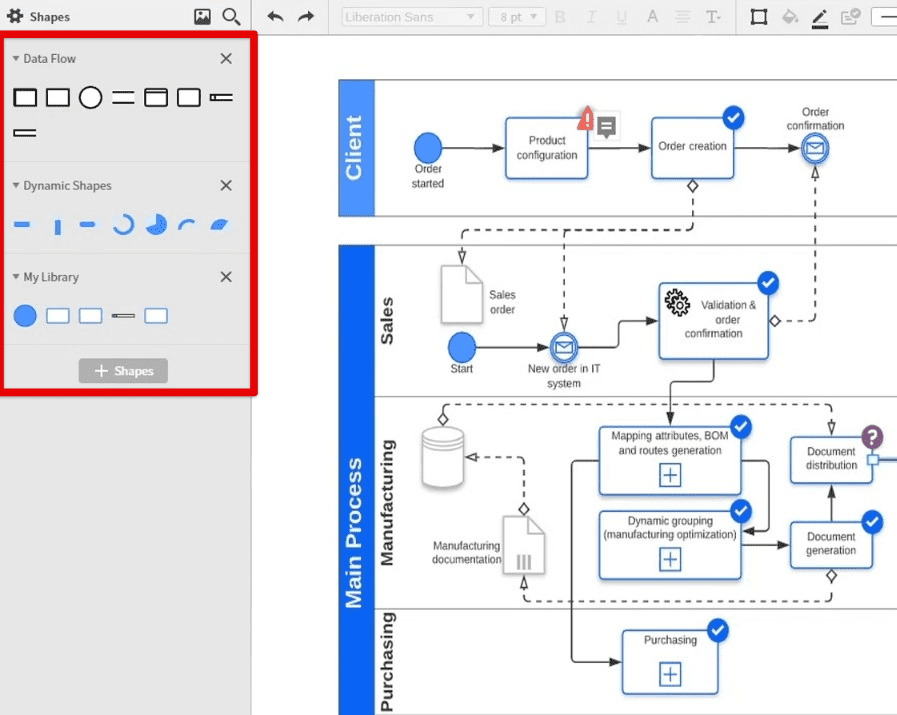
Add-ons: There is inherent support for add-ons, which are third-party tools that enhance the functionality of any application. Add-ons provide additional features, templates, or design elements unavailable in the standard Google Drawings tool set. You can access add-ons from the “Add-ons” menu in Google Drawings and install them to extend their capabilities. Some popular ones include Lucidchart Diagrams, Unsplash Images, and Flaticon for Docs.
Add-ons
Integration with other applications: Google Drawings seamlessly integrates with other Google Workspace applications, such as Docs, Slides, and Sheets. Insert a drawing into a document, presentation, or spreadsheet, and any changes made to the drawing will be reflected in the linked documents immediately. This integration allows you to create visuals in Google Drawings and use them across different apps, providing consistency and efficiency.
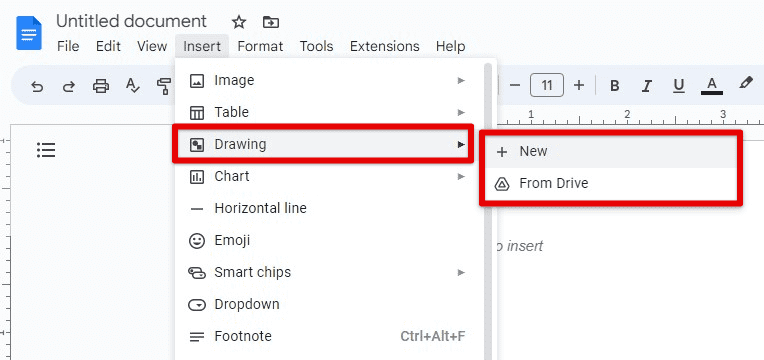
Integration with other applications
Advanced design techniques: You must use advanced design techniques to create professional-looking visuals for documents and presentations. Create flowcharts, diagrams, infographics, mind maps, and other complex visualizations using different shapes, lines, and text tools in Google Drawings. Apply advanced design principles, such as color theory, typography, and composition, to create appealing designs that effectively convey your message. Experimenting with different techniques can elevate the visual impact of your drawings and make them stand out.
Best practices for visual design
Creating visually appealing designs in Google Drawings requires careful consideration of various principles and best practices. Following are some guidelines for doing so. These are especially helpful if you plan on employing Google Drawings regularly.
Choosing appropriate colors: Colors play a crucial role in visual design. Choose visually pleasing colors that align with the tone and purpose of your document or presentation. Use a limited color palette to maintain consistency and harmony in your visuals. Avoid using bright or clashing colors that can create visual distractions. Regarding colors, Google Drawings provides various options, including custom ones, to experiment with different combinations.
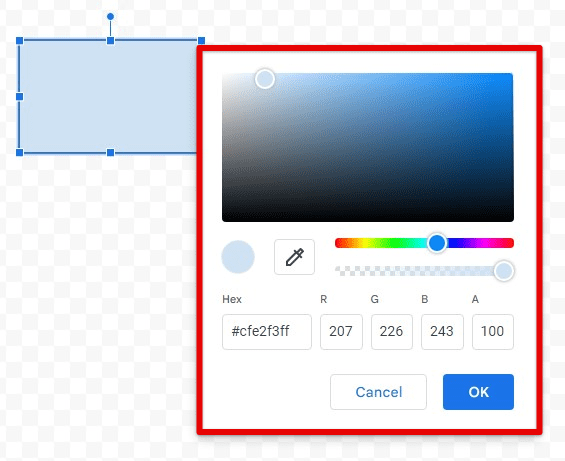
Choosing appropriate colors
Selecting suitable fonts: Fonts convey the tone and style of your visuals. Select fonts that are easy to read and align with your design’s overall theme and purpose. Avoid using too many fonts, creating a cluttered and unprofessional look. Instead, explore different styles and sizes and consider their readability, legibility, and appropriateness.
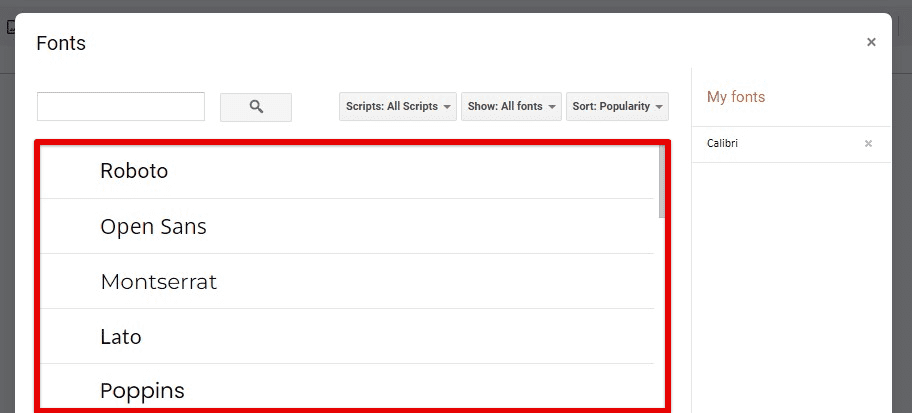
Selecting suitable fonts
Creating a visual hierarchy: Establishing a visual hierarchy helps guide the viewer’s eye through your visuals and emphasizes important information. Use different font sizes, colors, and styles to create a visual hierarchy that highlights key points or elements in the design. Larger fonts, bolder colors, and contrasting styles help draw attention toward highlights, while smaller fonts and more muted colors can be used for secondary or supporting items.
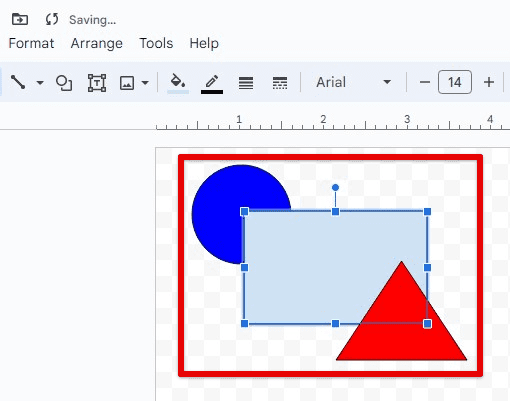
Creating a visual hierarchy
Creating accessible visuals: Consider accessibility when designing your visuals. Use alt text to provide alternative descriptions for images and other visual elements, making your visuals accessible to individuals with visual impairments or using screen readers. Follow standard accessibility guidelines to ensure that your drawings are inclusive and usable by a diverse audience.
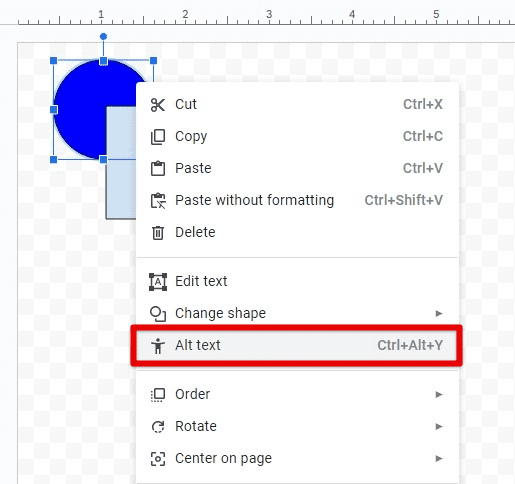
Creating accessible visuals
Avoiding common design mistakes: Some common design mistakes can detract from the visual appeal of any creative work. Avoid using too much text or overcrowding your visuals with many elements, as it can overwhelm the viewer. Keep your drawings clean, simple, and focused.
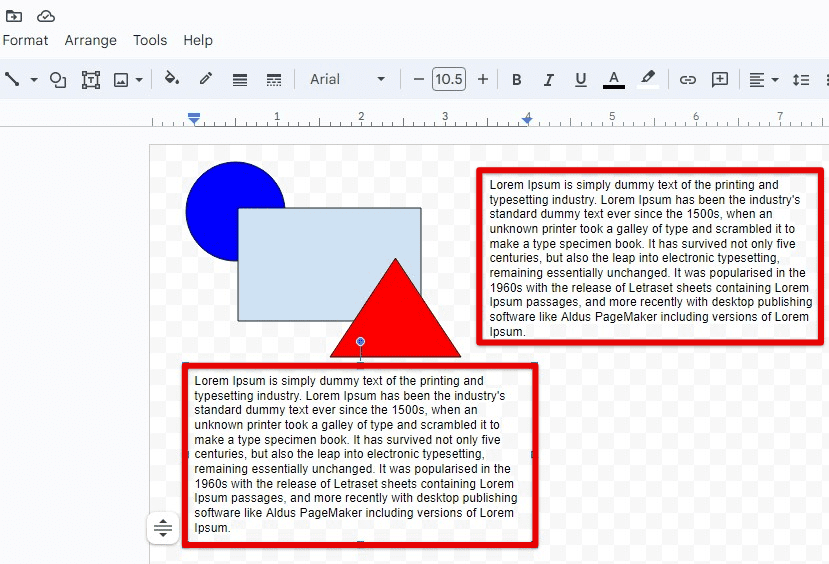
Avoiding common design mistakes
By following these best practices for visual design, you can create visually appealing drawings that effectively communicate your message and enhance the overall quality of your documents and presentations. Experiment with different color palettes, fonts, alignment, and spacing techniques to create engaging visuals that capture your audience’s attention within moments.
Conclusion
Google Drawings is a versatile tool for creating various visuals and drawings. Google Drawings offers a user-friendly interface with a robust set of features, from diagrams for educational materials to social media banners, visual resumes, and beyond. You can create amazing drawings conveniently by customizing visuals with size, color, transparency, effects, and layering and utilizing grids, guides, and alignment tools.
In addition to its design capabilities, Google Drawings has tons of collaboration and sharing features. Inviting collaborators, leaving comments, and using the internal chat allows you to collaborate in real-time, making Drawings an ideal tool for teamwork and group projects.
