All of us want to work smarter, not harder. One way to achieve this is using custom templates in Google Docs, Sheets, and Slides. Custom templates can save time and effort by providing a pre-formatted, reusable framework for your documents, spreadsheets, and presentations. With some planning and creativity, you can create templates tailored to your specific needs, whether you’re working on a project at school, a report for work, or a presentation for a client.
In this article, we will walk you through the process of creating custom templates in Google Docs, Sheets, and Slides and show you how to use them effectively to boost your productivity and achieve your goals.
Understanding templates
Templates are pre-designed formats that serve as a starting point for creating documents, spreadsheets, and presentations. They are blueprints that allow you to quickly create a document with a consistent layout and style without starting from scratch every single time.
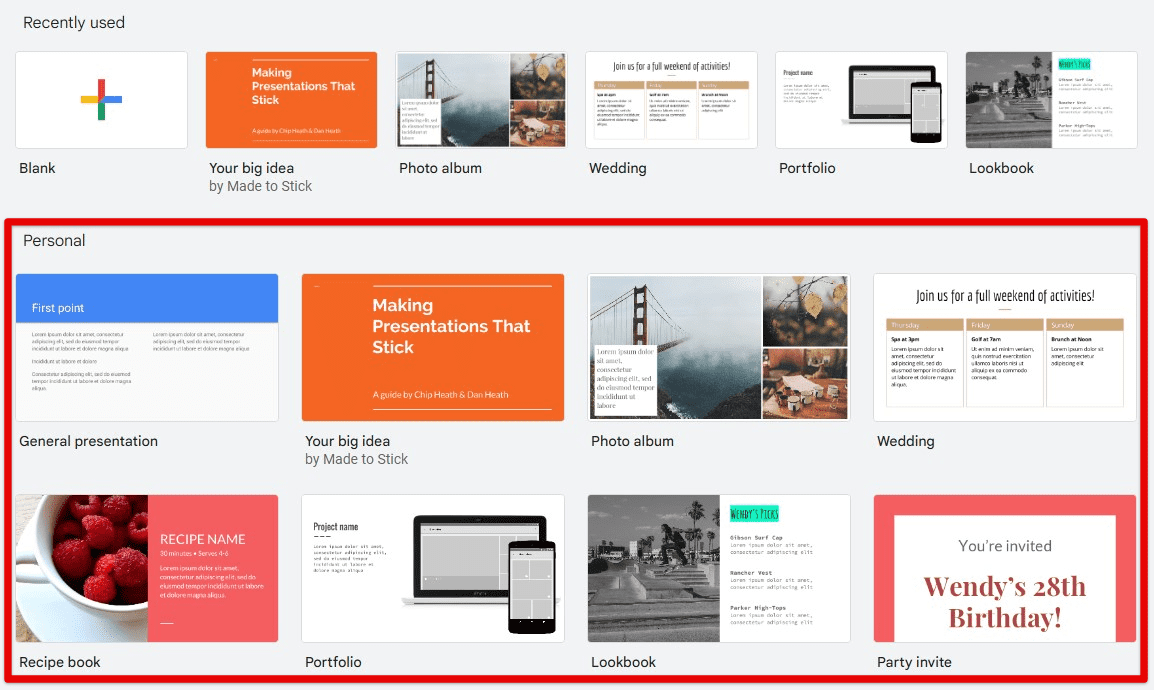
Understanding templates
Built-in templates are provided by Google and can be accessed directly from within the Google Docs, Sheets, and Slides applications. They cover various categories, such as resumes, reports, newsletters, invoices, and calendars. Using these, you save time and effort by providing a starting point for the already formatted and pre-designed document. You can use them as-is or modify them to meet specific needs, requirements, or preferences.
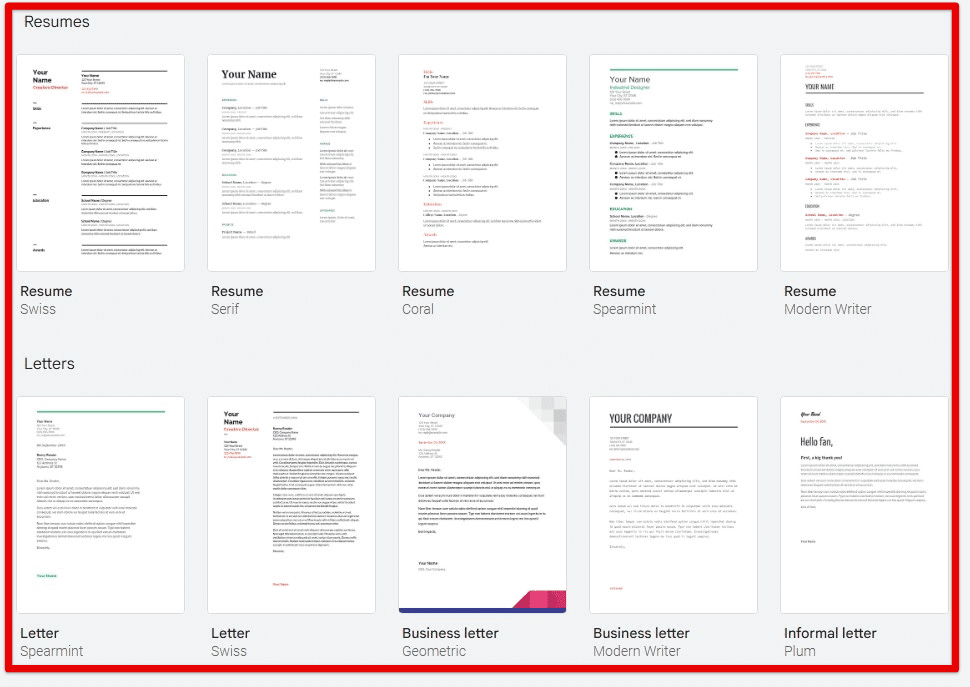
Built-in templates
On the other hand, custom templates are templates you create yourself from scratch or modify from an existing template. They are helpful when you have a specific document format to be used frequently, such as a company letterhead, a project proposal, or a client presentation. By creating a custom template, you ensure that every document has a consistent layout and style, improving your document’s professionalism.
Creating a new template in Google Docs, Sheets, or Slides
Creating a new template in Google Docs, Sheets, or Slides begins with selecting the appropriate document type. Once you have identified the document type that you want to create a template for, follow these steps to create your own custom template:
Open Google Docs, Sheets, or Slides, and click “Blank” to open a new document, spreadsheet, or presentation. Add the content you want to include in your template, such as text, images, tables, and charts. Be sure to format the content to your desired style and layout.
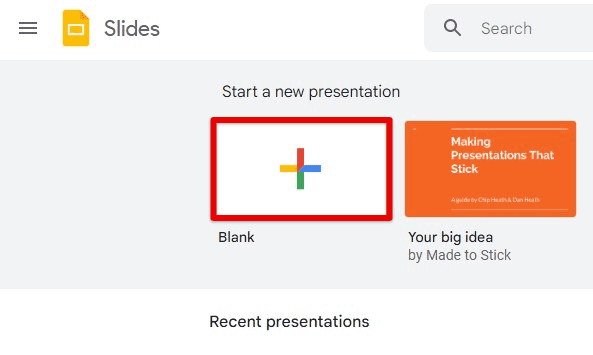
Opening a new document
Once you have added and formatted the content, click “File” and select your preferred download format from the dropdown menu. Enter a name for your template and click on “Ok”. Your new custom template will now be saved and available to use the next time you want to create a document.
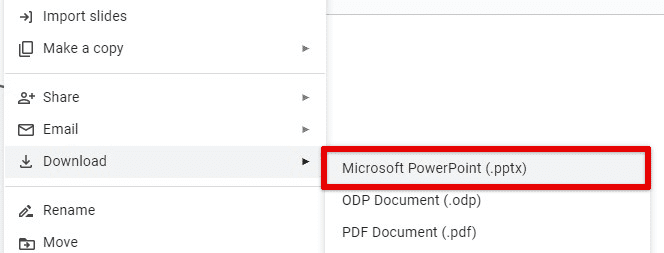
Saving a new document as a template
Note: When creating a template, you should consider the purpose and audience of the document. If you’re making a template for a business report, you may want to include sections for a title page, executive summary, and financial analysis. On the other hand, if you’re making one for a class project, have sections on research questions, methodology, or results.
In addition, you can also customize the font style, color scheme, and layout of your template to make it more visually appealing and professional. Experiment with different fonts, colors, and layout options until you find the combination that works for you.
Editing an existing template
Editing an existing template in Google Docs, Sheets, or Slides allows you to modify the layout, color scheme, font style, and content to meet your specific requirements. Follow the steps below to edit an existing template in these applications:
Open the template you want to edit by clicking “Template gallery” in the main menu of Docs, Sheets, or Slides and selecting the template you want to modify. Make the necessary changes to the template, such as modifying the layout, color scheme, or font style. To change the layout, select the element you want to modify, such as a heading or paragraph, and choose a new layout option from the formatting menu. Select the “Theme colors” option to change the color scheme and pick a new color palette from the available options.
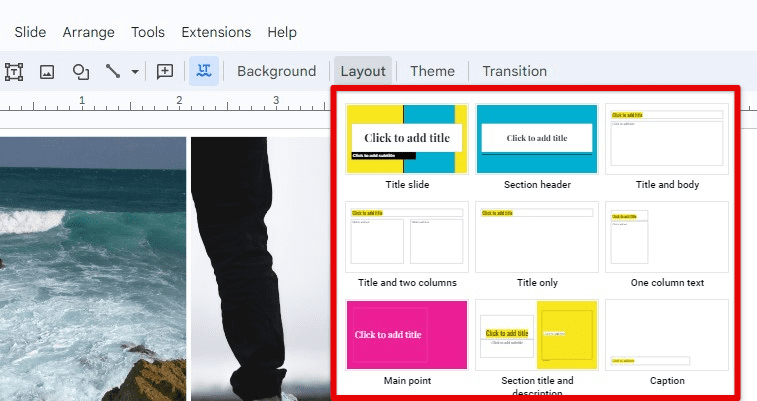
Editing an existing template
Add new sections or elements to the template as needed. To add a new section, insert a new heading or paragraph and format it to your desired style. You can add new elements, such as images, tables, or charts, by selecting the appropriate option from the “Insert” menu.
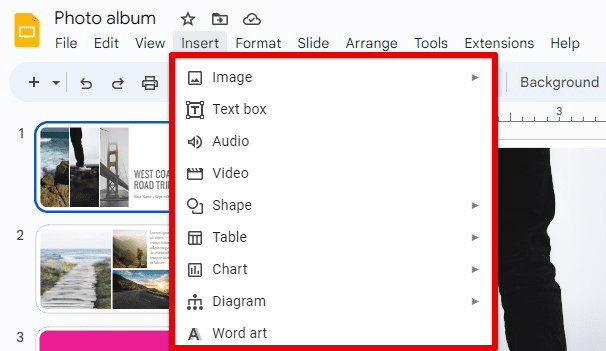
Adding new sections or elements
Once you have made all the necessary changes, save the template by clicking “File” and selecting your preferred download format from the dropdown menu. Next, give your modified template a new name to differentiate it from the original template.

Saving the modified template
Remember that when editing an existing template, you should consider the purpose and audience of the document. When modifying a template for a business report, you may want to add sections for a company overview, market analysis, and competitive landscape.
Sharing templates
Sharing templates is essential to collaboration, especially when working on projects with multiple team members or colleagues. Google Docs, Sheets, and Slides provide several ways to share your custom templates with others, such as:
Sharing with specific individuals or groups: You can share your custom templates with particular individuals or groups by granting them access to the template file. To do this, open the template file and click the “Share” button in the top-right corner of the screen. Then, add the email addresses of the individuals or groups you want to share the template with and choose their access level (view, comment, or edit).
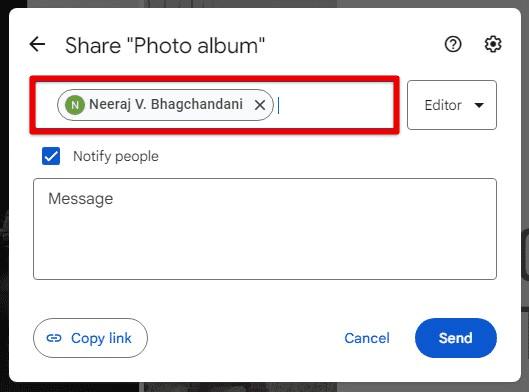
Sharing with specific individuals or groups
Making them publicly available: There is also the option of making your custom templates publicly available, allowing anyone with the link to access and use them. To do this, open the template file and click the “Share” button in the top-right corner of the screen. Then, click on “Change” next to “Anyone with the link can view” and select “Anyone with the link can edit”. This will generate a shareable link you can distribute to others online.
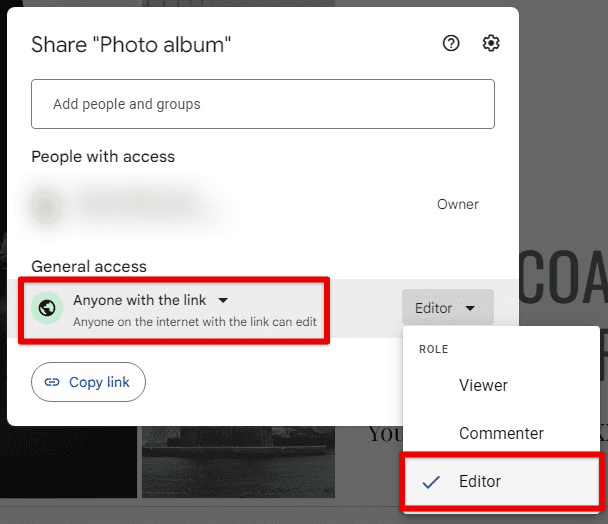
Making templates publicly available
Publishing on the Google Workspace Marketplace: If you want to share your custom templates with a broader audience at once, you can publish them on the Google Workspace Marketplace. This allows other Google Workspace users to discover and install your templates directly from the marketplace instead of looking for good ones from unreliable sources. For publishing your template, you’ll need to create a listing on the marketplace and provide a description, screenshots, and other relevant details. This will guarantee that the template gets listed on the top pages and is accessible to several users worldwide.
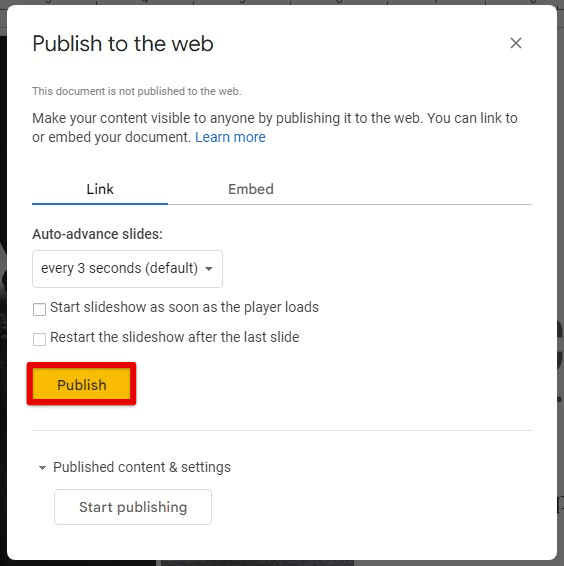
Publishing on the Google Workspace Marketplace
Learn how to plan events effortlessly with our step-by-step guide to creating and sharing Google Calendar event templates. Our instructions will help avoid hassle regarding event planning so you can focus on the important details.
Note: When sharing custom templates, be mindful of any sensitive or confidential information that may be included in the template. To protect your data, consider using the appropriate access level when sharing the template, and avoid sharing it with individuals or groups who do not need to access that information.
Using templates in Docs
Google Docs offers several ways to use custom templates for creating new documents or applying a template to an existing one. In this section, we’ll show you how to use templates in Google Docs.
Creating a new document from templates: Click “Template Gallery” on the Google Docs homepage to create a new document from a template. Next, select the category of the template you want to use, and browse the available templates. Once you find a template you want to use, click on it, and select “Use this template” to create a new document.
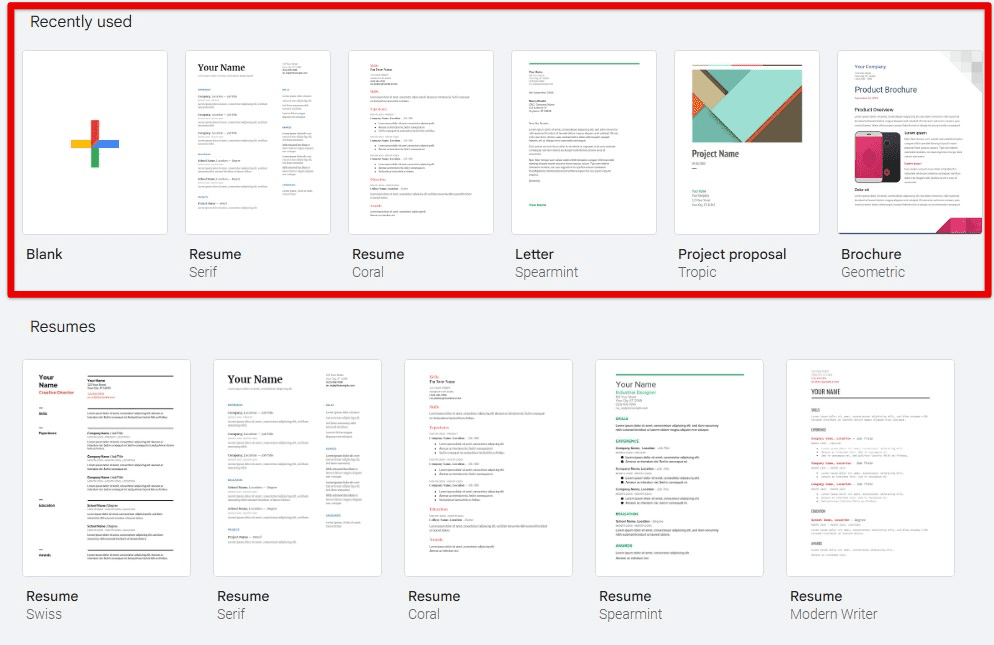
Creating a new document from templates
Applying templates to an existing document: If you have a current document that you want to use a template to, first, open the document in Google Docs. Then, click “File” and select “New from Template.” This will unlock the Template Gallery, where you can browse and choose the template you want to apply to that document. After finding the suitable template, select “Use this template” next to it. Doing so will immediately apply that to the existing document.
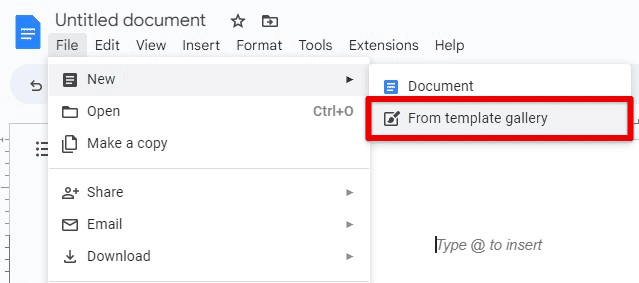
Applying templates to an existing document
Managing your templates: To manage custom templates in Google Docs, click “Template Gallery” on the Google Docs homepage. Then, click on “My Templates” to view your saved templates. There, you can edit, delete, or make a copy of the previously listed custom templates.
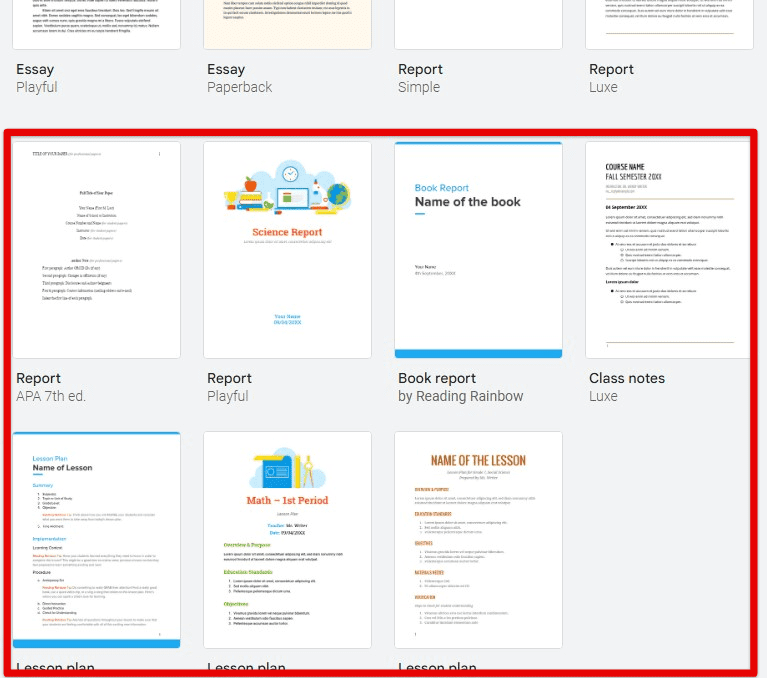
Managing your templates
Note: When using a custom template in Google Docs, any changes you make to the document will be saved to the document, not the template itself. If you want to preserve the original template, be sure to make a copy before using it to create a new document.
Using templates in Sheets
Using custom templates in Google Sheets can help you create professional-looking spreadsheets quickly and easily. In this section, we’ll show you how to use templates in Google Sheets.
Creating a new spreadsheet from templates: To create a new one using a template, click “Template Gallery” on the Google Sheets homepage. Next, select the category of the template you want to use, and browse the available templates. After finding one you want to use, click on it, and select “Use this template” to create a new spreadsheet.
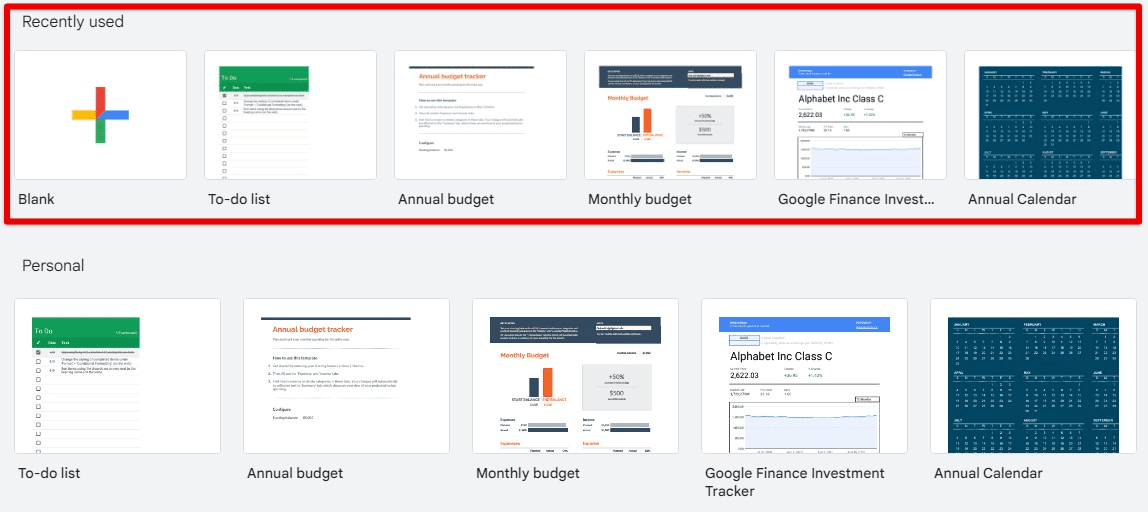
Creating a new spreadsheet from templates
Applying templates to an existing spreadsheet: If you have an existing spreadsheet that you want to use a template to, first, open the spreadsheet in Google Sheets. Then, click “File” and select “New from Template.” Doing so opens up the Template Gallery, where you can browse and choose the template you want to apply to that spreadsheet. Select one yourself, then click “Use this template” to apply it to the current spreadsheet.
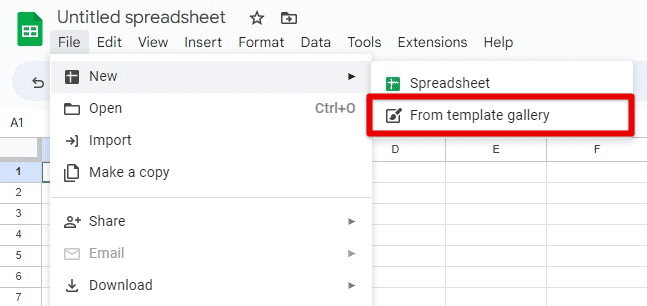
Applying templates to an existing spreadsheet
Managing templates: To manage custom templates in Google Sheets, click on “Template Gallery” on the Google Sheets homepage. Then, go to “My Templates” to view previously saved versions. You can edit, delete, or share any existing templates there.
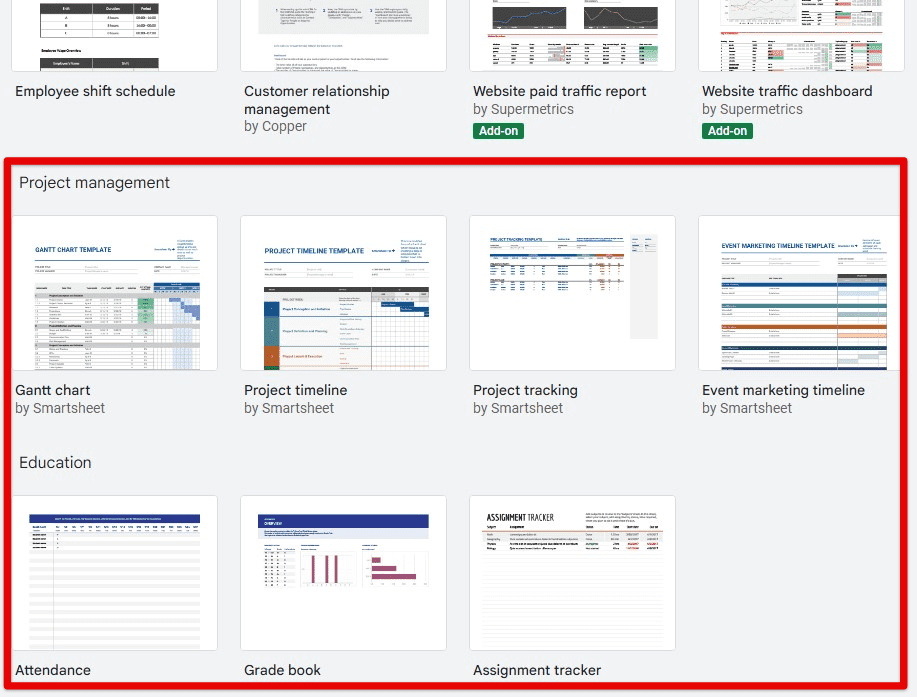
Managing templates
When using a custom template in Google Sheets, remember that any changes you make to the spreadsheet will be saved to that sheet, not the template itself. If you want to preserve the original template, remember to make a copy before using it to create new spreadsheets.
In addition to pre-designed layouts and formatting options, Google Sheets templates often come with pre-built formulas and functions that you can use to perform calculations and data analysis. These templates can save you a lot of effort by automating complex calculations and providing pre-designed charts and graphs.
Using templates in Slides
Google Slides provides various pre-designed templates to help you create engaging and appealing presentations. However, custom templates can save you even more time by allowing you to reuse preferred layouts and formatting options. This section will show you how to use custom templates in Google Slides.
Creating a new presentation from templates: To create a new one, open Google Slides and click “Template Gallery” on the Slides homepage. Browse the available templates by category, and select the one you want to use by clicking on it. Then, click on “Use this template” to create a new presentation.
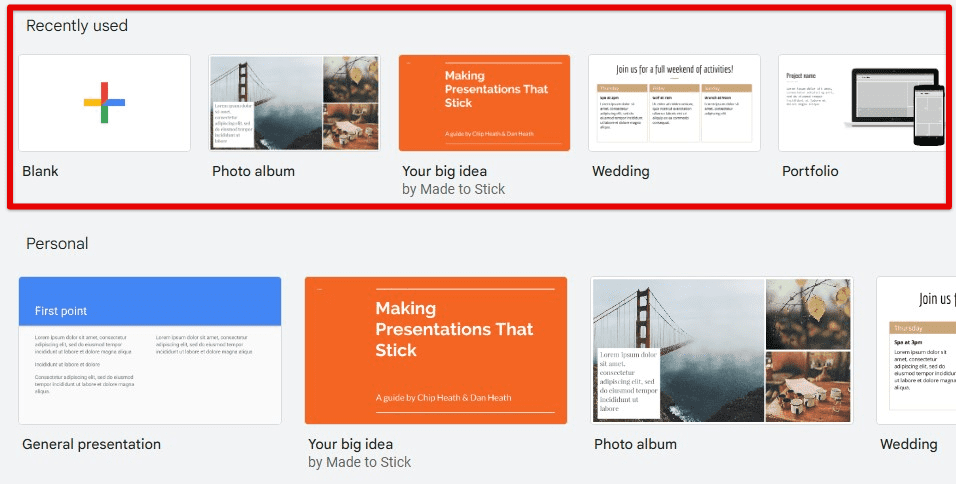
Creating a new presentation from templates
Applying templates to an existing presentation: If you have an existing presentation that you want to apply a template to, open it in Google Slides. Then, click “File” and select “New from Template”. Doing so opens up the Template Gallery on your screen, where you can browse and choose the template you want to apply to that presentation. Once you have found the right one, click “Use this template” to finish the process.
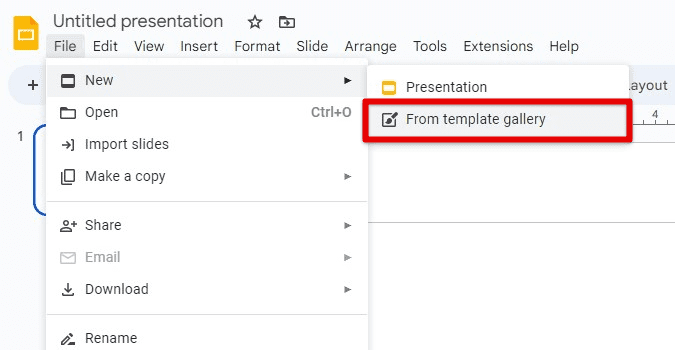
Applying templates to an existing presentation
Managing templates in Google Slides: Click “Template Gallery” directly from the Slides homepage to manage custom templates in Google Slides. Then, go to “My Templates”. That page contains all of your previously saved templates for Slides. You can edit, delete, or make copies however you like.
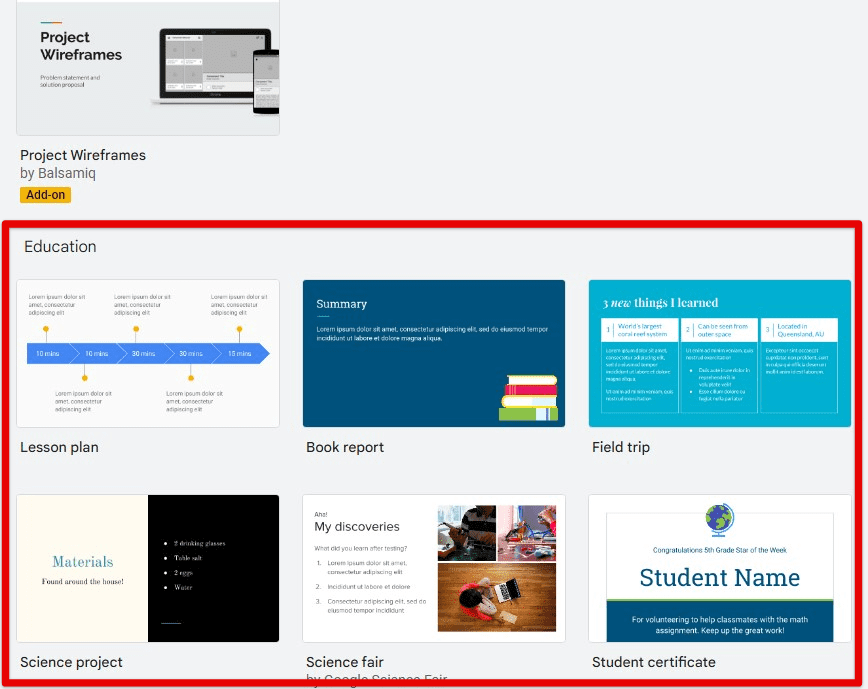
Managing templates in Google Slides
In professional working spaces, people who climb the corporate ladder know how to deliver and get their word across. That is possible only when your presentations are on point and of high quality. Learn how to create engaging presentations with Google Jamboard.
Custom templates in Google Slides help you create professional-looking and effective presentations with minimal effort. Besides pre-designed layouts and formatting options, Google Slides templates often come with pre-built slide elements such as charts, graphs, and tables. These elements can help you create dynamic and engaging presentations regularly.
Creating effective templates
Creating effective custom templates ensures users can easily create documents, spreadsheets, or presentations that meet their needs and preferences. Following are some tips and best practices for creating effective custom templates for Google Docs, Sheets, and Slides:
Defining the purpose: Before creating custom templates, determine their purpose and what they need to accomplish. Consider the audience, the type of content, and the desired outcome of the document, spreadsheet, or presentation. This will help you create a template that is specific and relevant.
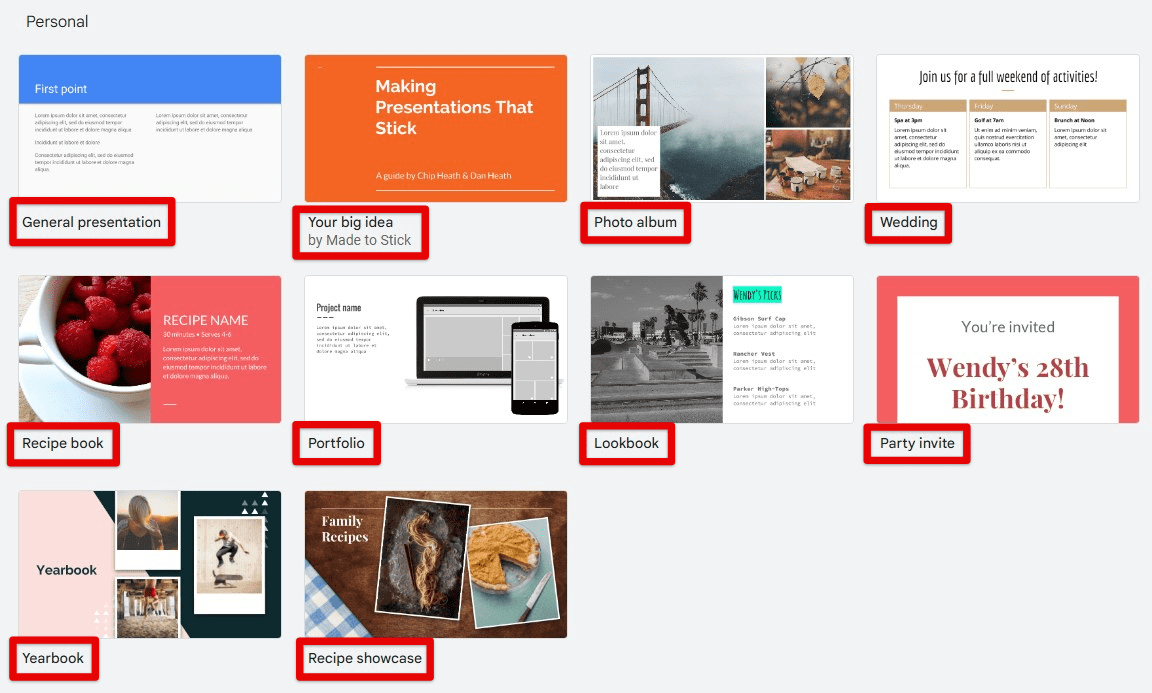
Defining the purpose
Keeping it simple: Avoid cluttering your template with unnecessary elements or complex formatting. Keep the design simple and clean, with a consistent layout and formatting that is easy to read and understand. Need to make a professional resume that can land you many interviews? Here are 10 Google Docs resume templates you should check out.
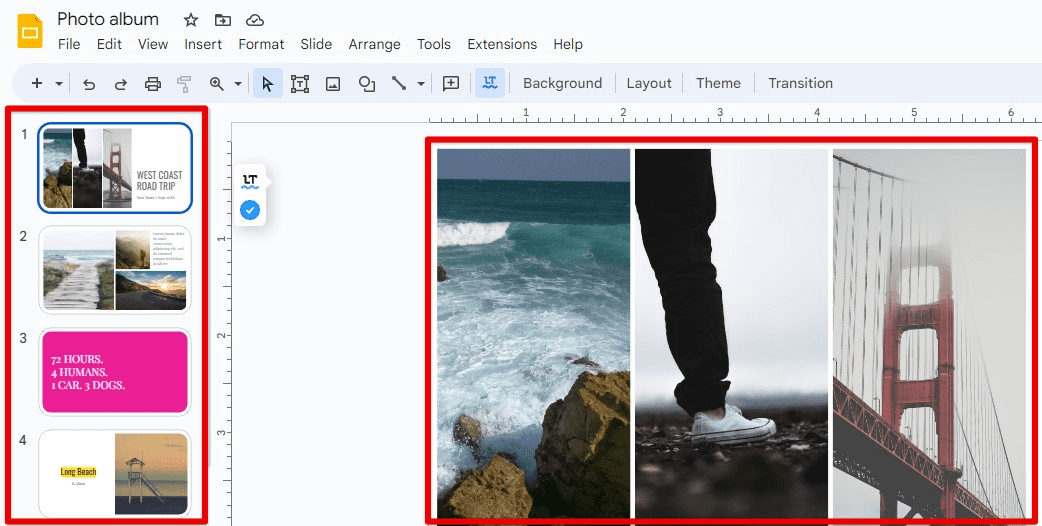
Keeping it simple
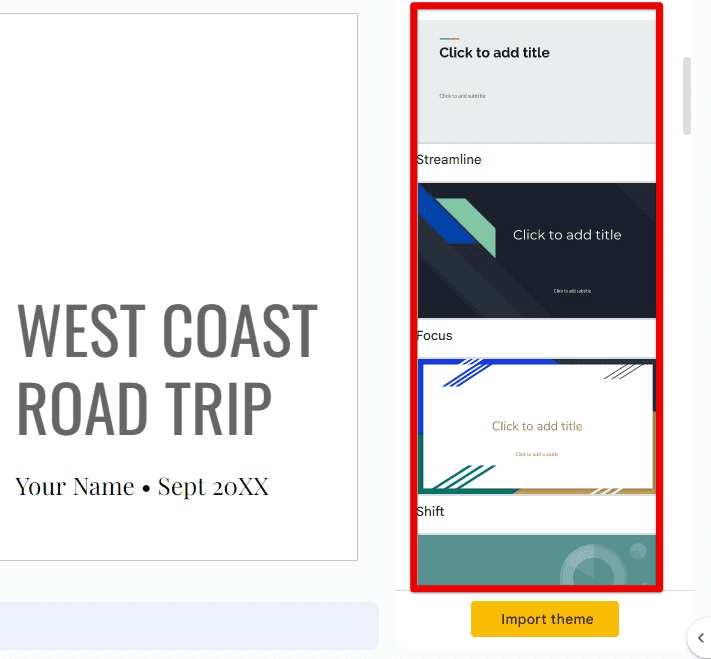
Using styles: Style format headings, subheadings, body text, and other elements consistently throughout the template. This makes it easier for users to apply to format and maintain document consistency.
Using styles
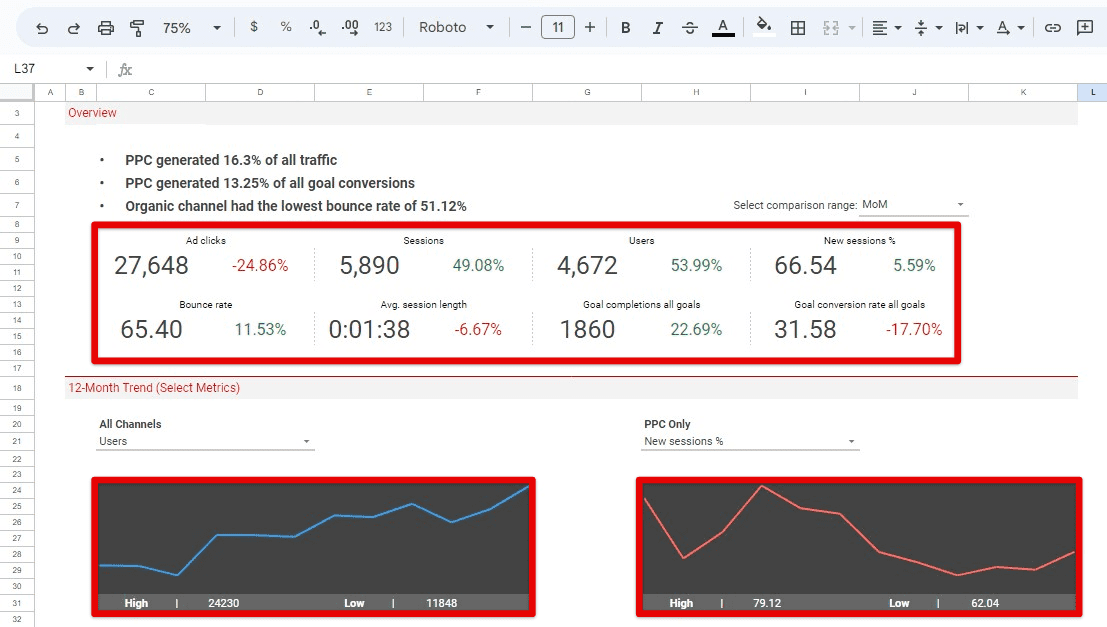
Including placeholder text and graphics: Use placeholder text and graphics to guide users and provide a clear understanding of what each section should contain. Doing so allows others to add their content and ensure that the resulting document, spreadsheet, or presentation is as effective as possible.
Including placeholder text and graphics
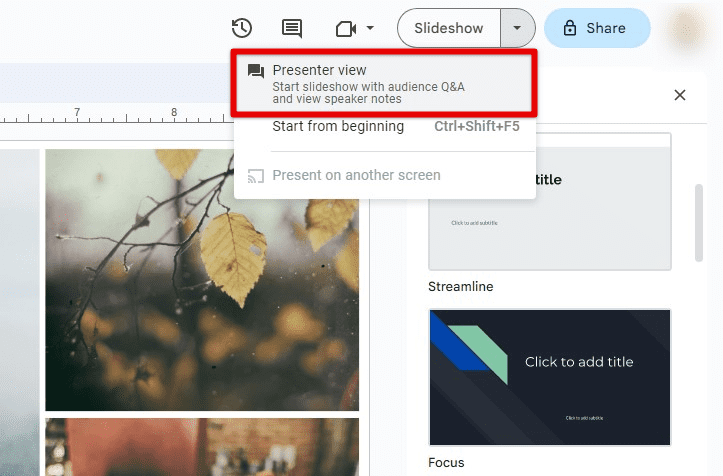
Testing the template: Test the template with different people to check out that it meets their needs and is, in fact, easy to use. You can then ask them to develop suggestions to expand the existing template functionality.
Testing the template
Providing instructions: Include instructions or tips for using the template. It can help others understand how that template is supposed to be used in a typical setting.

Providing instructions
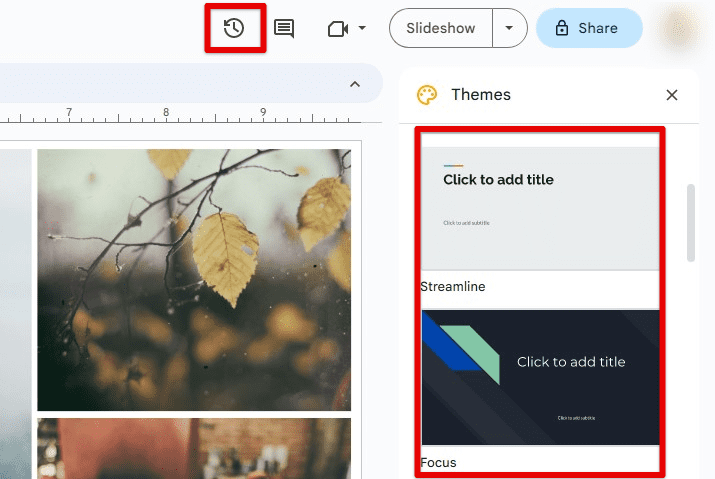
Updating regularly: Regularly review and update your templates so that they remain relevant for the audience. Genuinely consider the feedback and make changes as necessary to improve the template’s usability.
Updating regularly
With these tips and best practices in your mind, you can design effective custom templates that are easy to use and help you achieve your work goals more efficiently. When creating a custom template, prioritize the actual requirements and design a clear, simple, and relevant template. Regularly review and update your templates to remain effective and meet the changing needs of those using that template in the future.
Conclusion
Custom templates for Google Docs, Sheets, and Slides help you save time and effort by providing a starting point for your documents, spreadsheets, and presentations. Creating custom templates enables you to format consistently, efficiently, and in a visually appealing manner.
In this article, we’ve covered the basics of creating custom templates, including creating one from scratch, editing an existing template, sharing it with others, and practical tips for using these in Google Workspace. By incorporating what we have discussed today into your design process, you can create templates tailored to your specific needs and those of your audience.
