Have you ever wanted to take screenshots of certain ChromeOS interface areas but shortly found out that the default ChromeOS screenshot tool does not operate that wholly? What you need to know about is the temporary directory section on your Chromebook, comprising files stored in the system for a brief time.
That way, you learn an easy-to-approach method of accessing your Chromebook’s temporarily saved files and make it possible to take more far-reaching screengrabs. Follow the instructions outlined in this short guide for the best results.
Accessing temporary files on ChromeOS
Thankfully, it is pretty plain and simple for Chromebook users to access their device’s temporary directory for various use cases. To get started, type in the following in the URL bar of the Chrome browser and press the “Enter” key to continue.
file:///tmp/
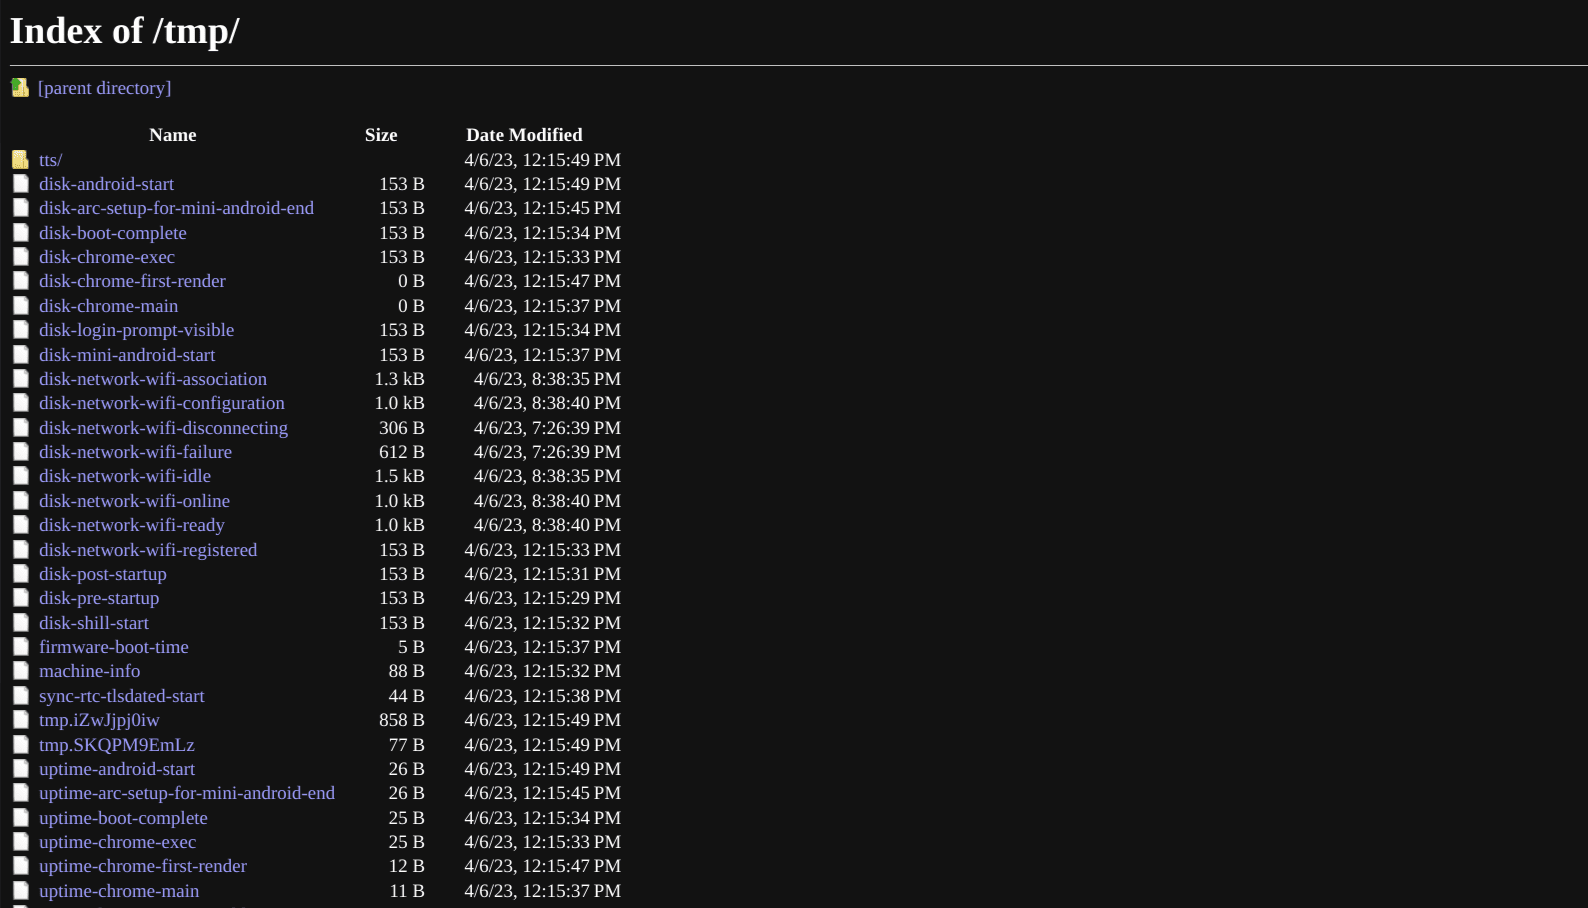
Once done, you should see a dedicated page on your end, with the tab titled “Index of /tmp/.” This symbolizes that you’re now inside your Chromebook’s temporary file directory. Various files will be present here, along with some important details, namely their respective file sizes and the date and time they were modified.

Temporary file directory in ChromeOS
The gist of it is that the temporary directory is held for keeping data that various software and applications write on the fly for concurrent use. They vanish in thin air as soon as they’re no longer required, thus the name “temporary.” The temporary file repository has a particular size limit, so you won’t find any data going overboard here.
Now, although accessing temporary files may have other advantages, there is something in particular that you can benefit from by accessing this directory on your Chromebook. And that is the possibility of a heightened potential for taking screenshots that otherwise just isn’t workable for ChromeOS.
If you’re reasonably acquainted with the best Chromebook screenshot tools and the default snipping tool as well, then you already know how there’s no proper way to take screenshots during specific sequences in the ChromeOS interface. A glaring example of this scenario is the Chromebook log-in screen. The native screenshot feature doesn’t budge there.
But with the help of the temporary file directory we just learned to access above, there is a way to capture the screen during that part. So let’s shed more light on the matter in the following section.
How to access screenshots in the temporary directory
The first step here is to take a screenshot but don’t try to capture the screen like usual and expect it to appear in the temporary directory. Only temporary-grade screenshots are supposed to appear in that section, and these are the ones that apply to distinct ChromeOS interface areas.
For starters, the log-in screen is a perfect way to clear things up here. Try taking a screenshot of the sign-in area, and you’ll quickly come to grips with this being impossible. However, instead of going for the usual “Ctrl,” Shift,” and the “Show Windows” key, which is shaped like a rectangle with two vertical lines, try just “Ctrl” and “Show Windows.”
Doing so will induce a subtle gesture on the screen and signal that a screenshot has been taken. Since you won’t find the screengrab anywhere in the “Files” app on your Chromebook, the temporary file directory area in ChromeOS comes in.
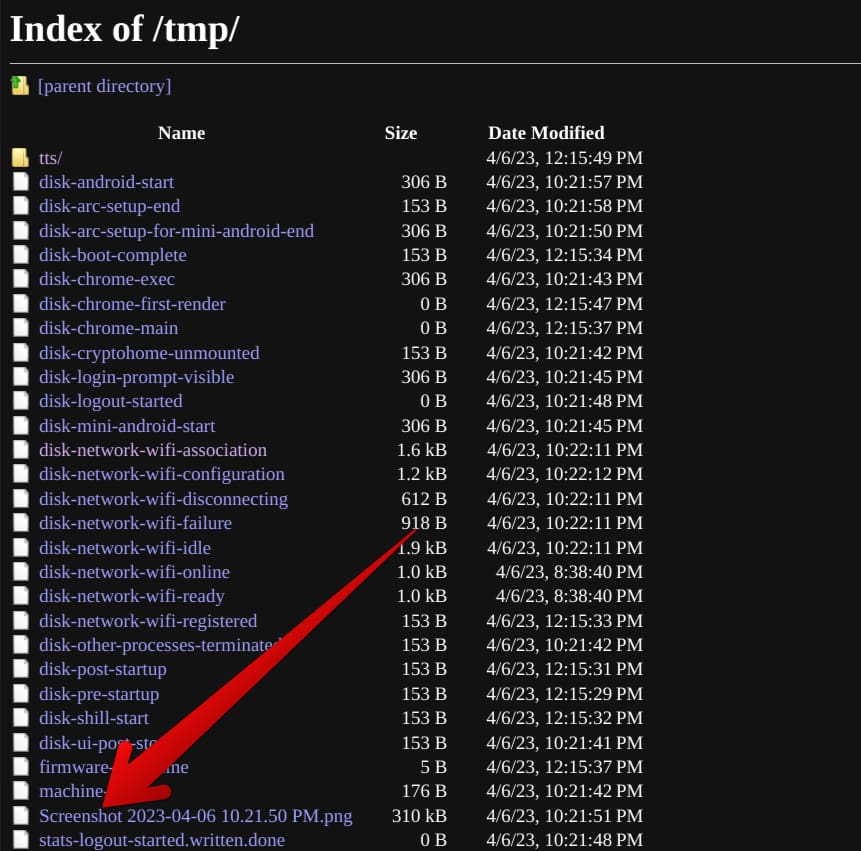
After you’ve captured your screen, head to “file:///tmp/” on your Chromebook and look for a file whose name says “Screenshot,” followed by the time and date; then, click on it, and you’ll instantly open up the screengrab you took earlier. It’s as easy as that.

Picking out the screenshot in the temporary directory
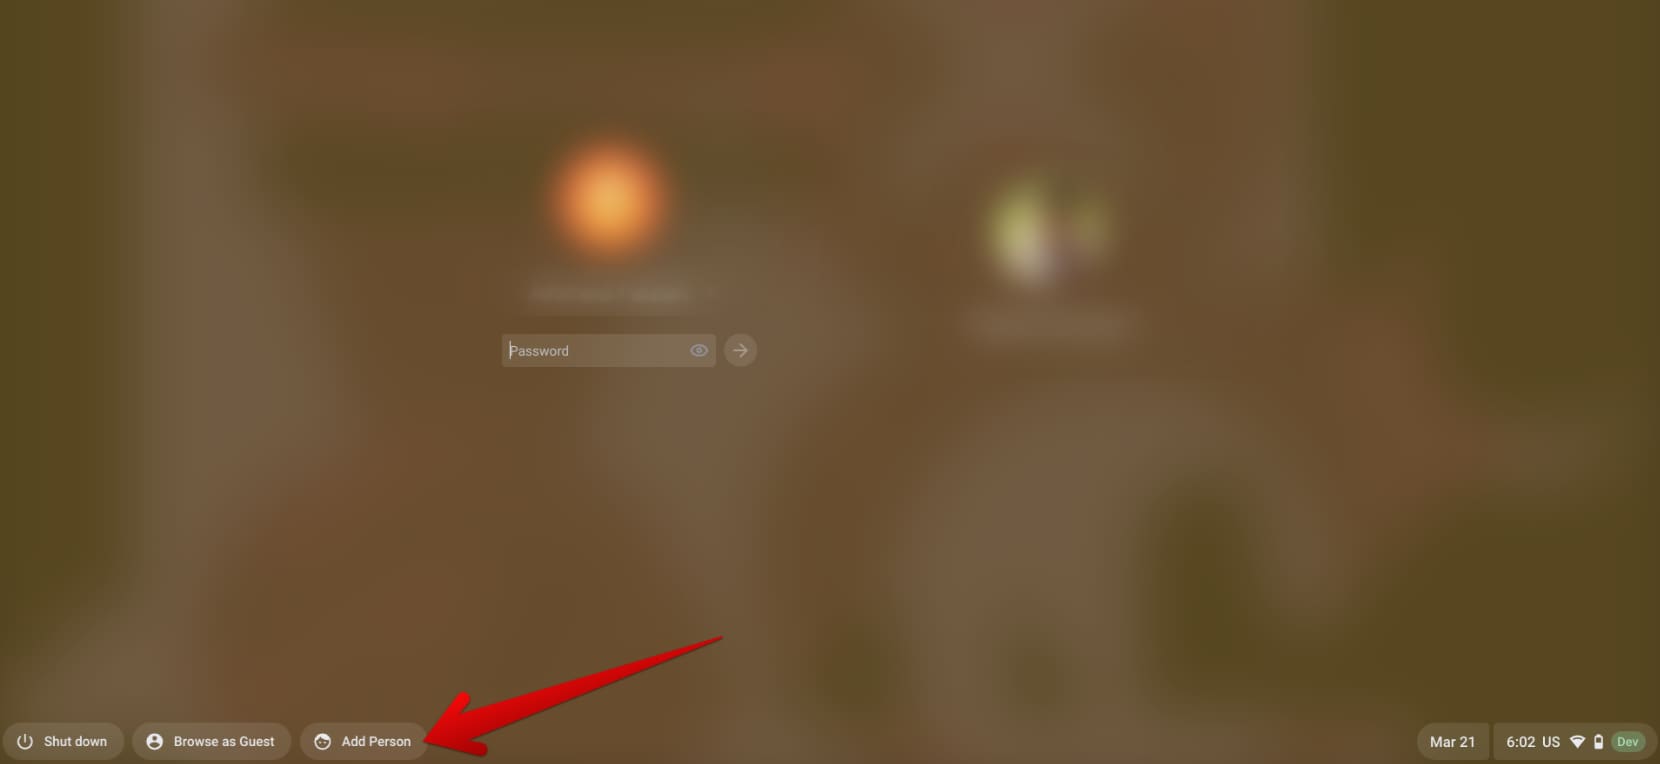
This method is what we used to take the following screenshot while explaining how to use multiple users accounts on ChromeOS. The screenshot helped us annotate and clarify what button needs to be clicked to move forward.

Adding a new Chromebook user
That’s about it how to access temporary files on a Chromebook. Of course, should you ever require the feature for a different purpose, you’ll already be ready for it from now on.
Conclusion
ChromeOS is loaded to the brim with accessibility features and tools, thereby declaring itself as an all-inclusive platform that caters to the needs of millions of people worldwide. The cherry on top is the inclusion of high-quality Chrome Web Store extensions that heighten the experience even more.
As highlighted in this guide above, there is even an easy-to-follow way for non-specialist users to access temporary files on a Chromebook. Using this directory, it’s possible to document parts of the ChromeOS interface, such as the log-in screen, and be able to download your screenshots right after.
Let us know in the comments section whether you found the article useful for your cause. As always, Chrome Ready wishes you good luck!
