Printing webpages can often be a frustrating experience, with text and images getting cut off, pages coming out too small or too large, and plenty of other issues. Luckily, Chrome browser’s Print Preview feature can help to make the process smoother and more predictable. By allowing you to preview exactly how a webpage will look when printed, this feature gives you more control over your printouts and can help you save time.
In this article, we will explore how to use Chrome’s Print Preview feature, including customizing print settings, adjusting page layout, fixing common printing issues, and a lot more. Chromebooks have become more feature-filled over the past decade, thanks to Google paying due attention to ChromeOS and making the software live up to its true potential. So here is a comprehensive guide on connecting a printer to ChromeOS.
Accessing Chrome’s print preview feature
The Print Preview feature can be found in the Chrome browser’s print dialog box, which can be accessed in several ways. One way is to press “Ctrl + P” (Windows) or “Cmd + P” (Mac) on your keyboard, which will bring up the print dialog box. Alternatively, you can click on the three dots icon (also known as the “more” icon) in the upper right corner of the Chrome browser window, then click “Print” from the dropdown.
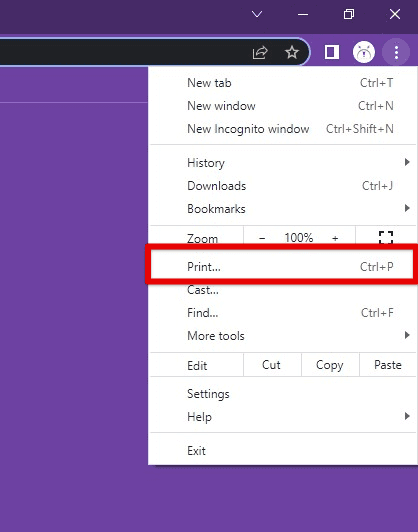
Opening the print preview window on Chrome
Once you have opened the print dialog box, you can access the Print Preview feature. To do so, click the “More settings” link at the bottom of the print dialog box. This will expand it and reveal additional options. Then, click the “Print using system dialog” link at the bottom.
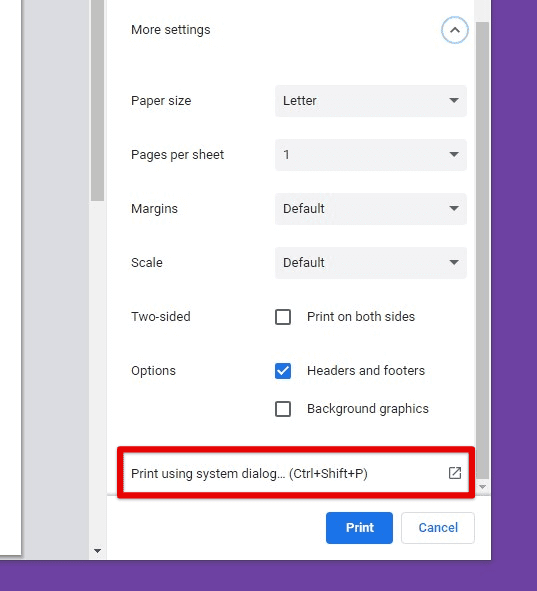
Print using the system dialog
After clicking this link, a new print dialog box will appear on your screen. This new box has a “Preview” button in the upper right corner. Clicking this button will bring up the Print Preview window, allowing you to preview your printouts before printing them. From here, you can adjust various settings, which are further discussed in the subsequent sections.
Customizing print settings
Once you have accessed the Print Preview window, you will have access to several different print settings that can be customized to your liking. Here is an overview of some of the most important ones:
Destination: Allows you to select which printer to use for the printout. You can also save the file as a PDF if you do not have a printer available.
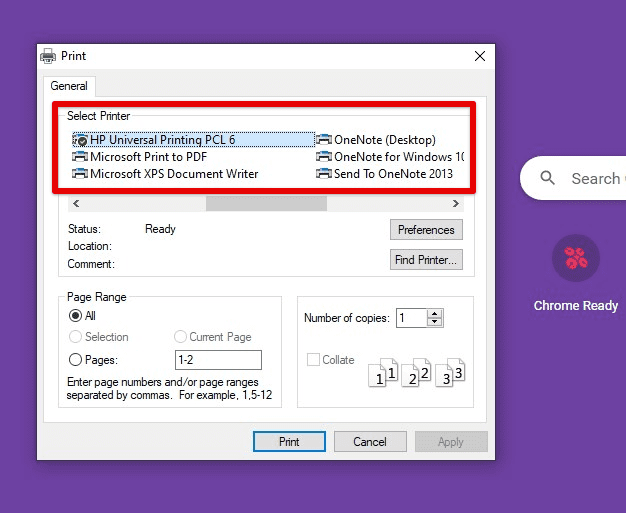
Destination
Layout: Allows you to adjust the page layout of the printout. Choose between portrait or landscape orientation, and adjust the margins to fit the content.
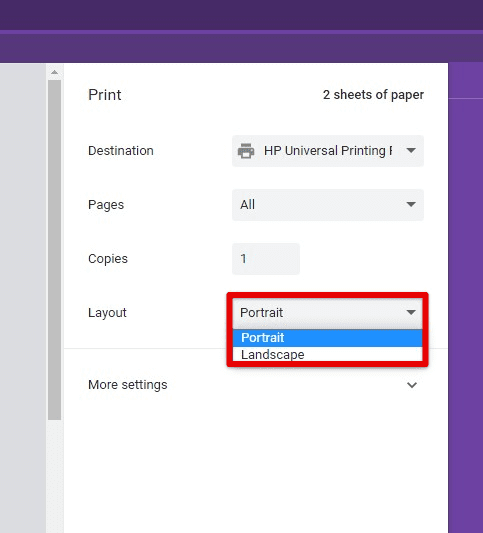
Layout
Paper size: This lets you pick the right paper size for the printout. You can select from standard paper sizes like A4, Letter, and Legal or create a custom one.
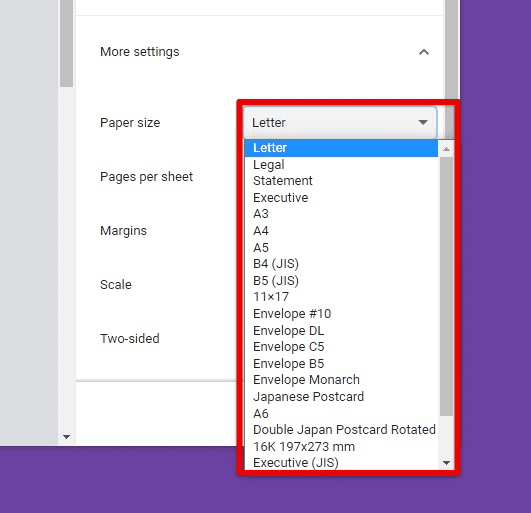
Paper size
Margins: This allows you to adjust the margins of the printout to fit the content. You can use default margins or adjust them manually by entering values in the “Custom” fields.
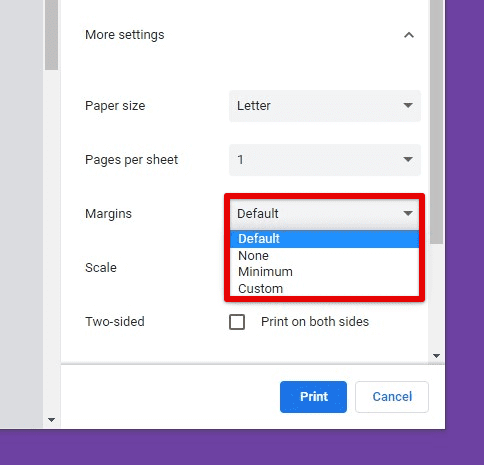
Margins
Scale: Allows you to adjust the scale of the content to fit the page. The user can fit the content to the page or change the scale manually.
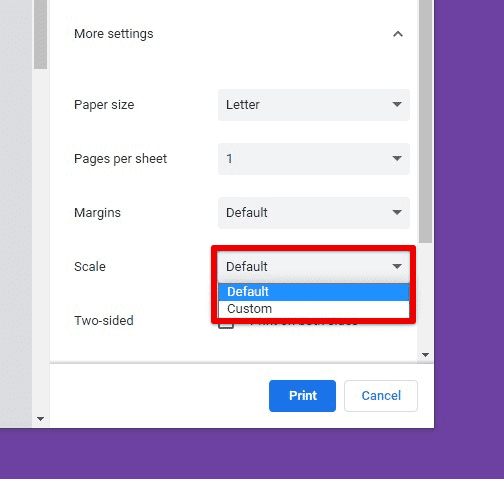
Scale
Headers and footers: Allows you to add or remove headers and footers from the printout. These can also be customized according to the actual content being printed.
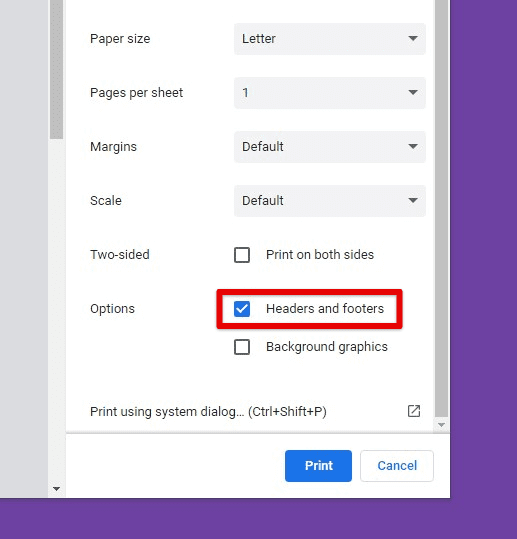
Headers and footers
Background graphics: Allows you to select whether to print background graphics.

Background graphics
To customize these settings, click the dropdown menus or input fields and make your desired adjustments. You can then preview the changes in the Print Preview window to see how they will affect the final printout. Once satisfied with your settings, click the “Print” button to finish the process.
The world of additive manufacturing is nothing short of a technological phenomenon. Several techniques are now adopted in 3D printing to take advancements beyond new horizons in this revolutionary domain. Want to learn more about it? Here is a detailed guide on 3D printing with Chromebooks.
Previewing and adjusting page layout
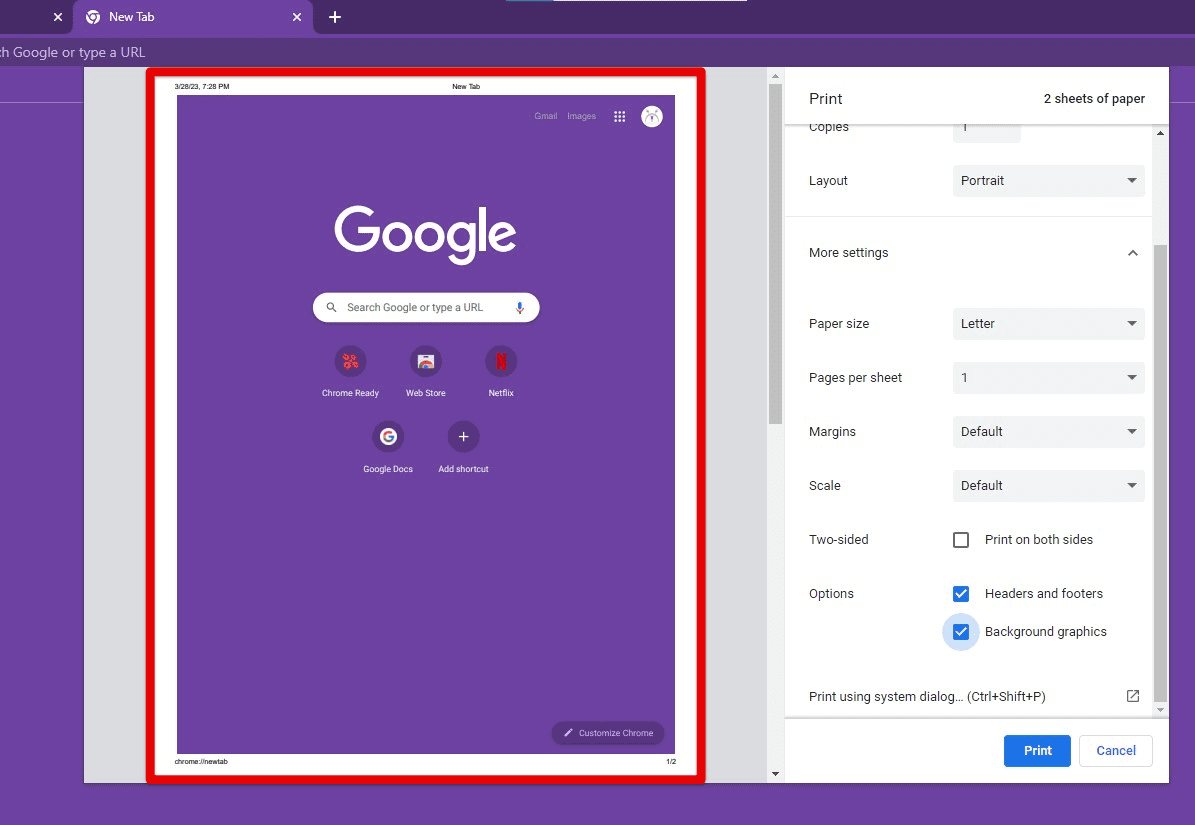
The most helpful feature of the Print Preview window is the ability to preview how your content will be laid out on the printed pages. This can be particularly important if you print a webpage with many graphics, images, or other visual elements that must be correctly aligned on the page.
Previewing page layout
To preview the pages you are about to print, click the “Preview” button in the upper right corner of the Print Preview window. This will display a preview of each page and any headers or footers you have already added. You can then use the navigation buttons in the top pane to scroll through the pages and ensure everything looks as desired.
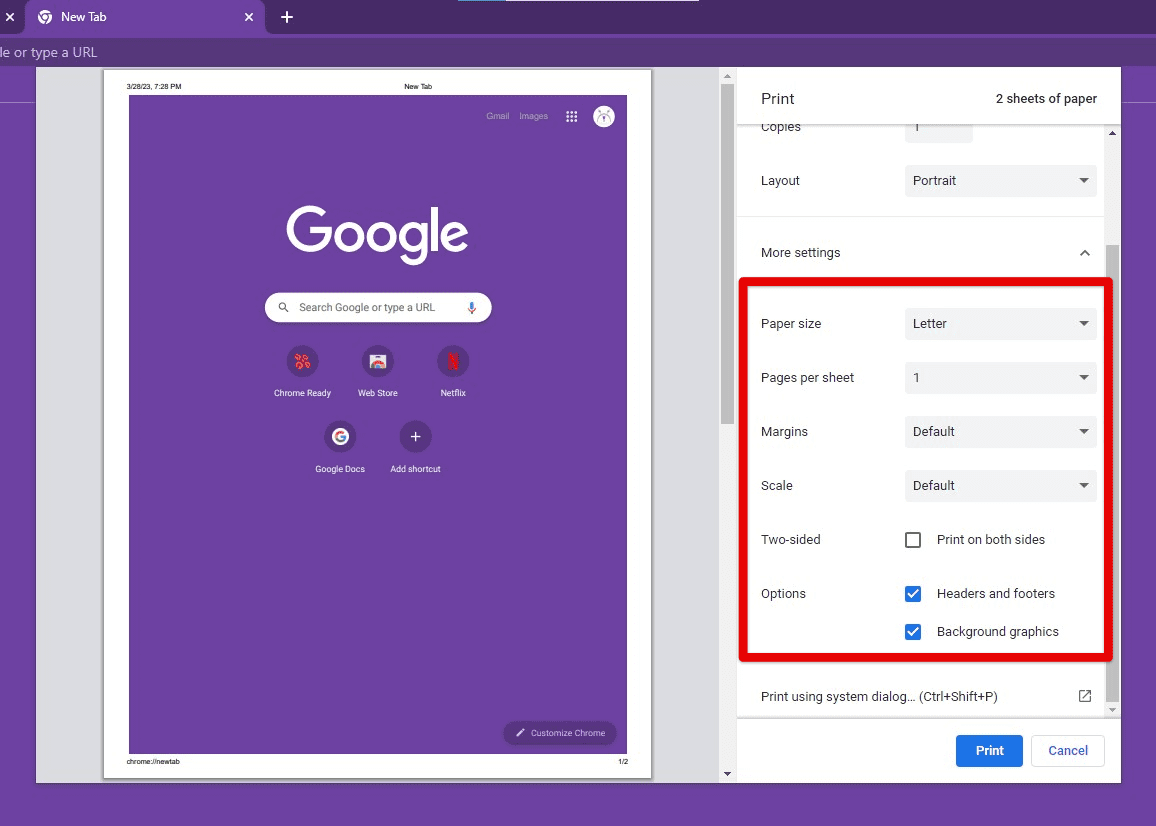
If you notice any issues with the page layout during the preview, you can adjust the settings in the Print Preview window to correct them. For example, you may need to change the margins or scale of the content to ensure that everything fits appropriately on the to-be-printed page. You can also choose between portrait or landscape orientation and adjust the paper size.
Adjusting print settings and preferences
To adjust the page layout, make your desired changes in the Layout, Paper Size, Margins, or Scale sections of the Print Preview window. You can preview these changes by clicking the “Preview” button again. Repeat this process until you are satisfied with the layout and appearance. By previewing and adjusting the page layout, you can ensure that your printed documents look professional and are easy to read.
Adjusting margins and scaling
Adjusting margins and scaling is another crucial aspect of print settings in this feature. If you don’t change these settings properly, your printed document may not fit appropriately on the page or be challenging to read.
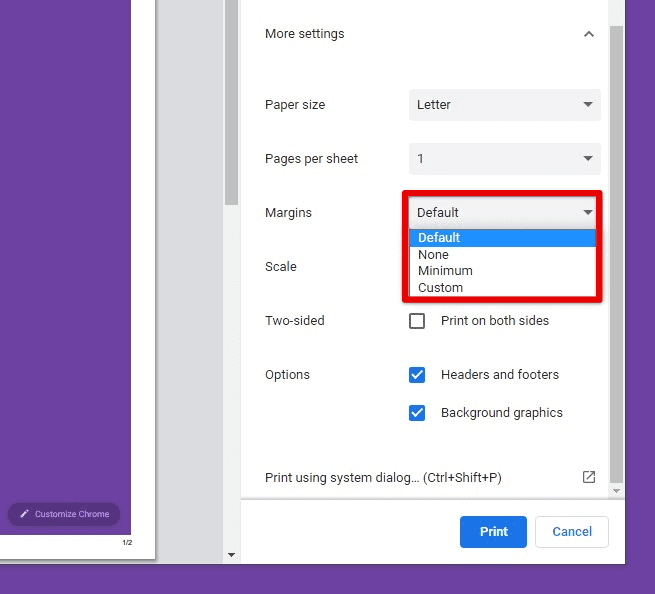
Margins: To adjust the margins of your document, select the Margins section in the Print Preview window. You can choose from preset margin sizes or enter custom values from here. You can also decide whether to apply the same margin size to all page sides or adjust each separately.
Adjusting margins
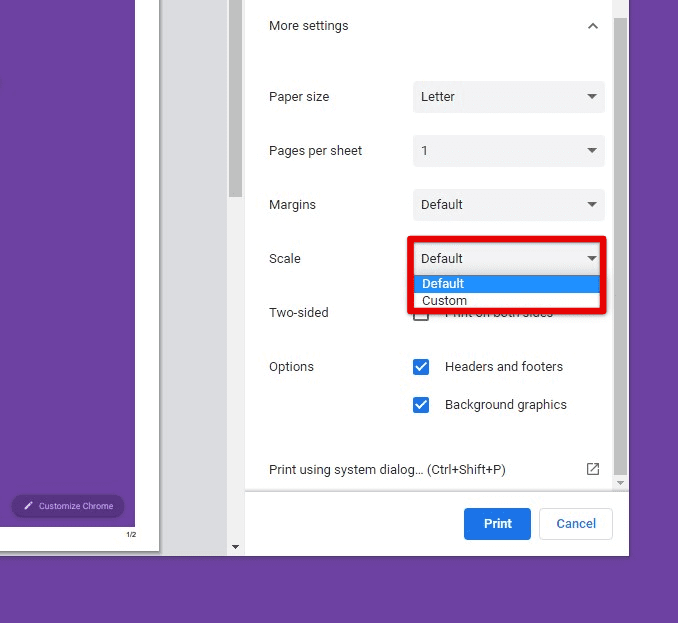
Scaling: To adjust the scale of your document, select the Scale section in the Print Preview window. You can scale the content to fit the page or enter a custom scaling value from here. Next, decide whether to adjust the scaling horizontally or vertically.
Adjusting scale
To ensure that your content is printed in the correct size and fits properly, here are some valuable tips:
If possible, use standard paper sizes like A4 or Letter. This will help ensure that your content fits appropriately on the page without any unwanted cropping. Make sure to adjust the margins so the content is centered, and there is enough whitespace around the edges on all four sides. Before printing your document, make sure to preview its scaling. Doing so lets you identify if the content is too small or too large for the page layout.
Printing selections and pages
Sometimes, you may only want to print a specific section of a webpage or document. Chrome’s Print Preview feature allows you to do this quite easily.
Printing selections: To print a selection of text or images, highlight the content you want to print and right-click on it. From the context menu, select “Print”. This will open the Print Preview window with the selected content displayed. You can adjust the print settings and click “Print” to finish the process.
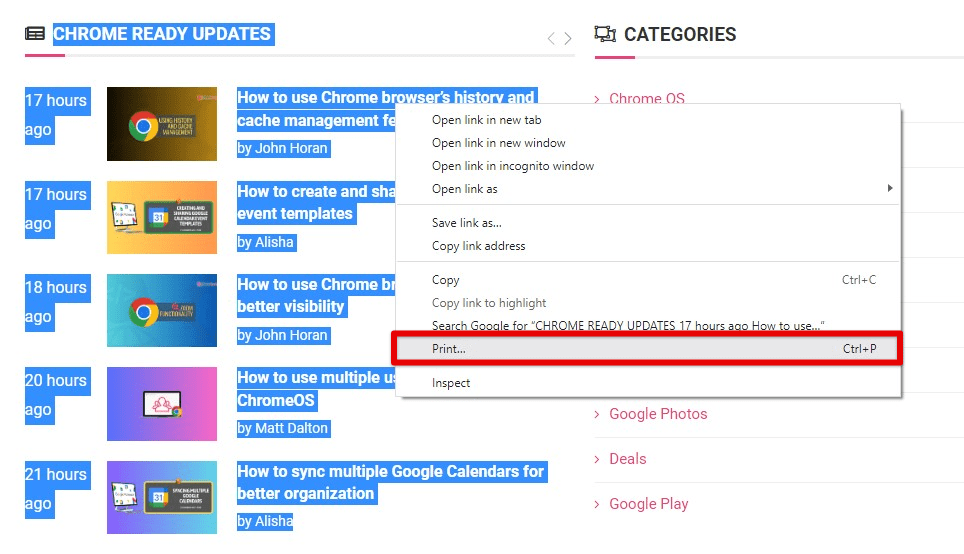
Printing selections
Printing pages: Select the Pages section in the Print Preview window if you only want to print specific document pages. From here, you can print all pages, a range of pages, or a particular set of pages. For example, you can print only odd or even pages or skip certain pages altogether.
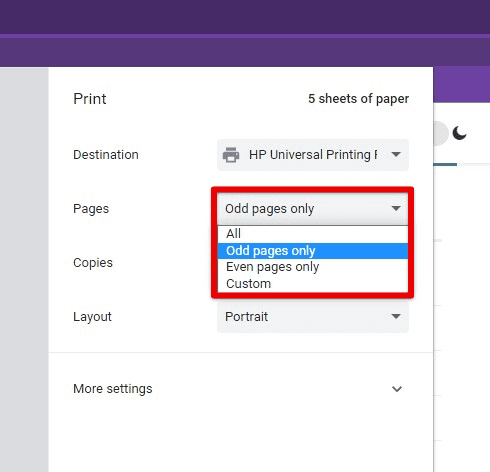
Printing pages
To specify which pages to print, enter the page range or individual page numbers in this section of the Print Preview window. You can also use the “+” button to add more page ranges or numbers to the list. Once you’ve specified the pages you want to print, adjust other print settings and click “Print” to finish the process.
Using the save as PDF feature
Saving a webpage as PDF is a great way to preserve online content and share it with others in a format that can be easily accessed and read offline. Chrome’s Print Preview feature allows you to save any webpage as a PDF file. This is particularly useful if you want to save a copy of the webpage for offline reading or in case you need to share the content with others without internet access.
Open the webpage you want to save as a PDF, select “Print” from the Chrome menu, or press “Ctrl + P” on your keyboard.
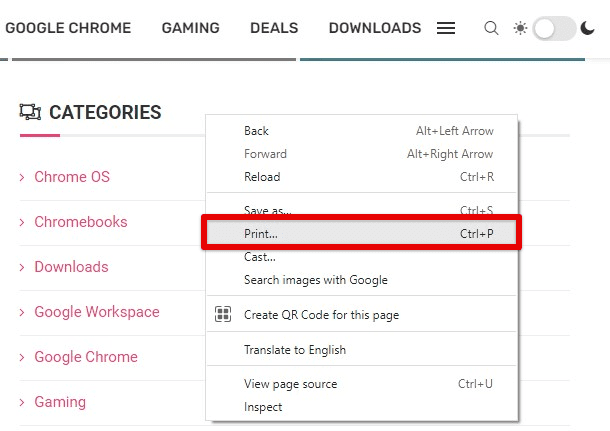
Print option in Chrome menu
In the Print Preview window, select “Save as PDF” from the list of printers. This will open the “Save As” dialog box.
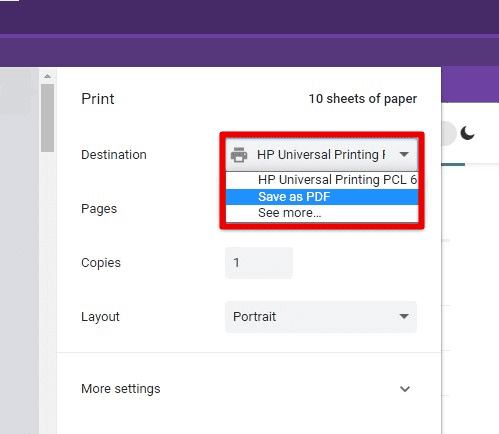
Save as PDF option
Choose a location to save the PDF file and enter a filename. You can also select whether to include headers and footers and select a page size. Finally, click “Save” to save the webpage as a PDF file.
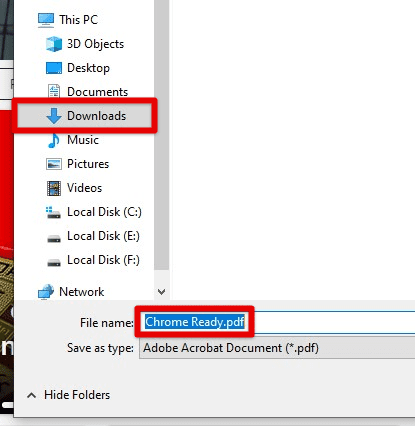
Location and filename
To customize PDF settings, click the “More Settings” button in the Print Preview window. This will open a menu where you can pick the right orientation of the PDF file (portrait or landscape), adjust the DPI (dots per inch) for images, and select whether to include background graphics.
Common printing issues
While Chrome’s Print Preview feature is a powerful tool for printing webpages and documents, some common issues may arise when using it daily. Following are a few of the most common printing issues and tips for resolving them:
Blank pages: Sometimes, when you try to print a webpage, you may end up with blank pages instead of the expected content. Several factors, such as incorrect print settings or a problem with the printer driver, can cause this. To resolve this issue, check your print settings to ensure that the correct printer is selected and the page range is set correctly. You may also need to update your printer driver or try printing from a different browser.

Blank pages
Cut-off or overlapping content: Another common issue when printing from Chrome is cut-off or overlapping content. This can happen when the content you’re trying to print is wider than the paper size or when the margins are set incorrectly. To fix this, adjust the margins and ensure the scaling is set to fit the content on the page. You may also need to try using a different paper size or adjusting the content size itself.
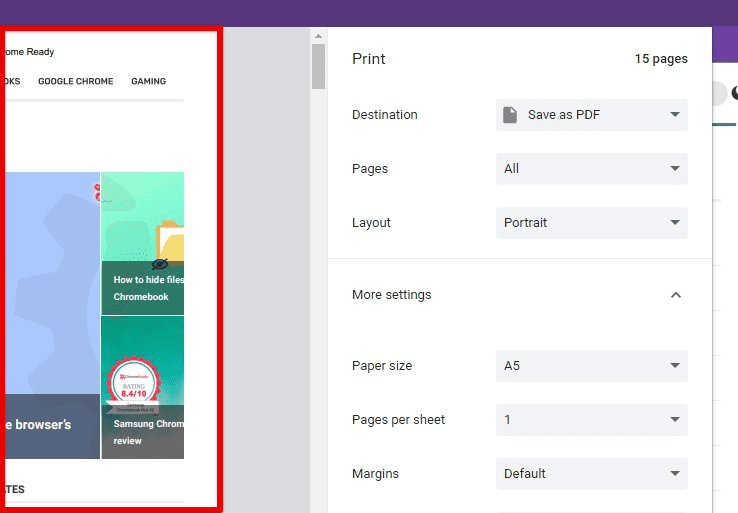
Cut-off or overlapping content
Slow printing: If your printer takes a long time to print or is not printing, it may be due to a problem with the driver or the network connection. Try restarting your printer and computer, and make sure your printer is connected to the network and has the latest drivers installed. You may also want to print a smaller document or use a different printer to see if the issue persists.

Slow printing
By following these tips and troubleshooting common printing issues, you can ensure that your printouts are accurate and high-quality. In case you continue to experience difficulties, consult the printer manual or contact the manufacturer for further assistance.
Conclusion
Chrome’s Print Preview feature helps you print webpages and documents with ease and accuracy. By following the steps outlined in this article, you can customize your print settings, adjust the page layout, and resolve common printing issues. Whether printing an article for reference or creating a hard copy of a document, Chrome’s Print Preview feature gets the job done quickly and much more efficiently. So next time you need to print something from the internet, try the Print Preview feature and experience the benefits for yourself.
The accessibility features in Chromebooks have recently seen a significant bump. For instance, the latest stable release for ChromeOS has brought new dictation-oriented functionality for users, allowing individuals to dictate their text and delete any hiccups with the backspace feature effortlessly. Over time, Chromebooks have also become great host devices for printing purposes. Learn how to add a Wi-Fi printer to your Chromebook.
