The internet has become an essential part of our lives, and with that, the need for faster and more efficient browsing has increased. Google Chrome, one of the most popular web browsers in the world, has a built-in feature called Data Saver that can help users speed up their browsing experience while reducing data usage. By compressing web pages and images, Data Saver can help users load web pages faster and consume less amount of data on mobile and low-bandwidth networks.
This article will explore how to enable and customize Data Saver on Chrome, discuss its benefits and limitations, and provide methods for speeding up browsing and reducing data usage. Dropbox and Google Drive are cloud storage services that offer tons of valuable features to their users. Even though Dropbox is quite popular, it still doesn’t work seamlessly with the Google services environment. Learn how to transfer data from Dropbox to Google Drive.
Understanding data saver
Google Chrome’s Data Saver is a built-in feature that aims to help users save on data usage while browsing the internet. It works by compressing web pages and images, which reduces the amount of data that needs to be downloaded to load a web page. Data Saver is particularly useful for users on mobile devices or low-speed networks, where this is a common concern.
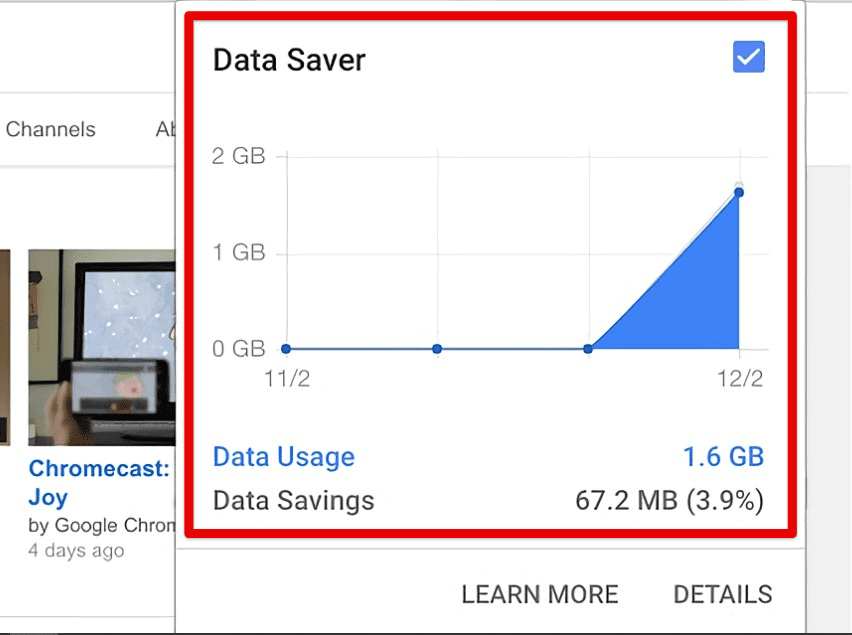
Google Chrome data saver
The Data Saver feature was first introduced in 2013, initially designed for users in emerging markets where mobile data was often expensive and unreliable. The goal was to provide a faster browsing experience with reduced data usage without sacrificing the quality of web pages. Since then, it has been rolled out globally and has become a popular feature for Chrome users worldwide.
Data Saver works by routing web page requests through Google’s servers, where the page is compressed before being sent back to the user’s device. This compression reduces the web page’s size, reducing the amount of data needed to download the page. Images are also compressed using Google’s WebP format, which provides high-quality images with smaller file sizes.
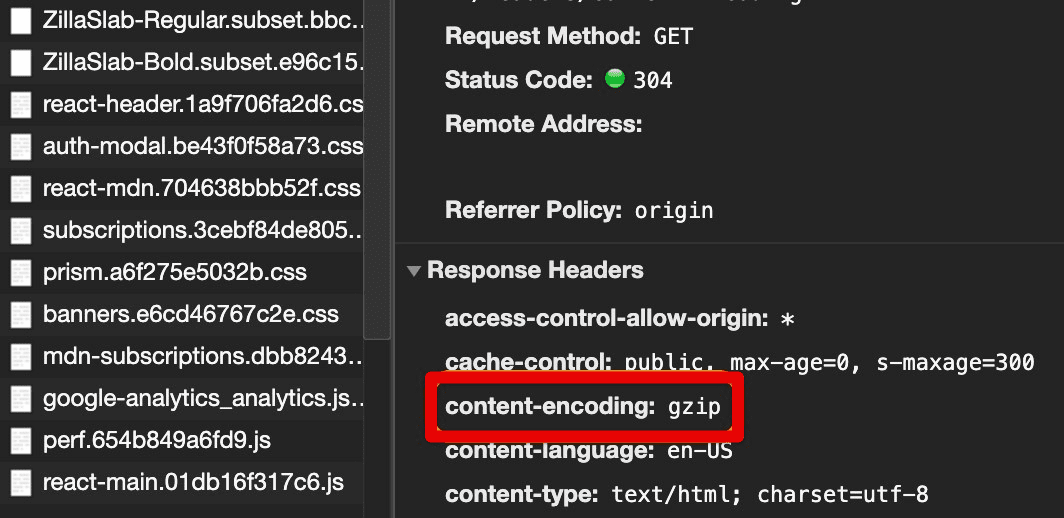
Compressed webpage
While Data Saver can help reduce data usage and speed up browsing, it can also have some limitations. For example, some websites may not be fully compatible with the compression used by Data Saver, resulting in slower load times or broken features. Additionally, the compression used by Data Saver may reduce the quality of images and videos to a considerable extent.
Despite these limitations, it is a helpful feature for those concerned about data usage or browsing on mobile devices with low-speed networks. In the following sections, we will explore how to enable and customize Data Saver on Chrome and provide tips for troubleshooting any issues.
Enabling data saver in Google Chrome
Enabling Data Saver on Google Chrome is a quick and easy process. Open Google Chrome on your device. Click on the three-dot icon in the top-right corner of the browser window. From the dropdown menu, select “Settings.”
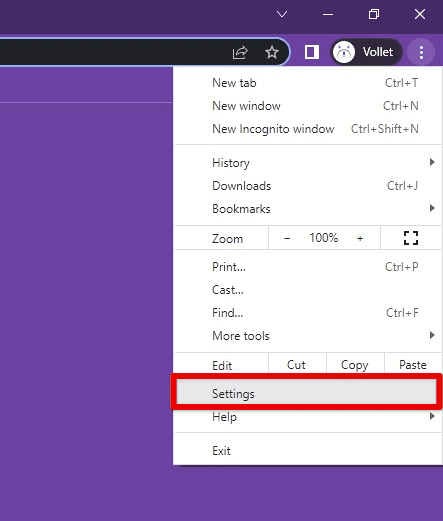
Opening Google Chrome settings
Scroll to the “Privacy and security” section and click “More”. Under “Advanced,” select “Use secure DNS”. Toggle the switch to the “On” position to enable this feature.
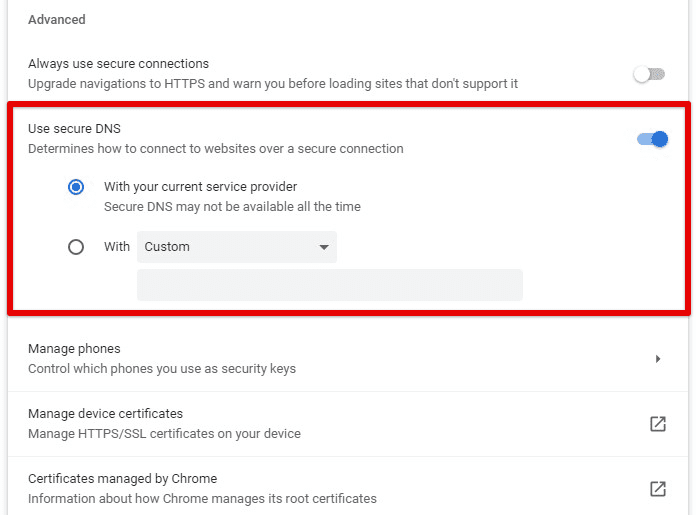
Advanced privacy and security settings
Once Data Saver has been enabled, you will start noticing faster load times for web pages and reduced data usage. It’s important to note that some websites may not be fully compatible, resulting in slower load times or broken features. If you experience any issues, you can turn off Data Saver again with the same toggle switch in the settings menu.
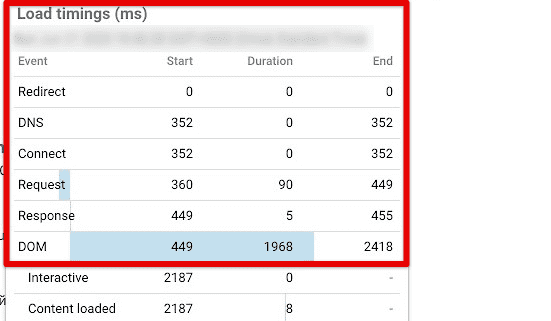
Faster load times
To verify that Data Saver is working, you can check your data usage in Chrome. To do so, click on the three-dot icon in the top-right corner of the browser window. From the dropdown menu, select “Settings”. Next, scroll down to the “Privacy and security” section and click “Site settings”.

Site settings in Google Chrome
Under “Advanced,” select “Data Saver.” Scroll down to the “Usage” section to view your data savings and total data usage.
Have you ever encountered a web page written in a language you don’t understand? You don’t have to worry about missing out on any information when using Google Chrome. Here is a comprehensive guide to using Chrome browser’s automatic translation feature.
Benefits of using data saver
Faster page loading times: By compressing web pages and images, Data Saver can help web pages load faster, especially on slower networks. This can be particularly useful when using a mobile device or when internet speeds are considerably slow.
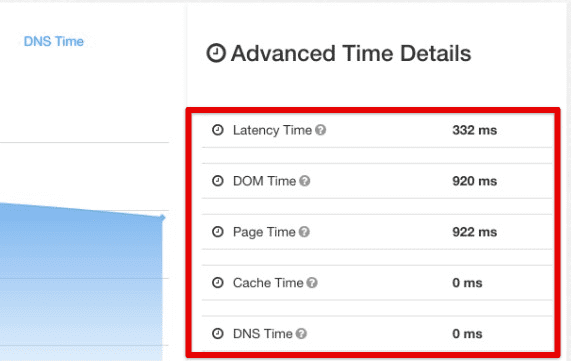
Faster page loading times
Reduced data usage: Data Saver can help minimize data usage while browsing the internet. By compressing web pages and images, less amount of data is needed to load each page, which can save on data usage and costs. This is especially important for users with limited plans or using a mobile device on a cellular network.
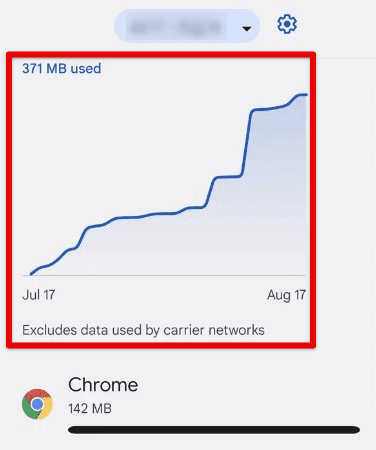
Reduced data usage
Cost savings: By reducing data usage, Data Saver helps users save on internet costs, especially when using a mobile device on a cellular network. This can be particularly important for users in emerging markets with relatively high data costs.
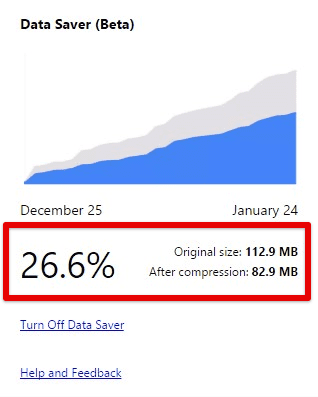
Cost savings
Improved battery life: When web pages load faster, it helps improve battery life on mobile devices. This is because the device spends less time loading web pages, which can be a battery-intensive process in itself.
How data saver works
Data Saver compresses data before it is sent to your device, reducing the amount of data needed to load each web page. This compression is done by routing your web traffic through Google’s servers, where the data is compressed using a special algorithm. The compressed data is then sent back to your device, where it is decompressed and displayed in your browser.
By compressing web pages and images, Data Saver reduces the amount of data used while browsing the internet. This is because less amount of data is needed to load each page, which can save on costs in the long run. The compression algorithm used by Data Saver is designed to maintain the web page’s quality while reducing the data size that needs to be transferred.
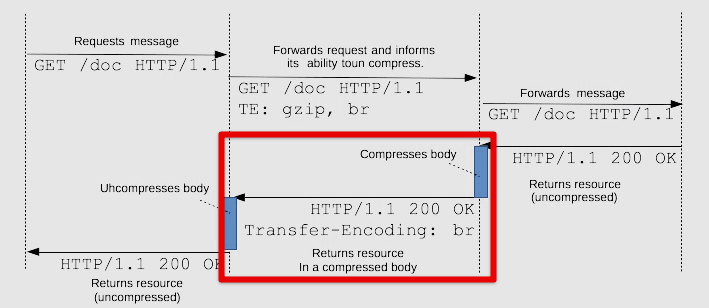
Compressed web pages and images
However, it’s important to note that this compression can also impact page loading times and the user experience. While Data Saver is designed to improve loading times, it can also slow that down if the compressed data is not efficiently transferred. Additionally, some websites may not be fully compatible with this feature, which can result in further inconvenience. If you are experiencing issues, you may want to consider turning off Data Saver for those web pages.
Data saver limitations
While Data Saver can be a handy feature, its functionality has limitations.
Reduced image and video quality: Since Data Saver compresses images and videos to reduce data usage, it can considerably reduce the quality of online media. This is noticeable on high-resolution displays or when viewing media in full-screen mode.
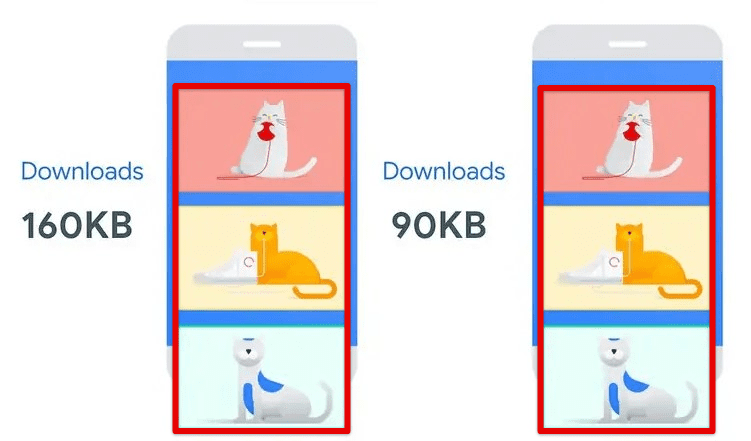
Reduced image and video quality
Compatibility issues: While Data Saver is designed to work with most websites, there may be some compatibility issues with certain ones. This will result in slower page loading times or broken features, as some websites may not be supporting this external routing or the underlying compression algorithm.
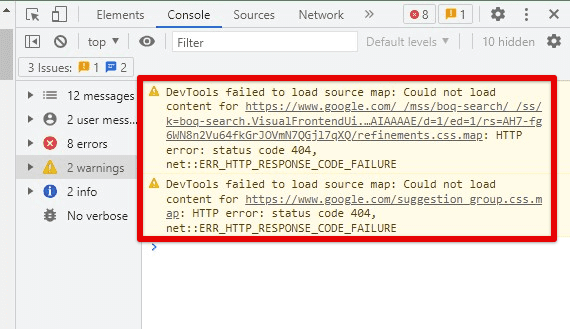
Compatibility issues
Potential impact on web applications: Some web apps, such as online gaming or video conferencing, may be negatively impacted by this compression. This is because these applications require real-time data transfer, and any delays caused by the compression and decompression process can result in lag or other problems.
Potential impact on web applications
Limited control over compression settings: Data Saver does not provide users with control over compression settings, meaning that it may not be suitable for users who require a specific image or video quality settings or who need to use particular web applications that are negatively impacted by this process.
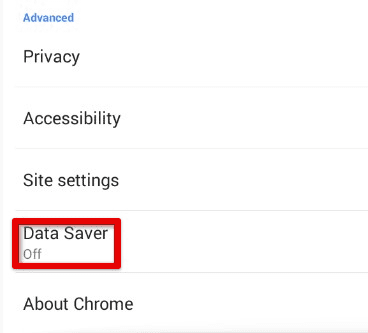
Limited control over compression settings
Awareness of these limitations and how they may affect your browsing experience is essential. If you encounter compatibility issues or notice a reduction in the image or video quality, consider disabling those websites’ features or using an alternative solution.
Customizing data saver settings
Data Saver is designed to be a set-and-forget feature that automatically compresses web data. However, Google Chrome still allows you to customize Data Saver settings to suit your browsing needs slightly.
Allowing certain websites to bypass: If you encounter compatibility issues with certain websites or notice a reduction in the image or video quality, you can enable those websites to bypass Data Saver by adding them to a list of exceptions. To do this, click on the three dots in the upper right corner of Chrome and select “Settings”. Click “Privacy and security” and then “Data Saver” from there. Under “Manage exceptions”, you can add websites you want to exclude from Data Saver compression.
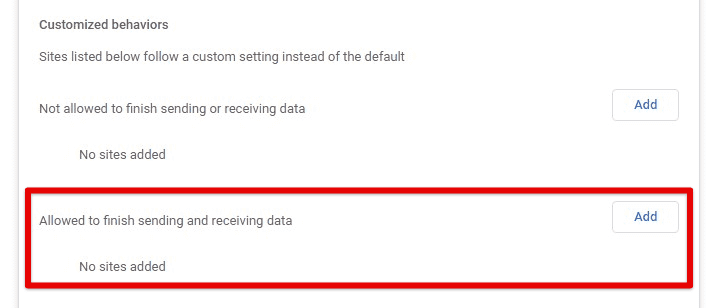
Allowing certain websites to bypass
Loading images in original quality: If you frequently visit websites that rely heavily on high-quality images, you may want to disable image compression altogether. To do this, click on the three dots in the upper right corner of Chrome and select “Settings”. Click “Privacy and security” and then “Data Saver” from there. Toggle the switch next to “Save data” to off, and Chrome will no longer compress images.
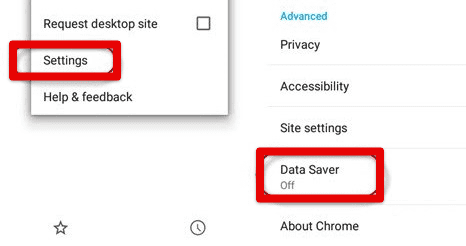
Loading images in original quality
Monitoring data usage: If you want to track how much data you have been saving with Data Saver, enable the “Show Data Saver details” option. Doing so displays a summary of your data savings on the respective page.
Common data saver issues
Data Saver is generally a beneficial and reliable feature for optimizing your browsing experience, but there are some common issues.
Pages not loading: If you notice that pages are not loading correctly or are taking longer than usual, it could be due to the recently enabled Data Saver. Try disabling it by clicking on the three dots in the upper right corner of Chrome and selecting “Settings”. Next, click “Privacy and security” and “Data Saver” from there. Toggle the switch next to “Save data” to off, and reload the page to see if this resolves the issue.
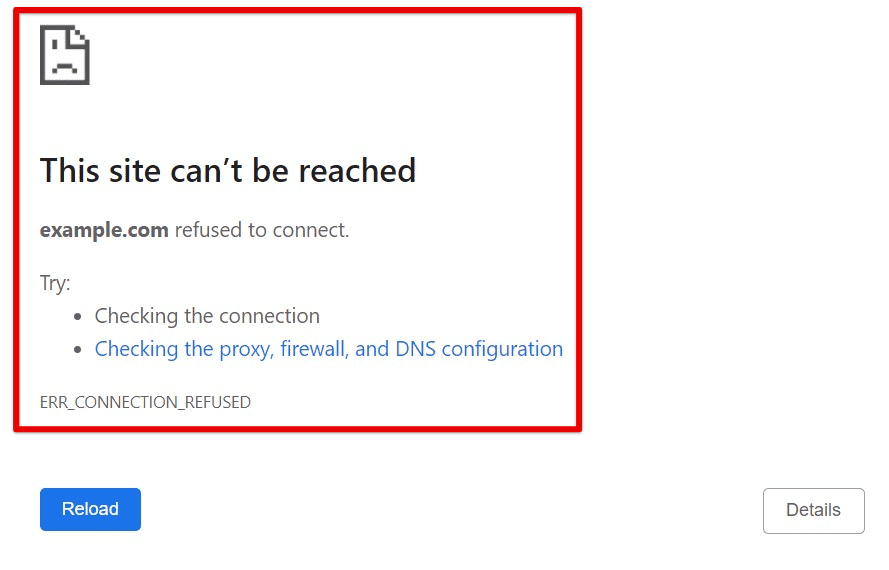
Pages not loading
Compatibility issues: Some websites may not be compatible with Data Saver compression and may not display correctly. To fix this, you can add those websites to a list of exceptions, allowing them to bypass Data Saver compression. To do so, click on the three dots in the upper right corner of Chrome and select “Settings”. Click “Privacy and security” and then “Data Saver” from there. Then, under “Manage exceptions”, add the websites you want to exclude from Data Saver compression.
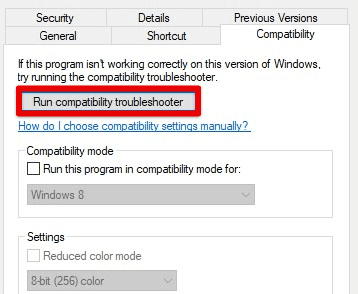
Compatibility issues on Google Chrome
Unable to access specific applications: Data Saver may affect some web applications that rely on specific data formats or protocols. If you encounter issues accessing a web application, try disabling Data Saver and reloading the page again. If the problem persists, it may be unrelated to Data Saver in the first place.
Conclusion
Google Chrome’s Data Saver feature helps you optimize the browsing experience by reducing data usage, increasing page loading speeds, and saving you money on data charges. By compressing web pages and images, Data Saver allows you to browse more efficiently, especially on mobile devices with limited data plans.
While there are some limitations, such as reduced image and video quality, Data Saver is still a valuable tool for users looking to optimize their browsing experience on Google Chrome. It is undoubtedly an essential feature for anyone looking to browse more efficiently. Millions of people use Chrome as their primary internet browsing software with a user-friendly interface, fast browsing speeds, and customizable features. Learn how to personalize your Chrome browser homepage, tailored to specific preferences.
