If you’ve been wondering whether logging multiple accounts into a Chromebook is possible, you’ve come to the right place. In this comprehensive guide, we’ll explain how it’s easy to use multiple user accounts on ChromeOS at once and get the best out of your operating system accordingly.
The primary benefit arising in the wake of this instance is the flexibility to get more done without having to bear the headache of switching between different accounts. Thankfully, Chromebooks arrive with an innate functionality to accommodate individuals with several log-ins. Let’s take a better look at what the process entails ahead.
Using multiple user accounts on ChromeOS
ChromeOS allows you to add up to 19 users on a single Chromebook, making it possible to switch between them while also allowing you to transfer one open Chrome window from one account to the other quickly. Follow the subsections outlined ahead to learn how to add a second user to your Chromebook and repeat the process—if needed—to add more accounts.
But before we get into further detail, it’s worth clearing the difference between a Chromebook user account and a regular Google account. Chromebook users get a whole space to themselves on the device, where they can surf the internet, enjoy their installed Android or Linux apps, and do almost anything else that ChromeOS is capable of.
Signing in a Google account on your Chromebook from the “Settings” app is a different story. A single Chromebook user account can log into multiple Google accounts on their Chromebook without switching the user itself. Doing so lets one access apps, such as Gmail, from different Google accounts on the web without repeating the sign-in process.
We’ll add more explanation to each of these different systems further into the article, so read until the end for the best results.
Adding a user to a Chromebook
You need to get to the sign-in screen to add a new user to your Chromebook. If you’re using your Chromebook, press and hold the “Power” key until you see the overlay menu. Then, select “Sign out,” and you’ll quickly be taken to the relevant screen on the device.
- Ensure you’ve backed up anything you were doing beforehand since signing out potentially restarts the Chromebook.
As soon as you return to the log-in screen, look for “Add person” on the bottom panel. Clicking on that will take you through the whole process of adding a new user to your Chromebook.

Adding a new Chromebook user
The system will first ask whether it’s a personal account that you’re setting up or a child account for parental supervision.
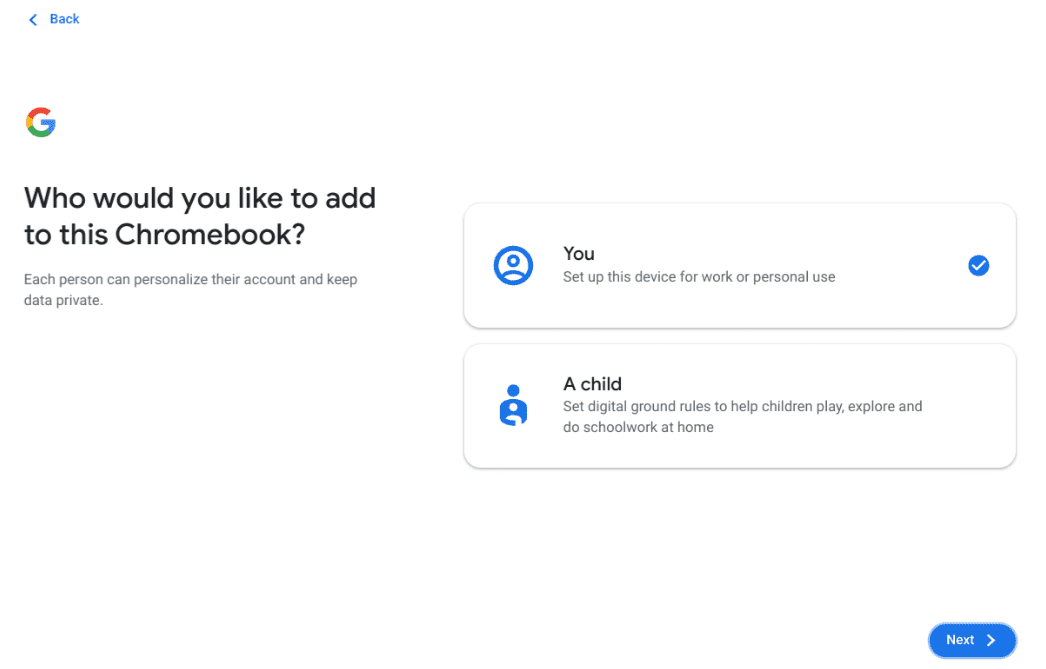
Choosing the type of user account
- Check out our dedicated guide on Family Link and learn the benefits of setting up a child account on Chromebook with supervised controls for parents.
After that, you’ll need to enter your Google account’s email address and, subsequently, the password to that as well. Proceed by syncing your mobile phone, activating Google Assistant, and setting your Play Store preferences, which would finally wrap things up for you.
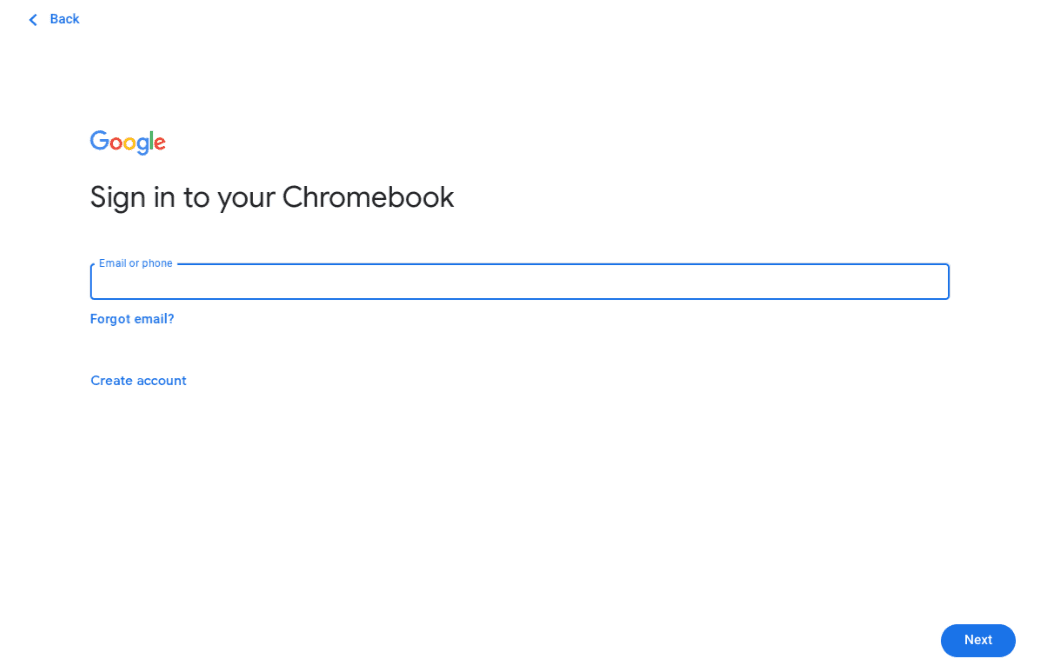
Completing the setup
As soon as you’re finished, the system will log in to this new account for you on the Chromebook and allow you to go through the rest of the setup on your own. Feel free to mess around with the settings section and experiment with different tweaks to determine the best preferences for you.
How to add more Google accounts to your Chromebook
As iterated earlier, adding a Google account differs from adding a new user altogether. To buff your Chromebook with additional accounts, go to the “Settings” app, then click on the “Accounts” section on the side panel to the left.
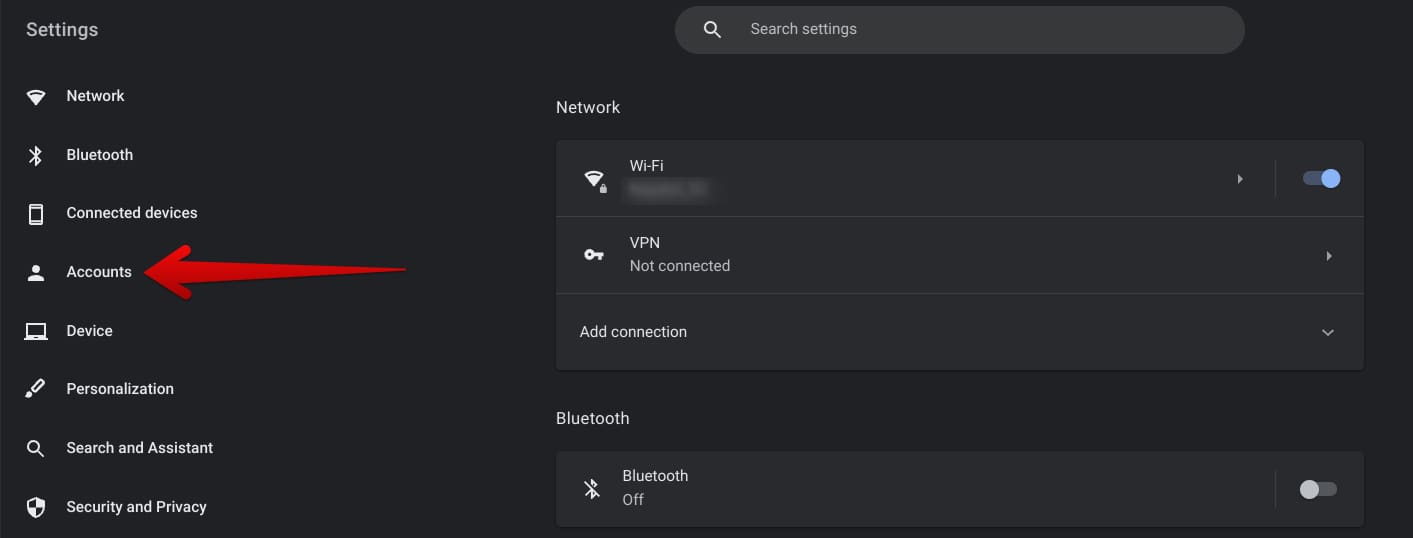
Choosing “Accounts”
Clicking on “Accounts” will direct you to the relevant area in your device’s settings. Click on the arrow beside where it says “Currently signed in as [your name]” to get to the next step.

Furthering the process
At this stage, you’ll be easily able to add new Google accounts for an existing Chromebook user. However, the point that we made in the section above still stands. This method is not for those who wish to seek privacy by adding a new account. Adding a new user to your Chromebook is the best possible approach for that purpose.
The operating system affirms this by saying, “If you want to add an account for someone else, like a family member, add a new person to your Chromebook instead.” Hence, click the “Add Google Account” button to move forward.
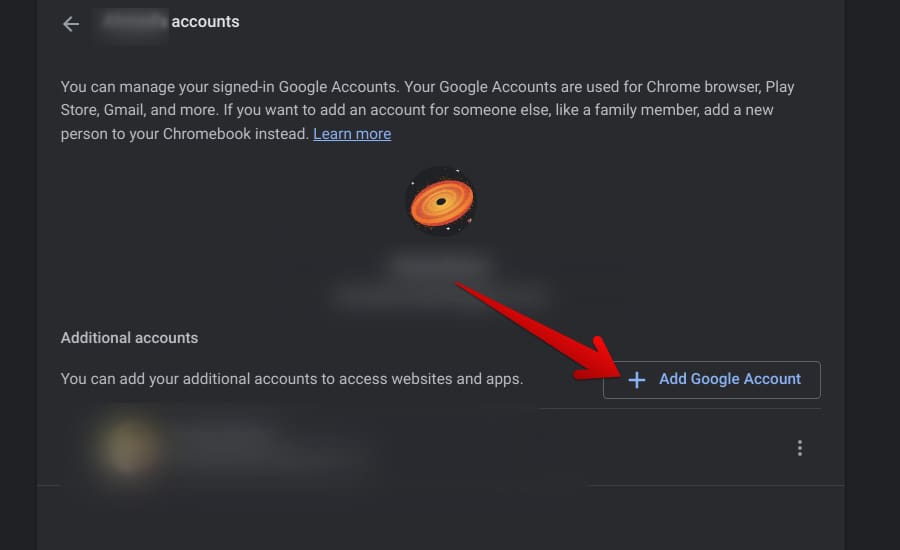
Adding another Google account
A prompt will appear on your screen now, letting you go through the defined registration process so that a new account can be made a part of your Chromebook. Finally, click “OK” and follow the on-screen instructions to finalize the process. That’s about it.
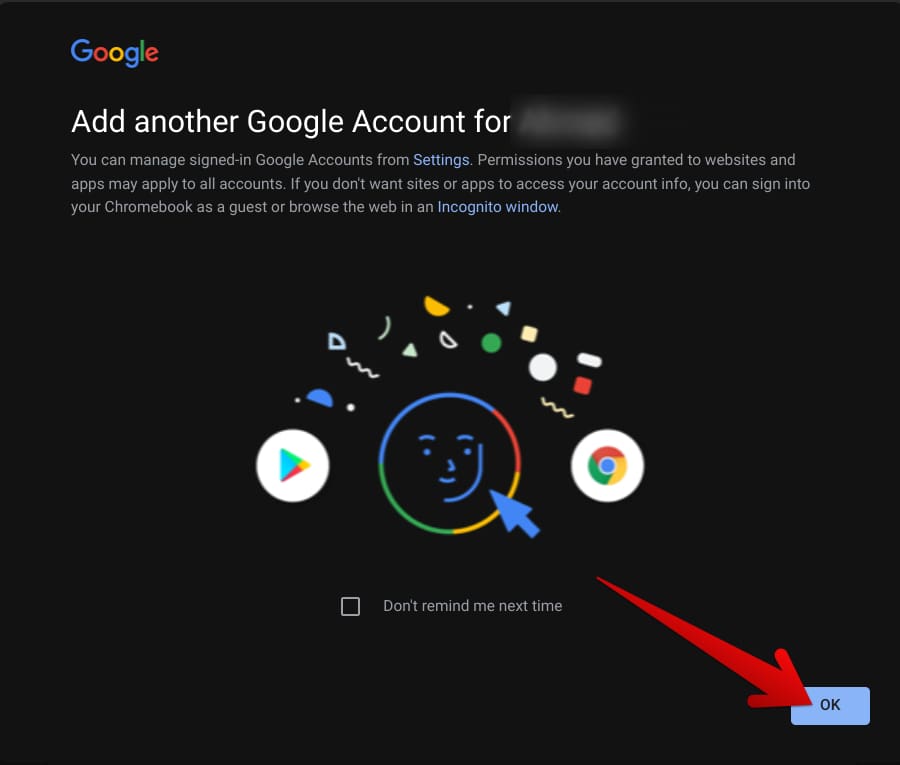
Adding a new Google account for existing Chromebook user
We hope that the difference between adding a new Google account and adding another person to your Chromebook is clear and that you know how to deal with both scenarios. Before we top this guide off, though, here’s how to resolve pertinent issues with signing in if the need arises.
How to fix potential sign-in problems on a Chromebook
If you’re trying to sign into an account on your Chromebook that is not your primary, and you keep running into an error, the account may not have permission to sign in.
To alleviate this predicament, sign into your main account, which has been deemed the owner of the Chromebook, and open the “Settings” app. From there, click “Privacy and Security” from the tabs on the left and then select “Manage your people.”
Following that, confirm if the toggle beside “Restrict sign-in to the following users” has been enabled. Disable the feature if it was activated in the past some time. That should resolve the sign-in error for you.
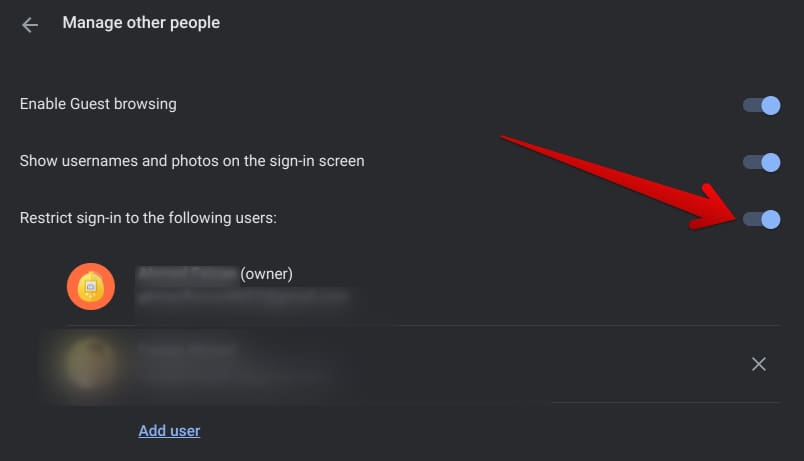
Taking off the restriction
On a side note, though, the functionality in question that lets you restrict some users from signing into your Chromebook is genuinely helpful. We recommend employing it in a way that benefits you for viable results. For instance, if you wouldn’t like your roommate to log into your Chromebook in your absence, incorporate this feature and get the best out of it immediately.
Another reason for not being able to sign in with your secondary or tertiary accounts could relate to you using the Chromebook at “work or school,” as Google describes. It is possible that the administrator of your professional setting might have applied certain restrictions on your device, so employees cannot use other accounts to log in.
That should get you going in the right direction! It’s high time to conclude the article now.
Conclusion
ChromeOS’s ability to support multiple user accounts is a valuable feature for anyone who shares a device with others. By following our step-by-step guide, you can easily set up and manage multiple accounts on your ChromeOS device, allowing each user to have their own personalized experience while maintaining privacy and security. With this feature, sharing a device has never been easier or more convenient.
As always, Chrome Ready wishes you good luck!
