Most of us rely heavily on the internet for our daily tasks and activities, from work and research to entertainment and socializing. With so many tabs open at once, it can be challenging to keep track of everything, leading to cluttered and confusing browsing experiences. However, Chrome browser’s tab groups solve this problem, allowing users to organize their tabs more effectively.
This article will explore how to use Chrome browser’s tab groups for better organization, smoother browsing experiences, and reduce clutter. We will discuss how to create, customize, manage, and restore them, as well as some tips and tricks at the end.
Enabling Chrome’s tab groups
Launch Google Chrome on your device and type “chrome://flags” in the address bar. This will take you to the Chrome experiments page. Scroll down or search for the tab groups flag.
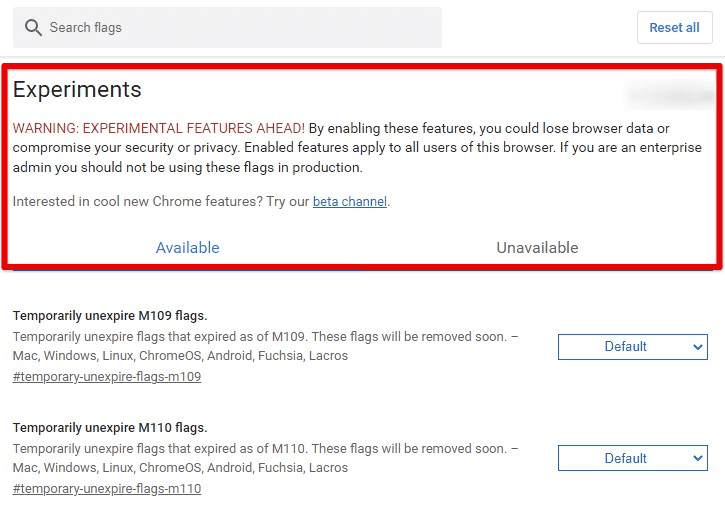
Chrome flags page
Click the drop-down menu button next to it and select “Enabled”.
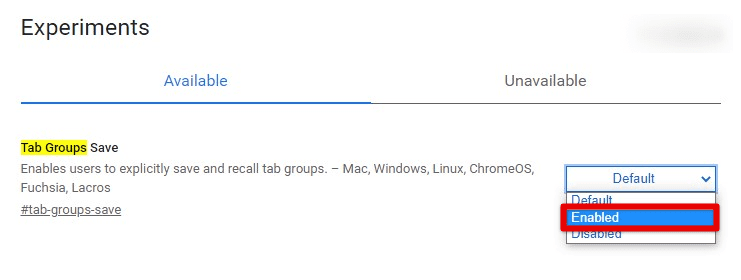
Enabling tab groups on Google Chrome
Your changes will take effect the next time you relaunch Google Chrome. To do so, click on the “Relaunch” button in your screen’s bottom right corner.
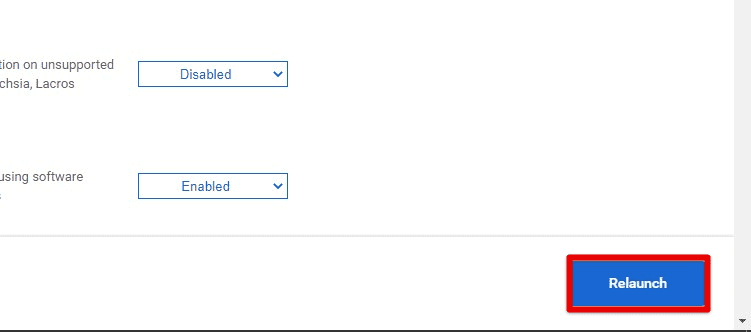
Relaunching Google Chrome
Once you’ve enabled tab groups in Chrome, you’ll notice several changes that will help you keep the browsing organized and efficient. With tab groups, you may label related tabs for easy identification. You can also reduce clutter by hiding inactive tabs or moving them to separate groups, so one may focus on the most important tabs.
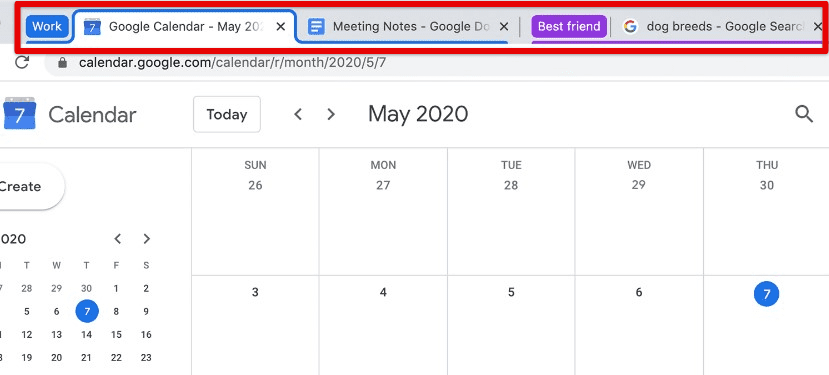
Google Chrome tab groups
Moreover, tab groups help reduce memory usage and improve the performance of your internet browser by unloading tabs that are not being actively used. Therefore, by enabling this feature, you not only make the browser more organized but also a lot smoother.
Creating tab groups
Now that you have enabled tab groups in Google Chrome, the next step is to learn how to create one yourself. There are two different ways to create tab groups in Chrome. Let us take a look at each one of them separately.
Dragging tabs into a group: To create a tab group by dragging tabs, click and hold on a tab, drag it to the right or left until it creates a new space, and release it. Then, drag any additional tabs you want to include in the group into the new space. You can also change the order of the tabs within the group by dragging and dropping them into the desired order.
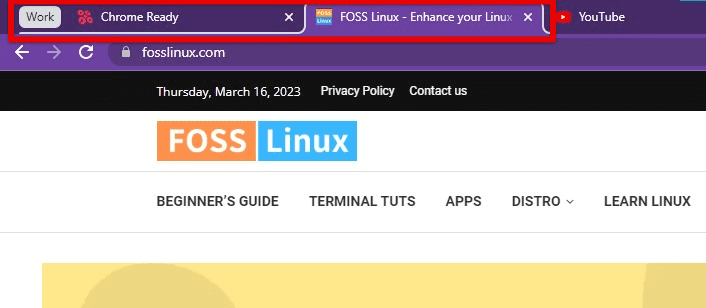
Dragging tabs into a group
Right-clicking on a tab: You can create a new tab group by right-clicking on a tab and selecting “Add tab to new group”. This will create a new tab group and move the selected tab into it. You can add additional tabs to the group by dragging them in or right-clicking on them and selecting “Add to group”.
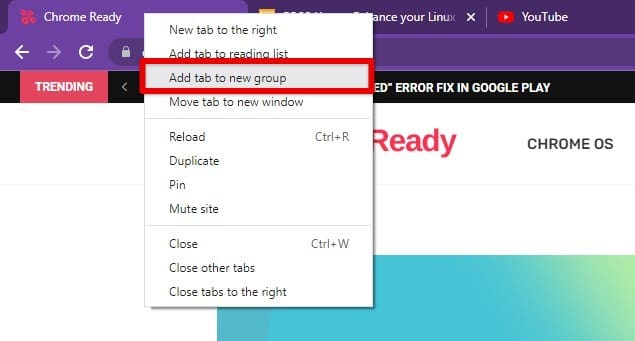
Adding a tab to a new group
Naming and color-coding tab groups
Naming and color-coding tab groups is an essential aspects of using these for better organization and easy identification. By giving your tab groups descriptive names and color-coding them, you can quickly identify the groups you need and reduce the time you spend searching for specific tabs.
Naming a tab group: Right-click on the group header for naming a tab group. Doing so opens up a menu right next to it. Write the name you want to assign in the “Name this group” bar. Use descriptive names that reflect the content or purpose of the tabs within the group. For example, name a group “Work Research” or “Shopping” to help you easily identify the tabs in these collections.
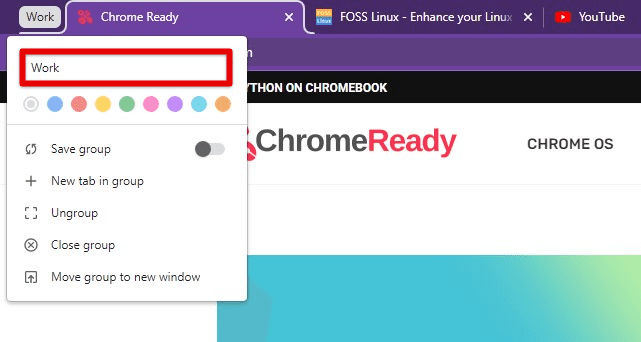
Naming a tab group
Color-coding a tab group: To change the color of a tab group, right-click on the group header. Doing so opens up a menu right next to it. At the top, you will see nine different color circles. Then, click on the color you want to assign to the entire group. Color-coding your tab groups can help you easily differentiate between them at a glance.
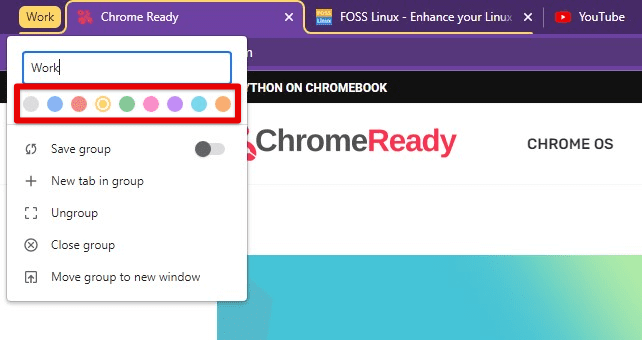
Color-coding a tab group
Using naming and color-coding together makes tab groups even more organized and easily identified. By using descriptive names and colors that are easy to remember, you streamline the browsing experience and spend more time focusing on the main content.
Managing tab groups
It is also essential to know how to manage these tab groups. Managing them includes adding or removing tabs from groups, rearranging tabs within groups, or moving tabs between groups. Here’s how you can do all of this in Google Chrome:
Adding tabs to a group: For adding tabs to a group, drag and drop them into the group space. You can also right-click on a tab and select “Add to group” from the drop-down menu, then choose the group you want to add it to.

Adding a tab to a group
Removing tabs from a group: To remove a tab from a group, drag and drop it out of the group space. You can also right-click on the tab and select “Remove from group” from the drop-down menu. If you want to remove all tabs from a particular group, right-click on the group header and select “Ungroup” from the pop-up menu.

Removing a tab from a group
Rearranging tabs within a group: To rearrange tabs within a group, click and hold on to a tab, then drag it horizontally to the desired position. You can also do the same for moving around entire groups at once.
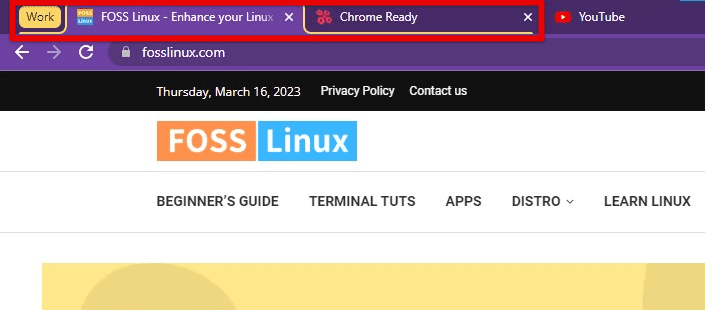
Rearranging tabs within a group
Moving tabs between groups: To move a tab from one group to another, drag the tab out of its current group and drop it into the new group’s space. You can also right-click on the tab, select “Add tab to group” from the drop-down menu, and choose the group to which you want to move it.
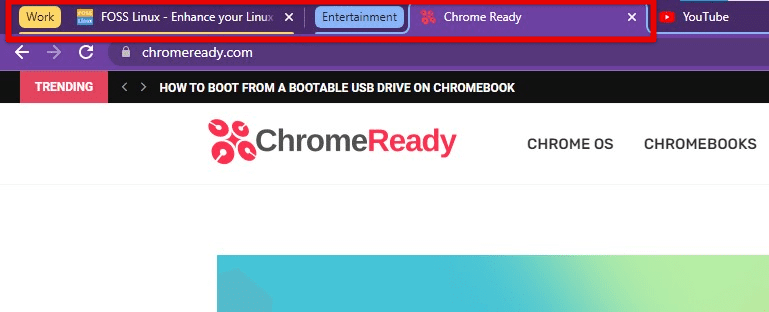
Moving tabs between groups
Moving groups to a new window: To move a group to a new window, drag the group header out of its current window and drop it somewhere else on your screen. You can also right-click on the colored circle and “Move group to new window” from the menu options.
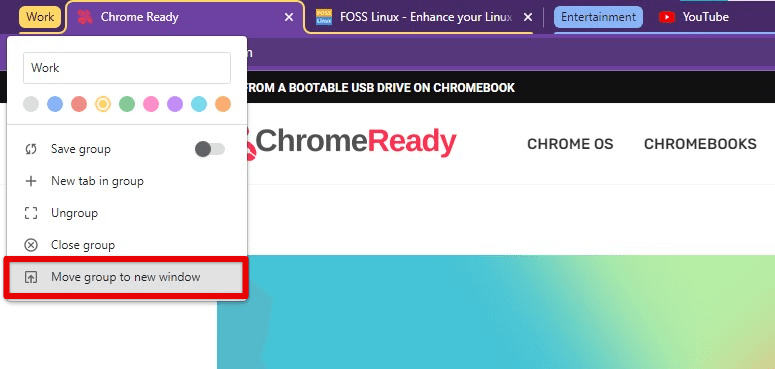
Moving the group to a new window
Ever since the COVID-19 outbreak, the world has learned the importance of remote learning and work. More and more organizations and global businesses have switched to this unorthodox work format, only to find Chromebooks already up and running to facilitate their working spaces. Here are the 10 best Chromebooks for remote workers in 2023.
Saving and restoring tab groups
In case you did not already know, saving Chrome tab groups and restoring them later is also possible. This feature allows you to save preferred groups of tabs from reaccessing them later easily. It conserves much time on the user’s end, especially if someone has to access similar sites or web pages daily.
Saving a tab group: To save a tab group, right-click on the group header and toggle the switch next to “Save group” in the pop-up menu. Give your group a name and choose where you want to save it. Either save it to the bookmarks bar or your desktop.
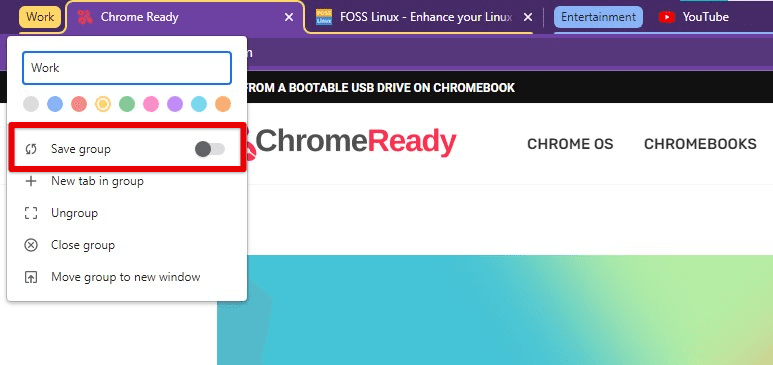
Saving a tab group
Restoring a saved tab group: To restore a saved tab group, open a new tab and click on the three-dot menu icon in the top right corner of the screen. From the drop-down menu, select “Bookmarks” and then “Bookmark manager”. In the Bookmark Manager, find the folder where you saved your tab group and click on it to expand it. Right-click on the group you want to restore and select “Open all bookmarks” from the drop-down menu. Doing so opens all tabs in that group at once.
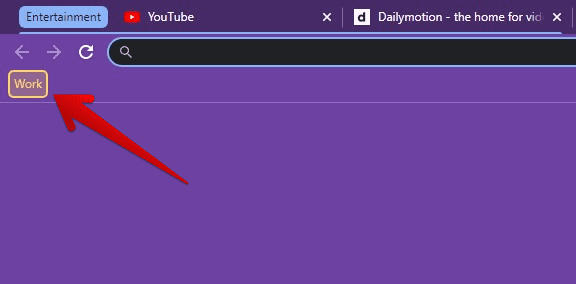
Restoring a saved tab group
As described earlier, this feature can be handy if you frequently visit the same set of websites or if you need to switch between different sets of tabs regularly. In case you’re new to Google Docs, getting the hang of things can be pretty daunting, despite its ease of use and simple interface. Go through our beginner’s guide to Google Docs in 2023 for an updated walkthrough.
Customizing tab groups
Tab groups may also be customized to a great extent. It is possible to change their layout or appearance, add icons or emojis to a group name, or more. Here is how you can do all of this in Google Chrome:
Changing the layout of a tab group: By default, tab groups appear as a row of tabs at the top of the browser window. You can change how these tabs are arranged by moving them around or dragging the entire group together.
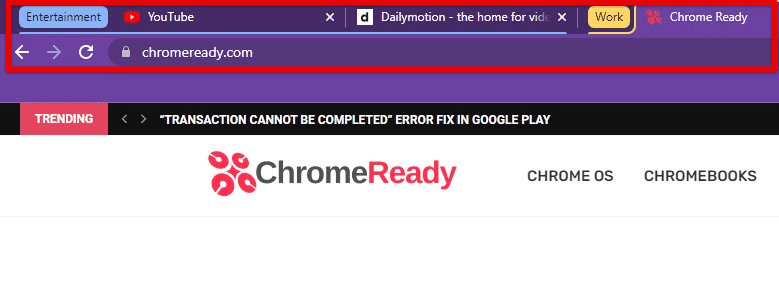
Changing tab group layout
Changing the color of a tab group: You can change the color of a tab group by right-clicking on the group and selecting the desired color from the pop-up menu. There are nine different options to choose from.
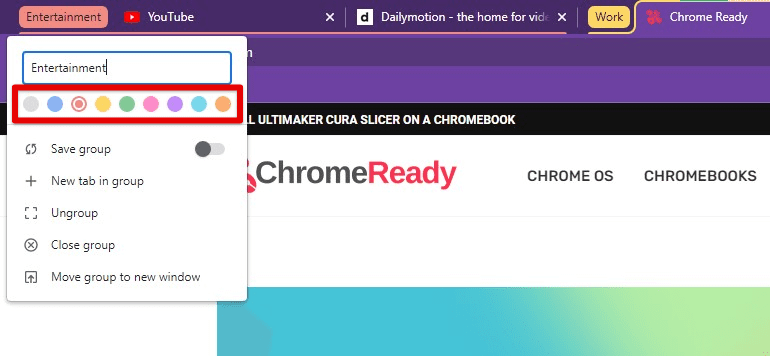
Changing the color of a tab group
Adding icons or emojis to a group name: To add an icon or emoji to a group name, right-click the group header and copy the emoji in the name bar. Emojis are much more recognizable than plain text and therefore serve as an excellent identifier for tab groups in Google Chrome.
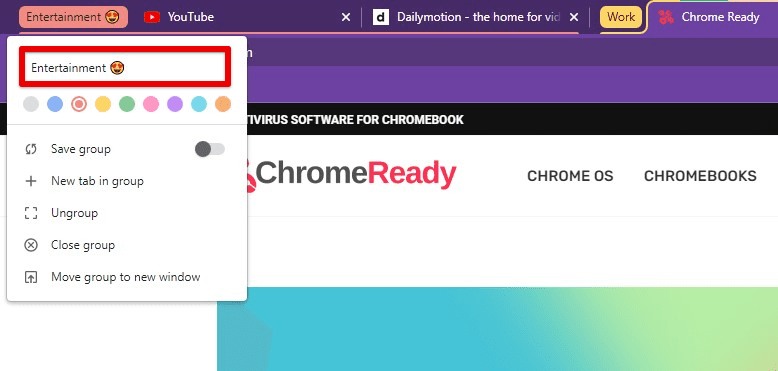
Adding emojis to a group name
Collapsing and expanding tab groups: You can collapse and expand tab groups by clicking on their name header or the small colored circle (in case you have not assigned a name to that group). This is helpful if several groups are opened, and you want to free up space on the browser window.
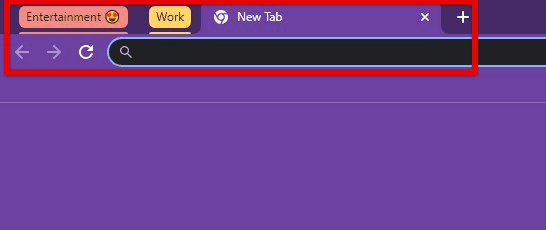
Collapsing tab groups
Tips and tricks
Following are some additional tips and tricks to help you effectually employ Chrome’s tab groups feature in day-to-day browsing:
Using keyboard shortcuts: Existing Chrome keyboard shortcuts can make it faster and easier to manage tab groups.
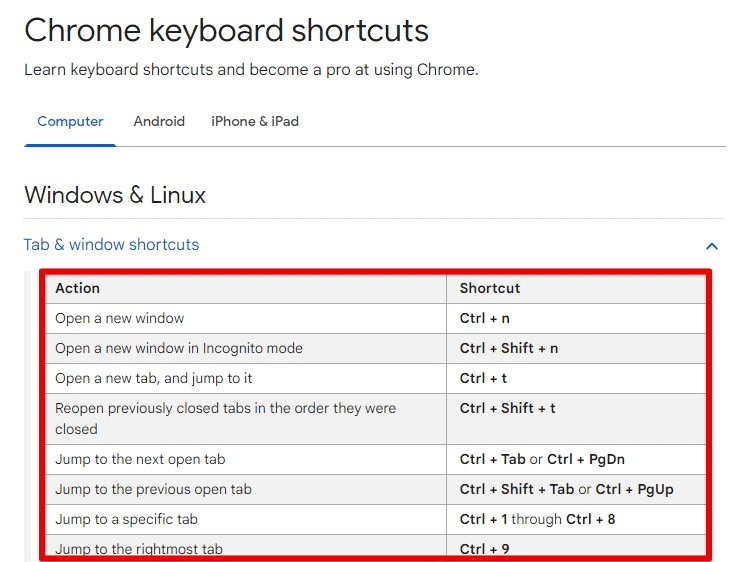
Chrome keyboard shortcuts for tabs
Ctrl + Shift + T (Windows) or Command + Shift + T (Mac): For reopening the last closed tab.
Ctrl + 1-8 (Windows) or Command + 1-8 (Mac): For switching to a specific tab group.
Ctrl + Shift + D (Windows) or Command + Shift + D (Mac): For saving all tab groups in a window as a new bookmark folder.
Using extensions: Several Chrome extensions can help you manage tab groups in coherence with each other.
Tab Resize: This allows you to split the browser window into multiple sections, each with its tab group.
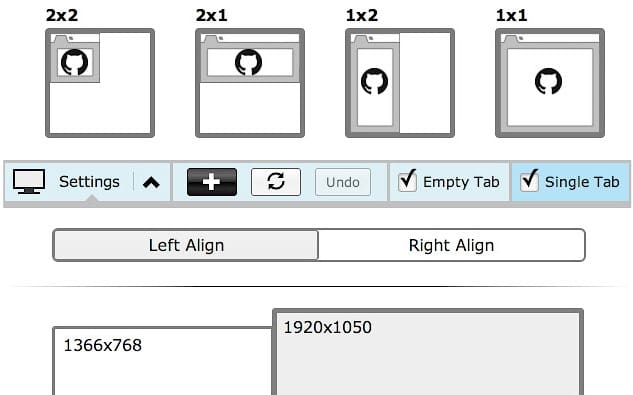
Tab Resize
OneTab: Consolidates all open tabs into a single tab group, helping you save memory and reduce clutter.
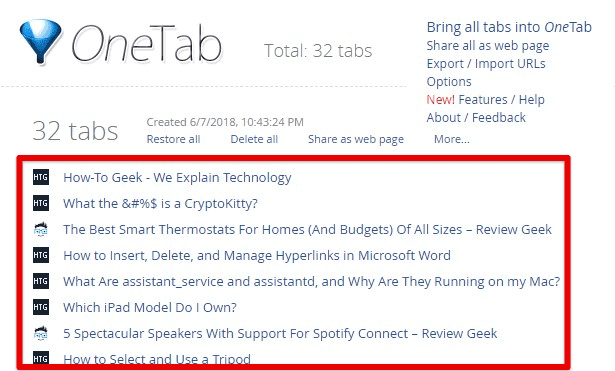
OneTab
Toby: Saves and organizes tabs into more customizable groups, which can be accessed from a dashboard.

Toby
Using tab groups with other organizational tools: While tab groups can be a great way to organize your tabs, they’re not the only tool available. Consider using other organizational tools, such as bookmarks, folders, and note-taking apps, to supplement these groups. You might use bookmarks to save frequently visited websites and a note-taking app to jot down ideas related to a particular project or topic.
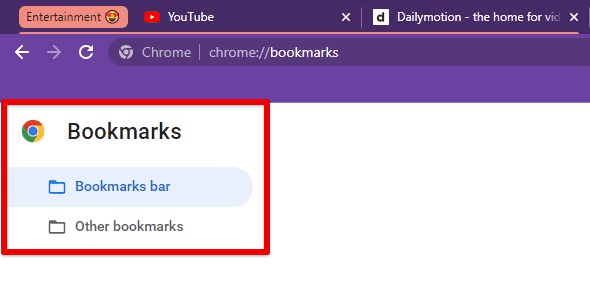
Google Chrome bookmarks
Using tab groups strategically: To get the most out of tab groups, it’s important to use them strategically. They work best when these groups contain sites that are related to each other. For example, create a tab group for all your social media accounts or for all the tabs related to a particular project.
Limit the number of tabs in each group. Too many tabs in one group can make navigating and finding what you need difficult, and this ultimately defeats the purpose. Limit the number of tabs in each group to less than 7. Also, when naming your tab groups, use descriptive names that will help you remember what’s in each one of them. Avoid vague or generic names like Group 1 or Project A.

Descriptive tab group names
Be mindful of memory usage. Tab groups themselves can use up a lot of memory, especially if you have many tabs open simultaneously. Be aware of your computer’s memory usage, and consider using extensions like OneTab to bring that down.
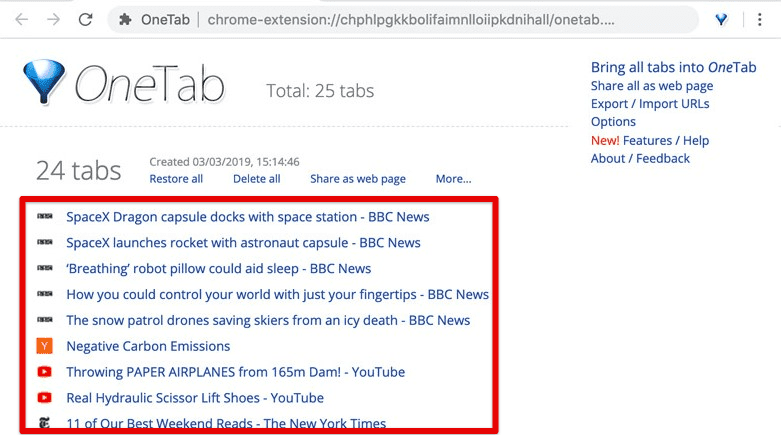
Reducing memory usage with OneTab
Conclusion
Google Chrome’s tab groups serve as an organizational tool, helping you manage tabs more efficiently and reduce clutter in your browser window. Creating, naming, color-coding, managing, and saving these tab groups can make your online activities more structured than ever before. So why not try them and see how tab groups can help you stay organized and productive while browsing the web?
Google Jamboard is widely recognized as an interactive digital whiteboard that can help you conduct virtual meetings, indulge in remote collaboration, and even make a productive brainstorming session possible. Here are 5 tips for making your Google Jamboard presentations stand out.
