All of us have our favorite websites that we visit frequently. Whether it’s social media, news sites, or online shopping, keeping track of them all can be challenging. Fortunately, Google Chrome’s bookmarking feature can help you organize your favorite websites and access them with ease.
In this article, we’ll explore how to use Google Chrome’s bookmarks to keep your favorite websites organized and easily accessible, making your online browsing experience more enjoyable. Google Chrome is a high-class internet browser whose greatest strength lies in its capacity to be consistently updated with time. Learn how to check the Google Chrome version and update it to the latest.
Effortlessly Organize Favorites with Chrome Bookmarks
Understanding Google Chrome’s bookmarking system
Google Chrome’s bookmarking system is a way to save the URLs of your favorite websites so that you can access them quickly and easily. When you bookmark a website, the browser saves the website’s URL and other information, such as the title and icon. You can then access your bookmarks from the bar or menu inside Google Chrome.
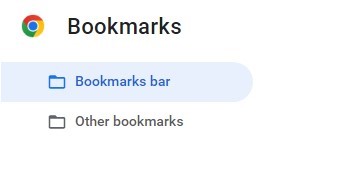
Google Chrome’s bookmarking system
The benefits of using bookmarks in Chrome are numerous. Firstly, they save you time by allowing you to quickly access frequently visited websites without having to type in the URL every single time. Secondly, bookmarks help keep you organized by allowing you to group similar websites in folders. This makes finding what you’re looking for easier and keeps the bookmarks neat and tidy. Thirdly, they can be synced across devices using your Google account, meaning you can access the same bookmarks on your desktop, laptop, tablet, or smartphone.
This system is powerful for keeping your favorite websites organized and easily accessible. By understanding how it works and its benefits, you can streamline your online browsing experience and make the most of your time online. Since Google Chrome accumulates complicated different processes, especially over time, it’s often prone to slow down in terms of performance. Go through our guide to make Google Chrome faster on Windows 10/11.
Adding bookmarks
First, navigate to the website you want to mark to add a bookmark. Once on the website, click the star icon in the address bar at the top of the Chrome window. It is present on the far-right side of that bar. This will bring up the menu, where you can choose where to save that website’s URL.
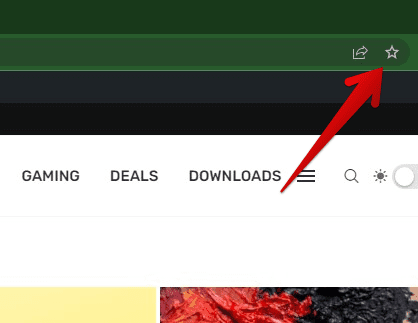
Bookmarking a webpage
When adding a bookmark, choosing the correct folder to store it in is important. This will help you keep them organized and easy to find. Chrome offers several pre-made folders, such as “Bookmarks Bar” and “Other Bookmarks,” but you can also create custom folders to suit your needs. To create a new folder, click the “Choose another folder” button at the bottom and enter a name for the new folder.
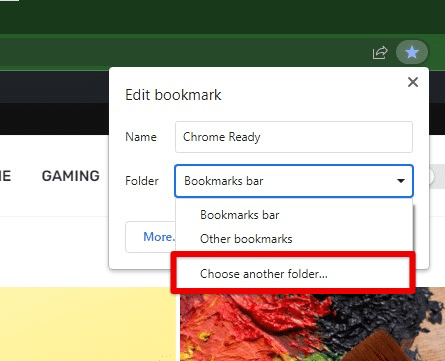
Choosing another folder for adding bookmarks
Once you’ve chosen the folder to store your bookmark, click the “Done” button to finish saving. Your bookmark will now appear in the selected folder and can be accessed from the menu or bar inside Chrome.
Creating bookmark folders
Creating new bookmark folders in Chrome is essential to organizing your bookmarks. By grouping similar websites in folders, you can quickly find the website you’re looking for and keep the entire menu organized.
To create a new bookmark folder, click on the bookmarks icon in the top-right corner of the Chrome window. From the dropdown menu, select “Bookmark manager.” Once in the bookmark manager, click the “Organize” button in the top-left corner and select “Add new folder”.
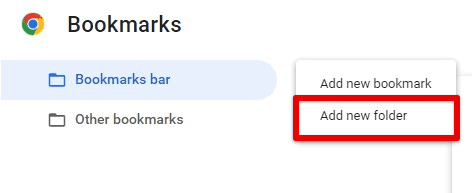
Adding a new folder
In the popup window, enter a name for the new folder. Be sure to choose a name that is descriptive and easy to remember. If you’re creating a folder for your favorite cooking websites, you could name it “Recipes” or “Cooking Blogs”.
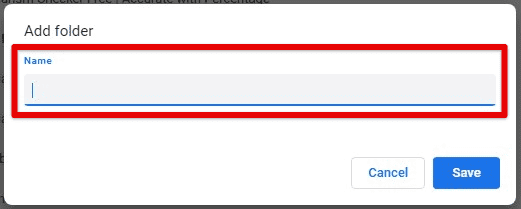
Naming the new folder
Once you’ve named the folder, choose where to store it. You can either store it in the “Bookmarks Bar” for easy access or in the “Other Bookmarks” folder. Alternatively, you can create a subfolder within an existing folder by selecting that folder before clicking “Add folder” in the previous step.
Organizing bookmarks
Google Chrome provides several ways to organize bookmarks, including sorting, rearranging, and deleting them. Sorting bookmarks is a great way to keep them organized. To sort bookmarks in Chrome, click the bookmarks icon in the window’s top-right corner and select “Bookmark manager”. Once in the bookmark manager, you can sort bookmarks by name, date added, or website URL. Click on the three-dot icon in the top-right corner of the manager and select your preferred sorting option.
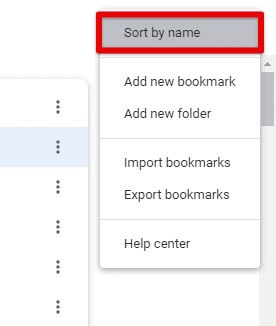
Sorting bookmarks by name
Rearranging bookmarks is also possible. Just click and drag a bookmark to a new location in the manager to rearrange. You can also drag and drop bookmarks between folders to move them around. This is a great way to group similar websites.
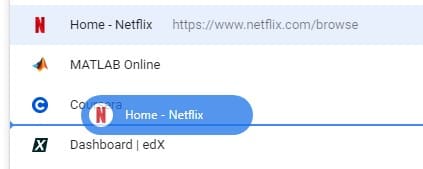
Rearranging bookmarks with drag and drop
Finally, deleting bookmarks you no longer need is essential for keeping the entire menu sorted and clutter-free. To delete a bookmark, right-click on the bookmark inside the manager and select “Delete”. You can also choose multiple bookmarks to delete at once by holding down the “Ctrl” key on Windows or the “Command” key on Mac.
Managing bookmarks
Once you have created and organized bookmarks, you may need to manage them by editing, renaming, or deleting. Chrome makes it easy to manage bookmarks, allowing you to make changes quickly. To edit a bookmark, click the bookmark icon and select “Bookmark manager”.
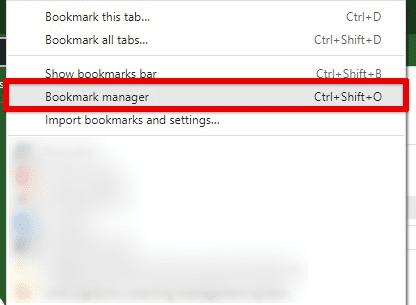
Opening bookmark manager
Once in the manager, locate the bookmark you want to edit and right-click on it. From the dropdown menu, select “Edit”. This will open the bookmark editor, where you can change the name, URL, and folder location.
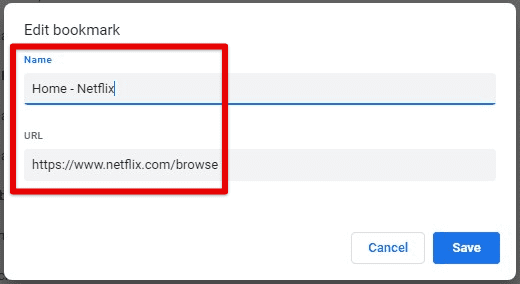
Editing an existing bookmark
To rename a bookmark, right-click on it in the bookmarks manager and select “Edit”. In the bookmark editor, change the name tile and click “Save” to update.
Exporting and importing bookmarks
One of the most valuable features of Chrome’s bookmarking system is the ability to export and import bookmarks across different devices. This allows you to access your bookmarks from any device, including a desktop, laptop, smartphone, or tablet.
To export or import bookmarks in Chrome, you must ensure you’re signed in to your Google account. Once you have done so, proceed to follow these steps. On your desktop or laptop, click the bookmarks icon in the top-right corner of the Chrome window and select “Bookmark manager”. Next, click on the three-dot menu icon in the top-right corner of the bookmark manager and select “Export bookmarks.”
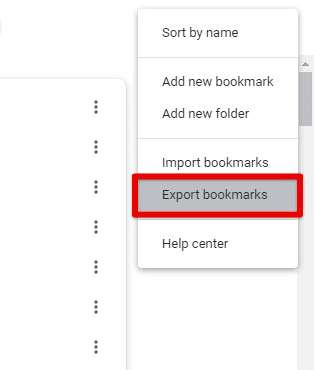
Exporting bookmarks
Save the bookmarks file to your computer. This will create a backup of your bookmarks that you can use to restore them if needed.
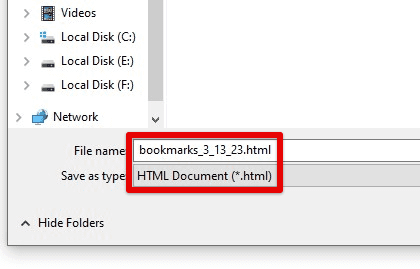
Saving bookmarks locally
Open Chrome and sign in to your Google account on the other device. Click on the bookmarks icon and select “Bookmark manager”. Next, click the three-dot menu icon inside the manager and select “Import bookmarks”.
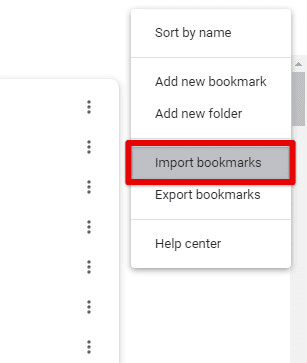
Importing bookmarks
Select the bookmarks file you exported from the first device and click “Open”. Repeat these steps for any additional devices. Once you have done so, any changes you make to bookmarks on one device automatically be synced to all other as long as they are connected with the same Google account. These changes include adding new bookmarks and rearranging or deleting previous ones.
Using bookmarks bar
The bookmarks bar is a handy feature in Chrome that lets you quickly access all your favorite websites with a single mouse click. Adding bookmarks to this bar allows you to easily navigate websites without having to search for them.
First, make sure that the bookmarks bar is visible. To do this, right-click on the top of the Chrome window and select “Show bookmarks bar” from the dropdown menu. This will display the bookmarks bar beneath the address bar.
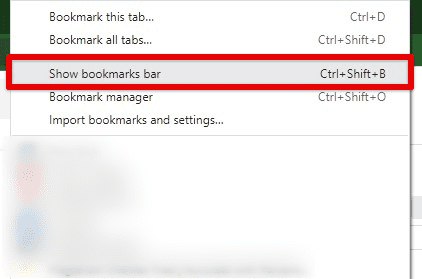
Showing bookmarks bar
Next, start adding bookmarks to it. To do so, click on the star icon in the address bar when you’re on the website you want to bookmark. In the dropdown menu that appears, select “Bookmark this page” and choose “Bookmarks bar” from the “Folder” dropdown menu. Click on “Done” to save.
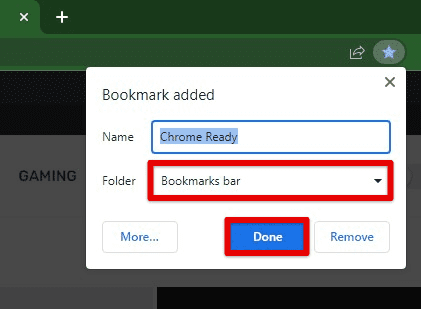
Adding a bookmark to the bookmarks bar
To access a bookmark located on the bar, click on it. You can also organize bookmarks on the bookmarks bar by dragging them horizontally and dropping them into different positions. You can also create folders on the bar to group related bookmarks together.
Note: By default, the top bookmarks you saved in the manager will automatically be displayed in the bookmarks bar. You can hide the bar view to remove them from the main Chrome window.
Keyboard shortcuts
Several keyboard shortcuts can help you manage bookmarks in Google Chrome. By memorizing these shortcuts, you can save time and navigate through added bookmarks more effectively. Here are some of the most useful keyboard shortcuts:
Ctrl + D (Windows) or Command + D (Mac): For bookmarking the current website. You can use this shortcut to quickly add bookmarks without using your mouse.
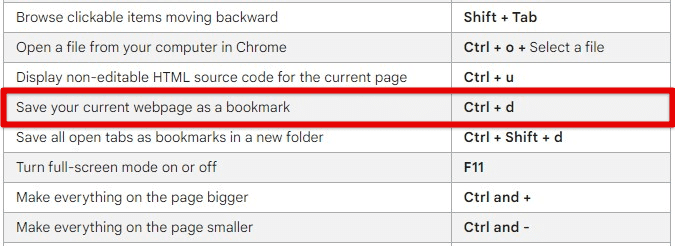
Bookmarking the current webpage
Ctrl + Shift + O (Windows) or Command + Option + B (Mac): For opening the Bookmark Manager, you can view, organize, and edit entries.
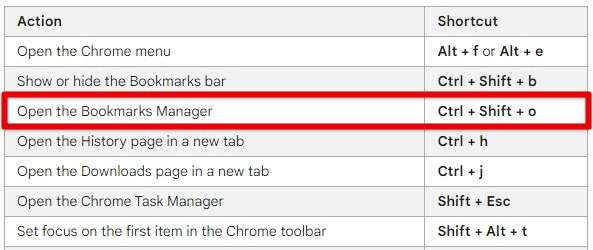
Opening the bookmarks manager
Ctrl + Shift + D (Windows) or Command + Shift + D (Mac): All the tabs currently open in Chrome for bookmarking. It is helpful if you want to bookmark an entire Chrome session at once.
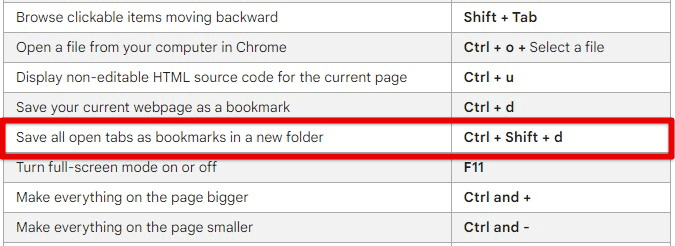
Bookmarking all currently opened tabs
Ctrl + Shift + T (Windows) or Command + Shift + T (Mac): For reopening the last tab you closed. This can be useful if you accidentally close a tab you were about to add in bookmarks.
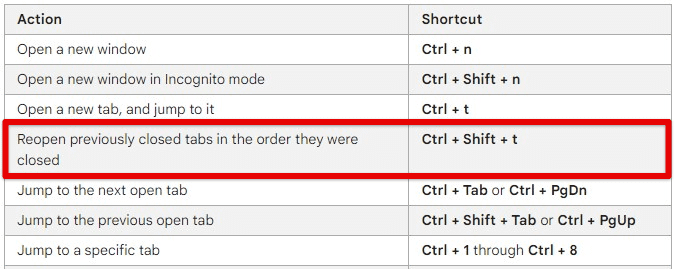
Reopening previously closed tabs
Conclusion
Google Chrome’s bookmarking system lets you organize and access your favorite websites with just a few clicks. By understanding how to add and organize new entries, sync them across devices, and use keyboard shortcuts, users can streamline the browsing experience and save time. It has been widely observed that mastering Chrome’s bookmarking system certainly makes web browsing more efficient. Google Chrome is available on various platforms, such as macOS, Chrome OS, Linux, and Microsoft Windows. At times, it can utilize an unusual amount of RAM for no apparent reason, slowing the system and giving rise to other issues. Learn how to make Google Chrome use less RAM on your PC.
