Google Jamboard has remained an ideal choice for remote collaboration worldwide for its novel capacity to get things done. The 55-inch 4K device with utter fluidity and responsiveness makes it seamless for others to join in, present, and add to virtual meetings. Still, there is the technical know-how you must possess before getting started with Google Jamboard—no need to worry, though, since Jamboard’s user interface is super simple to grasp.
You need to log into Jamboard with your Google account, share your jam with others, and begin your remote collaboration with the easy-to-follow controls in front of you. In this guide, we’ll walk you through the whole procedure in a step-by-step manner, so it’s undemanding for you to utilize Jamboard when you require it. So let’s get started right away.
- A must-read for Jamboard users: The ultimate guide to using Google Jamboard.
Elevate remote teamwork with Google Jamboard
There are quite a few features of Jamboard that help us work remotely and collaborate with others live to brainstorm ideas. But before that process can begin, we first need to set up our jam session and ensure that the work we’ll be doing is presentable immediately. For this purpose, let’s divide the working steps into different subheadings, so you can understand what to do and how to do it. Let’s begin with the
Accessing Jamboard, signing in, and creating a new jam
First, before you accomplish anything with Jamboard, you need to gain access to it. Head over to the official Jamboard web handle and sign in with your Google account if you haven’t taken care of that. After signing in, you should be taken straight to the Jamboard home screen. If this is your first time using Jamboard, you won’t see any of your existing jam sessions, obviously.
However, if you’re a returning user, the home screen is where you can access all your jams in the blink of an eye. Options such as renaming, downloading as PDF, deleting, and re-arranging your jams in a specific order are also available in this section. To continue, we’ll click the sizable “plus” icon in the bottom-right corner of Jamboard’s home page. Doing so should create a new jam session for you.
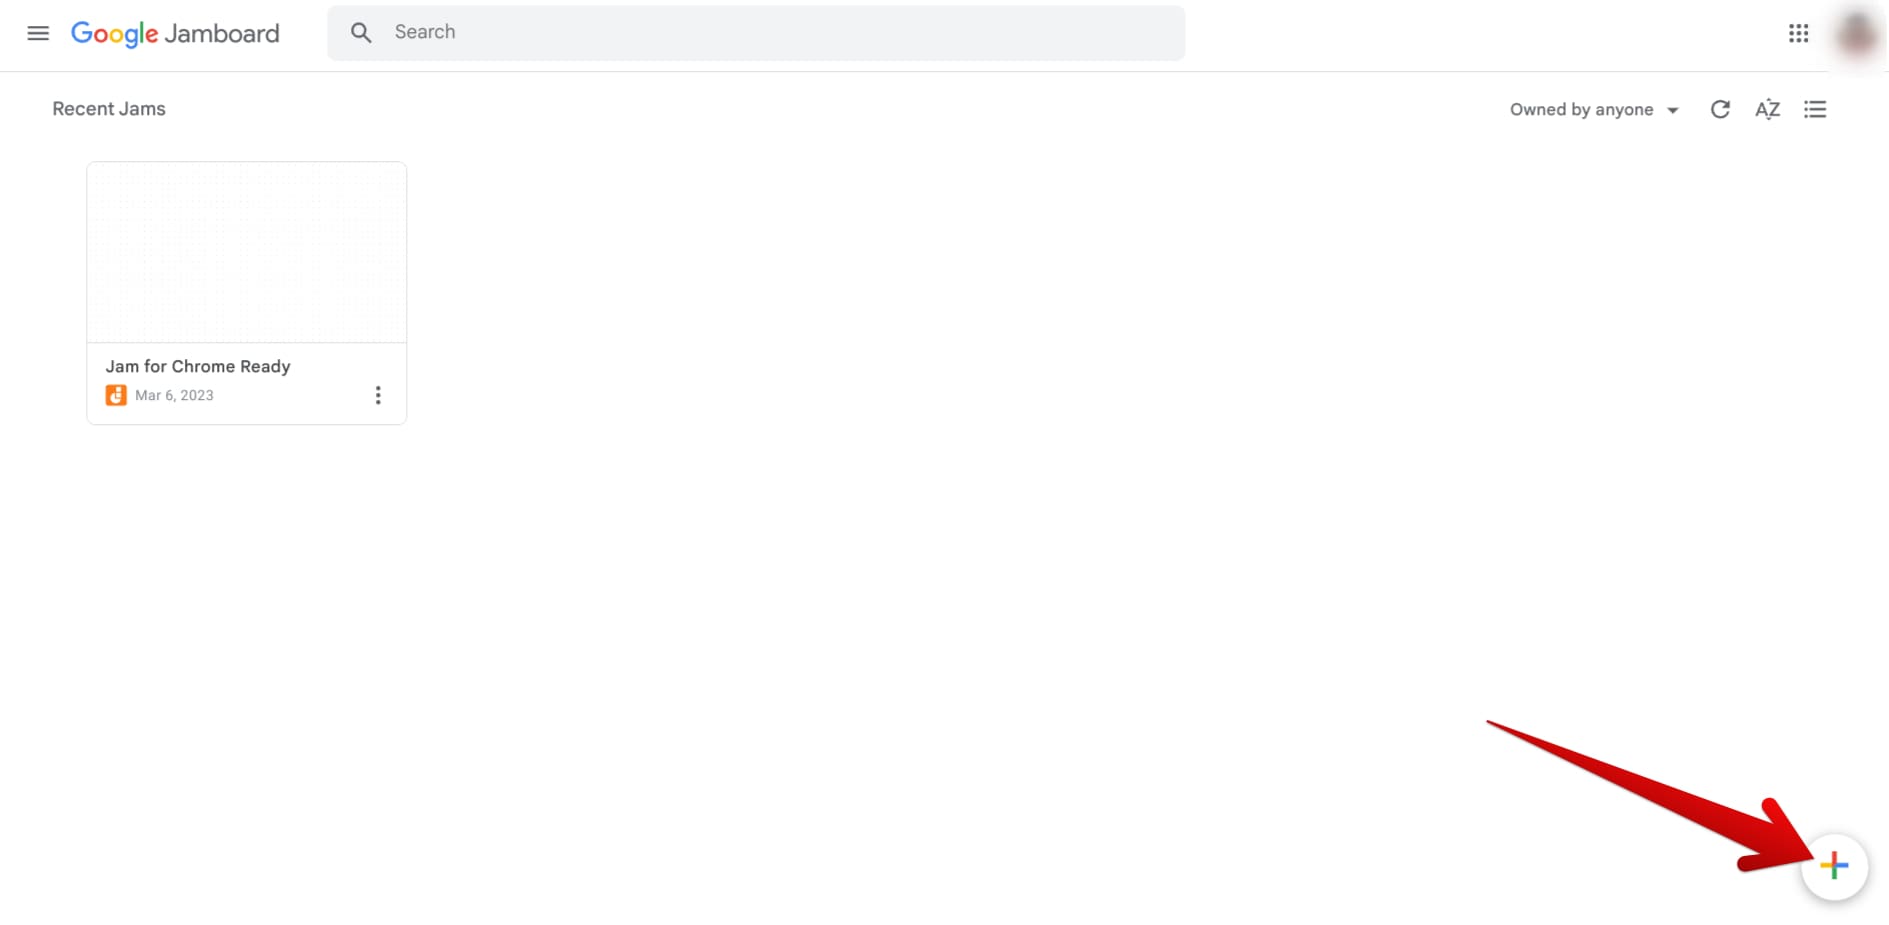
Creating a new jam session in Google Jamboard
Renaming the jam
One of the first things we recommend you do is rename your jam session to appear more professional. Setting the tone for your remote collaboration this way makes you look more presentable and prepared for what’s to come. Thankfully, renaming the jam session is a piece of cake. Click on the area where it says “Untitled Jam,” and you’ll be good to go.
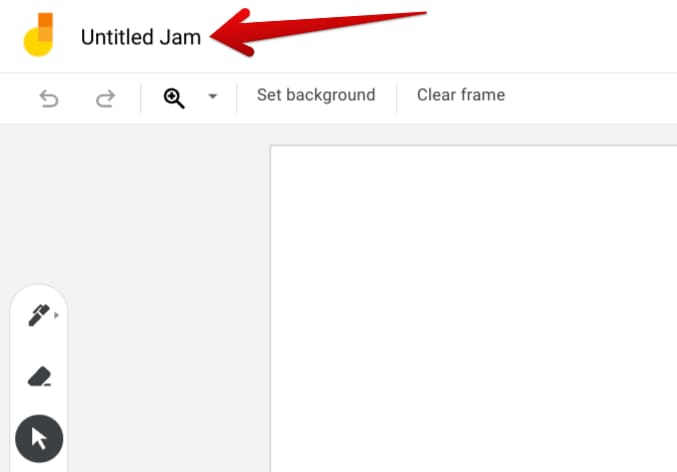
Renaming your jam
Clicking on the area specified above should allow you to rename your session afterward. Set the name of the jam to anything that fits the scenario and is relevant to the context.
Choosing a fitting background for the jam
When you’re done choosing a proper name for your jam session, your next focus should be selecting a fitting background. Again, this is another little thing that adds to the impression your jam session will leave on your attendees. To change the background, click the “Set background” button in the toolbar at the top of the screen to further the process.
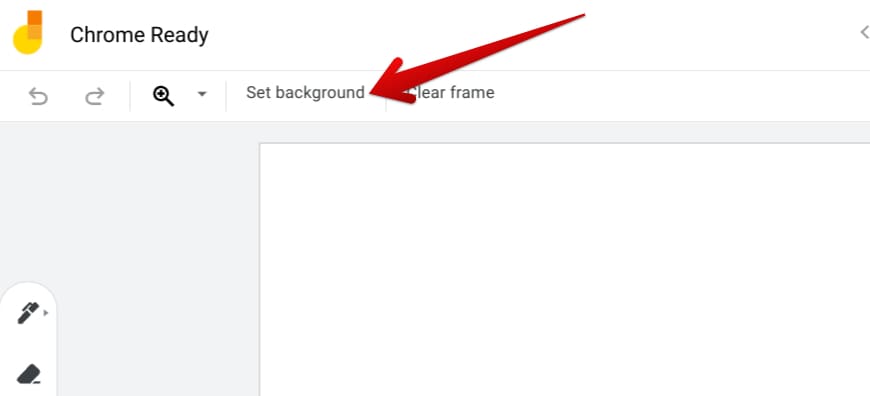
Changing the background in Jamboard
Completing the previous step will make several different background options right below that area, allowing you to choose from the many options available. The best part about Jamboard’s background feature is that it can also be customized to your personal preferences. If you click on the option in the bottom-right corner, you can upload images from your computer and from Google Images—quite the flexibility exhibited by Jamboard, as you can comprehend.
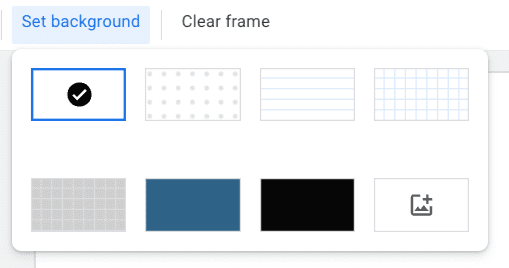
Choosing a relevant background
We suggest taking time with the background, as it can often positively impact your whole jam session. There are the default options, which do the job well too, and the custom possibility that lets you insert your images in the frame. If one option doesn’t work, you can always try out another.
Sharing the jam session’s link
As soon as you have some of the initials of your jam meeting ready, you can start bringing in people so the brainstorming can start or anything else that defines the purpose of your jam session. To generate a live link in Jamboard so others can join in on the fun, click on the “Share” button in the top-right corner of Jamboard’s UI beside your profile picture.
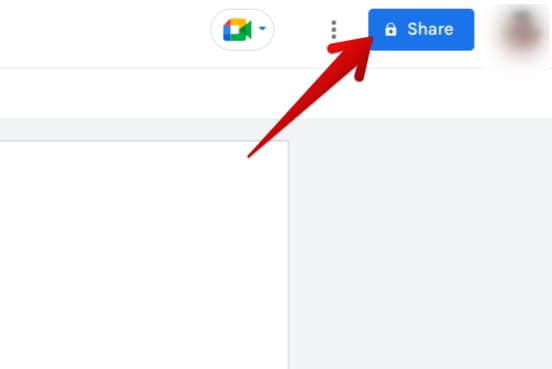
Sharing the jam session with others
Clicking on the “Share” button will prompt you to tweak the preferences of the jam session. Here, you can copy the live link generated by Jamboard concurrently and optimize the viewing privileges of the people you share the link with. Click on the dropdown arrow beside “Restricted” to change the “General access” to “Anyone with the link.” Once done, you can change the further privilege of the joiner to either “Viewer” or “Editor.”
Those who use the G Suite, formerly Google Workspace, apps should remember that there’s a third option called “Commentator,” too here. But with Jamboard, you can only choose between two options. Anyhow, after setting the type of preferred general access, click “Copy link” to save the link to your device’s clipboard and share it.
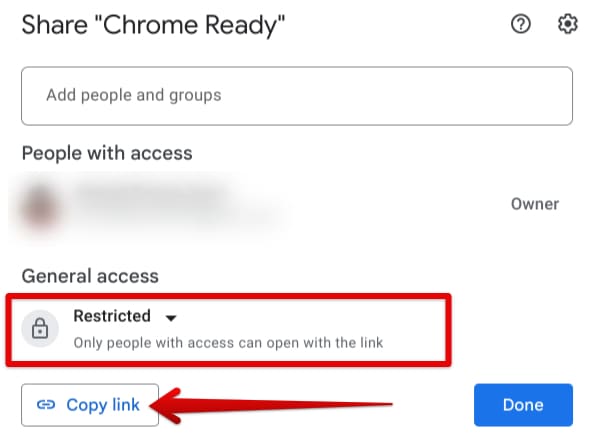
Optimizing the sharing preferences
Presenting the jam with Meet
After you have enough people joining your jam session and you’d like to take things further, Google Meet is the software that can help you out drastically in this regard. Meet is one of the world’s most popular video conferencing programs. It is known for its speed, reliability, and painless integration with most Google productivity apps, such as Docs, Sheets, Slides, and Calendar.
In Jamboard, you can enjoy the convenience of conducting Meet calls with just a couple of taps and nothing more. Look for the Google Meet icon in the upper-right area beside the “Share” button and click it for more. Please beware that you can only start a Meet call in Jamboard using a PC. The feature isn’t currently supported on mobile operating systems, but joining a Meet call within a jam session from mobile is still possible.
Clicking on the Google Meet icon
You should now be able to visualize all your incoming scheduled meetings and have the option to start a new one. The best part about residing in a Google ecosystem is that everything is so integrated with each other. Within Jamboard, you find an option to use Google Meet—essentially an external application—and within Meet, you also find Google Calendar integration. How cool is that?
If you use Calendar to plan your meetings ahead of time, you’ll find your nearest upcoming appointments right after clicking on the Meet dropdown arrow icon. That way, you can get a headstart with all the basics already sorted, including inviting the people who had to be a part of the conference call. On the other hand, if you’re starting a new meeting right from the get-go, click on “Start a new meeting” to take your participants on a video call.
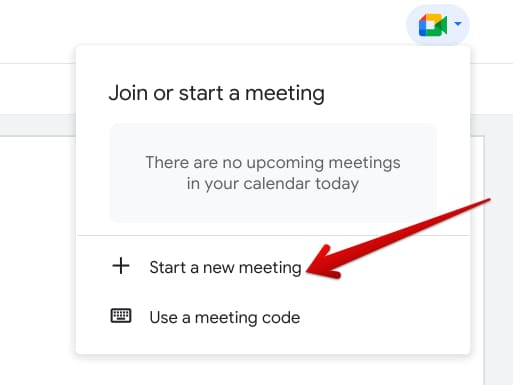
Creating a new meeting in Jamboard
You’ll next find Google Meet’s conference UI opening in a sidebar on the right side of the screen. To provide the relevant camera and microphone permissions to conduct the meeting properly. Using the sidebar, you can send out further invite links to the Meet, present your screen, and perform the same number of actions as you would in a full-scale Meet window. Speaking of which, if you click on “Move to a tab,” Meet will open in a new tab in your browser.
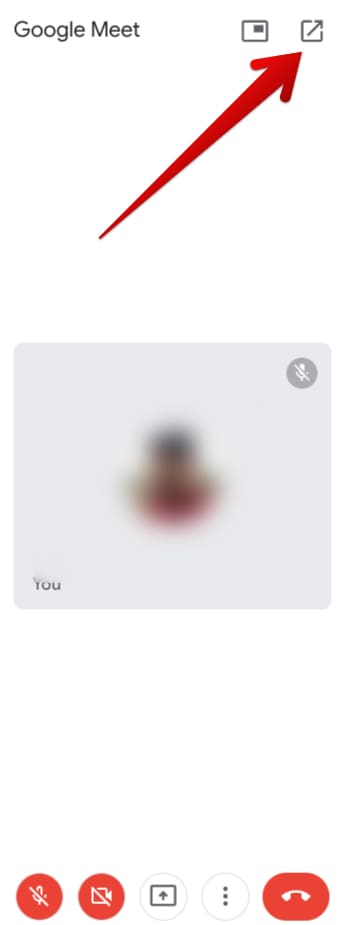
Google Meet sidebar in Jamboard
That is all about Meet that you can learn in the context of using Jamboard. For more details, check out our dedicated article on Meet here.
Using annotation tools to add depth to the meeting
Google Jamboard comes with various annotation tools, both in the form of shapes and other designs. You can use the convenience of annotating your jam sessions and make the presentation stand out more. Of course, the tools in question are separate from the 55-inch Jamboard screen with a high-quality stylus and eraser. The possibilities are endless since you can practically write, draw, or sketch anything.
However, the rest of the annotations can be carried out by three major functions for boosted remote collaboration. These include Shapes, Text Box, and Laser. Each of these boasts its own specific function. “Shapes” is self-explanatory as it allows you to easily place different shaped objects such as a circle, triangle, half circle, and even diamond in your jam session without having to draw them yourself.
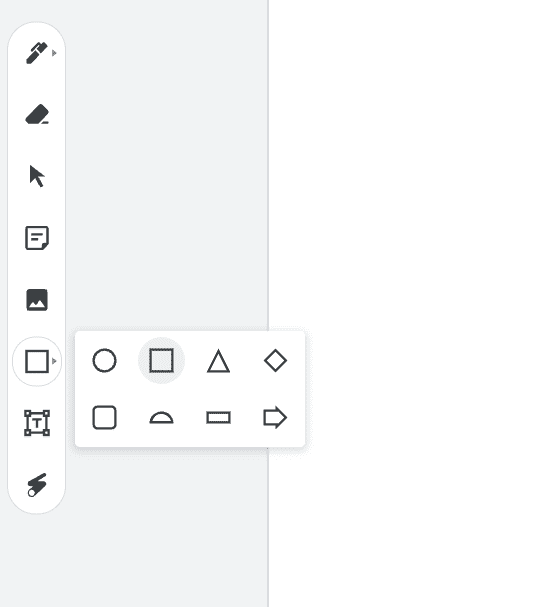
Shapes in Jamboard
Text Box lets you insert text in your jam session. It’s a convenient tool that can help you annotate your presentations to a great degree, especially if there are elements of your session that require some explanation. It’s easy to use and can be incorporated with just a few clicks. From that point onward, you can readjust the shape and size of the text box and switch up the font’s size and color to ensure your preferences are entertained.
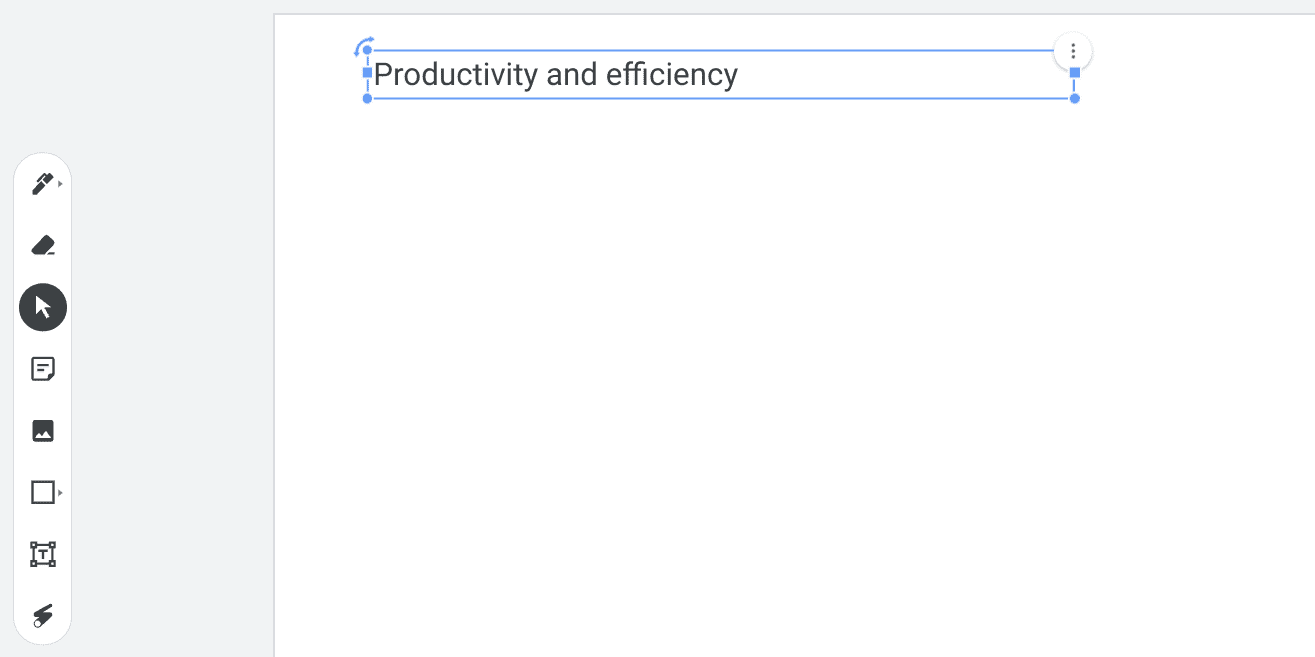
Text Box in Jamboard
Last but not least, a highly thoughtful tool called “Laser” has been made a part of Jamboard that can help you temporarily highlight essential parts of your jam session. However, it bears noticing that this feature is best employed with a stylus where you can rapidly use Laser on screen. Additionally, a touch functionality can also be utilized to yield the same effect.
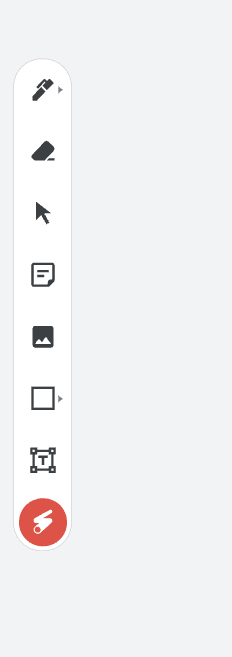
Laser in Jamboard
Employing the convenience of sticky notes
If you thought Jamboard was running out of features to help you with remote collaboration, you’ve got it wrong. It still has an ace in the hole left, called “Sticky note.”
Not only are these exceptionally easy to incorporate in every frame while conducting a Jamboard session, but the height of convenience that the “Sticky note” functionality brings forth is just super desirable. Use “Ctrl,” “Shift,” and “P” together to bring up the sticky notes’ overlay interface. Or, you can click on the feature itself in the bar at the side of the screen for similar results.
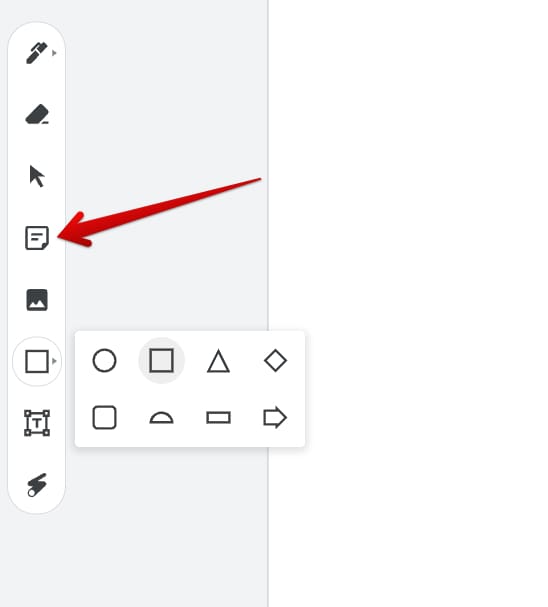
Clicking the Sticky Notes feature in Jamboard
Whether you click the feature button or use the shortcut key combination, the sticky notes’ overlay will appear shortly afterward. Jamboard allows you to choose different colors for the note, so it’s easy for you to differentiate between them and place the notes accordingly. The available colors range from yellow, green, and blue to pink, orange, and no color.
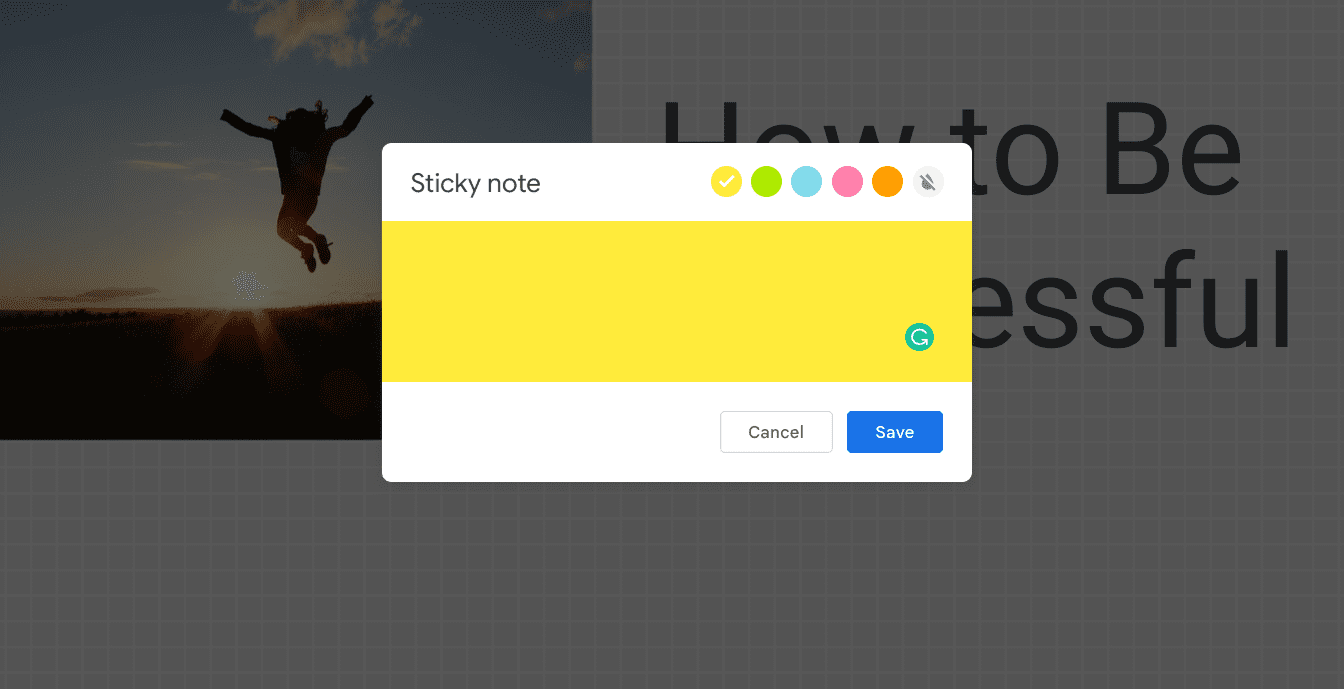
The Sticky Notes overlay in Jamboard
Using the “Sticky note” feature is a great way to indulge in remote collaboration. It’s a tool that lets everyone participate in their own way, contributing to a productive jam session. There’s virtually no limit to the number of sticky notes you can use in Jamboard, another critical benefit.
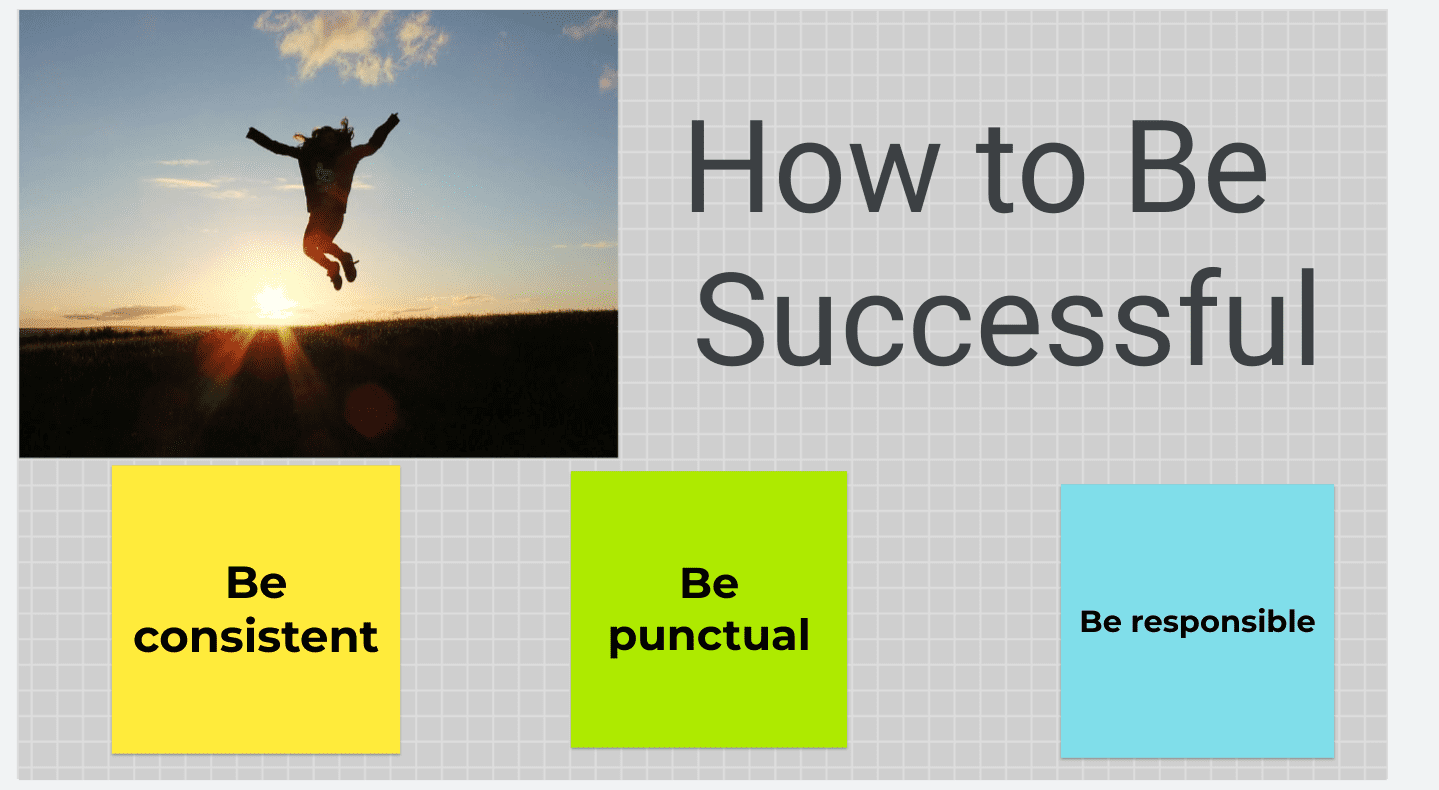
Using sticky notes in Jamboard
Saving the jam session
This subheading is more general information than instructions on doing something in particular. Did you know that doing nothing is the best way to save your jam session for later use in Jamboard? That’s right. Talk about automatic progress saving every step of the way in Jamboard, where the software’s cloud AI technology consistently remembers the work you’ve done without you having to employ any effort manually.
With every word you write or line you draw, there’s a brief saving moment of 1-2 seconds where Jamboard does its job duly. After that, you can be worry-free, and since the software syncs across your account on various devices, you can pick up right where you left off in Jamboard. That’s just the beauty of it.
Conclusion
We’ve taken a close-up look at how you can use Google Jamboard for remote collaboration by setting up your digital workspace and then kickstarting your work by holding Meet conferences. There are other possibilities to pursue with Jamboard, such as creating and sharing presentations with your circle. Let us know in the comments ahead whether the guide helped you out.
We would love to read your feedback!
- Latest article: Tips and tricks for mastering the Chrome browser’s DevTools.
