Google’s front-running note-taking application called Google Keep has become ubiquitous over time, offering a straightforward user interface with many enticing features to keep users hooked. On ChromeOS, the program behaves natively and lets Chromebook owners reliably jot down notes whenever and wherever they want.
This guide will detail everything you need to know about Google Keep and how to utilize it best on ChromeOS. The latter half of the article will comprise many tips and tricks for you to employ, so keep reading until the end for the best results.
- A helpful read: How to keep your WhatsApp data backed up with Google Drive.
What is Google Keep?
Keep is Google’s iteration of a program that lets you take notes and write stuff down for later use. However, make no mistake; Google Keep is far from a basic app in this regard that you can use to create checklists and leave a note. As the years have gone by, the developers have made many improvements to Keep to make it stand out.
As Google has enhanced the rest of its major apps, namely Google Drive, Google Docs, and Google Slides, Google Keep was automatically made a part of all the improvements that came toward Google’s ecosystem of connected apps. Talk about touches to the UI—making it more simplistic and responsive—and more facilitative tools to help you out.
Therefore, the version of Keep that users can test out for themselves today is chock-full of functionality, not to mention an utterly smooth performance that one can rely on for days. Google Keep was first released publicly in 2013 and has been subject to constant improvement ever since that time.
As with ChromeOS, Keep has been praised well throughout its service up until now for being plain, simple, and straight to the point. Its interface, in particular, has been regarded well for its colors and is incredibly handy in other facets, such as speed and responsiveness.
Learn more about Keep in the following section as we expand on its primary features and core functionality.
Best features of Google Keep
The following is our round-up of the most noteworthy Keep features that have worked like a charm for millions worldwide.
Easy to access
Google Keep is available to use on a variety of different platforms, may it be Android, iOS, or the web. The application was first launched a decade ago from now, precisely, and has been getting a lot of attention from developers ever since. In light of that, Keep will be more accessible than ever in 2023.
On Chromebooks, you benefit from a dual approach to using Google Keep. The operating system that these sleek devices run is compatible with the Google Play Store—the world-famous Android storefront—so mobile apps on Chromebook are an easy possibility.
You can use Keep on the web, download it as a Progressive Web App (PWA), use its extension version, and even grab its Google Play Store version effortlessly. The options of an average Chromebook user are diverse in this regard, thanks to the multi-faceted capability that the developers have instilled in ChromeOS.
Location-based reminders
Forgetfulness is part of human nature, but those who genuinely understand this take suitable measures to prevent themselves from being lousy. Keep lets you set reminders, not just regular ones that pop up at a specific time. Instead, you can designate reminders to notify you in particular locations.
These location-based reminders, therefore, are a vital part of Keep’s feature set and are pretty helpful in the grand scheme of things. Assume that you’re driving back from work and you have to buy groceries. If you already have a reminder, a notification will pop up as soon as you come near the relevant grocery store.
Syncs across various devices
One of Google Keep’s major points of convenience is that it takes full advantage of Google’s cloud-powered ecosystem and lets you sync your progress and data across various devices.
For instance, if you’ve been using Keep on your mobile, logging into the browser-based version of the app will carry over all of your saved notes to the web.
All you have to do is log in with your Google account, and that’ll be it. Just ensure that the account you’ll use to sign in on a different device is the same as the one you initially used Keep with.
Voice transcription
Another handy benefit of using Keep is in-built voice transcription. Too occupied to write something down? Don’t worry about it. Leave a voice note there, and Keep will automatically transcribe the audio for you—a major convenience.
Color-coding and addition of labels
Try indulging in Keep’s color-coding functionality when you find yourself handling a lot on your plate at once. This lets you organize your notes and visualize at a glance what note page talks about what. In addition to just coloring your notes, you can label them too to increase searchability.
This can help you arrange your notes and prevent getting lost in your Keep app. Both color coding and adding labels are easy and require a couple of taps for you to employ.
Real-time collaboration
In case you’re planning something for your loved one with a group of friends or family, Keep has something for you to try out. The note-taking app features collaboration in real-time with other Google users, similar to Google Docs, Google Drive, and Google Sheets.
You can invite others to access your notes by tapping on the “Collaborator” button in the main user interface of Keep below a specific note. That way, you can invite others and get them to join in on whatever you’re plotting.
Using Google Keep on a Chromebook
There are various ways to use Google Keep on a Chromebook, with the best one of them being Keep’s browser-based version. The latter is fast, easily accessible, and super easy to use that doesn’t even warrant any download or installation.
Nevertheless, we’ll be going through all the different methods that one can use to try out Keep on ChromeOS, namely as a browser extension, a Google Play Store app, PWA, and, of course, the web variant.
Option #1. Using Google Keep on the web
One of the main ways of using Keep on a Chromebook is using its web-based version. Google Keep on Chrome is speedy, efficient, and flat-out reliable. To get started, head to the official Keep home page and log in with your Google account. Make sure to use your primary account that you’ll utilize to sync your progress across different devices.
That way, your Keep experience will remain uninterrupted and hassle-free. After logging into Keep, you’ll be taken straight to its main user interface, which will sport the dark theme by default. If you’ve already been using the note-taking app on other devices, your saved notes will be carried over to the web version.
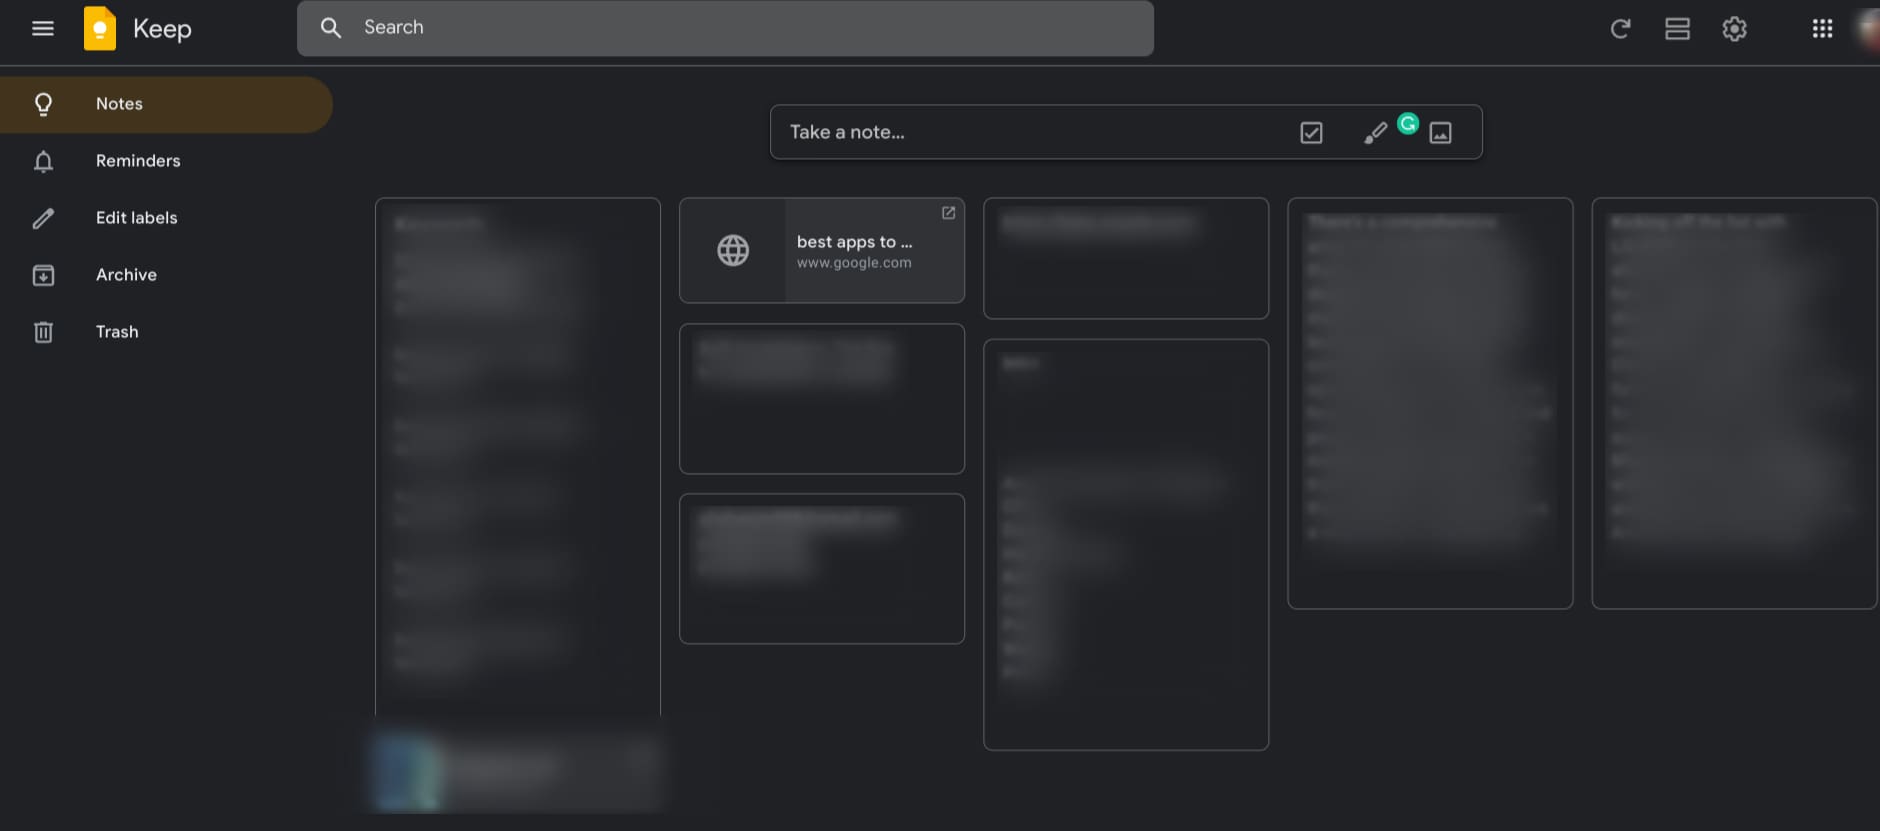
Google Keep home page
As you can comprehend, it’s plain and simple to start drafting new notes in Keep. Start typing away in the box that says “Take a note…” and that’ll take things forward for you. Given its simple, vibrant user interface with sizable icons, it won’t take long to get used to the Keep app.
That covers one way to use Keep on a Chromebook. Let’s dive into the remaining ones as well.
Option #2. Downloading Google Keep as a web app
Being directly related to the first method of using Keep on ChromeOS, it’s super simple to download the PWA version of the app at hand on a Chromebook. Upon arriving at the home page of Google Keep, look for the “Install” button in the URL bar of the Chrome browser. It’ll be symbolized by either a “+” icon or the typical symbol of a download.
Clicking on the “Install” icon
Click on it, and a pop-up will appear on the screen, allowing you to proceed with the installation. Getting the Google Keep PWA going on your Chromebook is as easy as that. Talk about the same web experience and everything else that makes the latter great, just more isolated and private.
Option #3. Utilizing Google Keep’s Play Store version
Moving forward, we’ve now got the Play Store version of the Google Keep app to turn our heads to. All Chromebooks made after 2018 come with Google Play support by default. Still, if you’re sporting an older model device and haven’t used Android apps on it before, try first authenticating whether your device is compatible with the Play Store feature.
With that being said, installing any app—let alone Google Keep—is a straightforward procedure on ChromeOS via Google Play. Although we’ll detail the installation steps for Keep ahead, we highly recommend checking out our Google Play Store beginner’s guide on Google Play Store to learn the ins and outs of this innate Chromebook functionality.
Follow the steps to learn how to install Keep on your Chromebook.
1. The first step is to launch the Play Store app on your Chromebook.
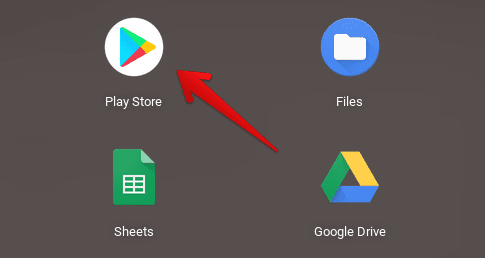
Opening the “Google Play Store”
2. Using the Play Store app’s interface, look for the app at hand by typing “Google Keep” in the provided search bar. Press the “Enter” key when you’re done.

Looking for Keep on ChromeOS
3. You should now see the official app page of Google Keep on your end. Use the vividly apparent “Install” button there to begin the download.

Installing Google Keep on ChromeOS
4. Google Keep should be installed on your Chromebook momentarily. Look for the app in the launcher section once you’re notified about the download’s completion.
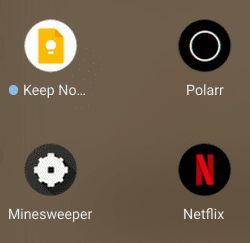
Google Keep installed on ChromeOS
- On a side note, the apps that you see in the screenshot above, except for Google Keep, include Polarr, Minesweeper, and Netflix, which is one of the best entertainment apps for Chromebook.
That’s about it for installing Keep on your Chromebook via the Google Play Store. The next step is to launch the app and get right into scribbling down anything of importance and relying on the note-taking app for the days to come.
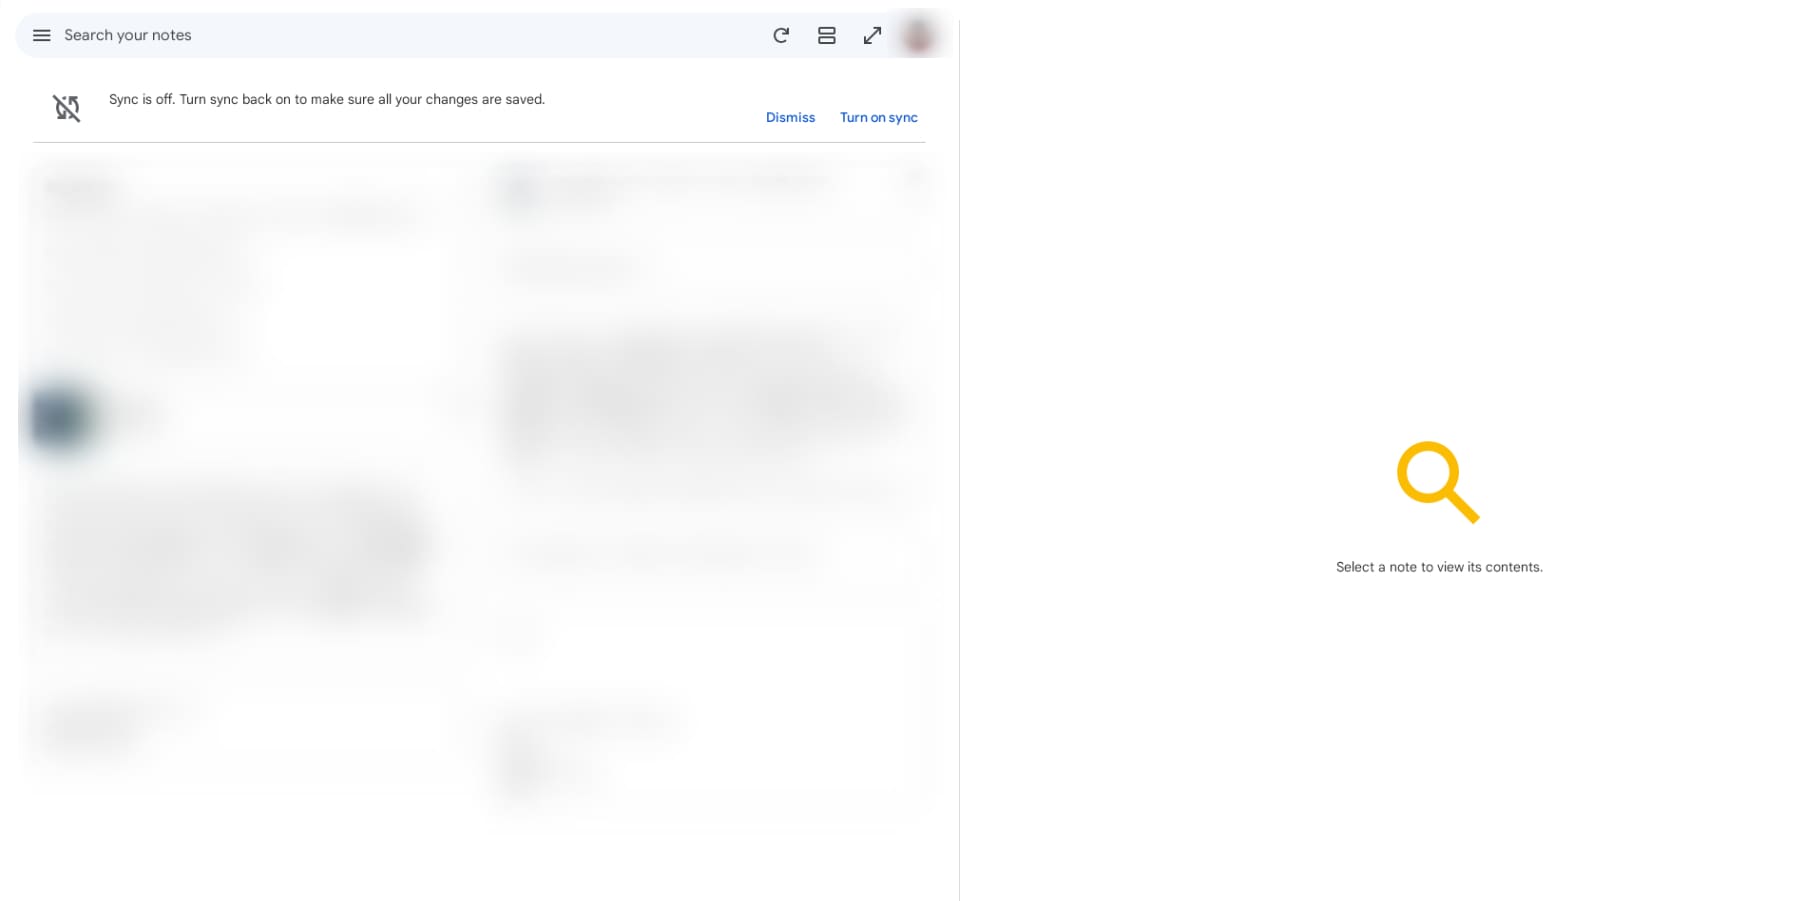
Keep installed on ChromeOS
That’s all there is to know about installing Google Keep on ChromeOS via the Play Store. The program’s interface feels snappy and responsive, not to mention all of your stored data getting transferred to the app.
Option #4. Trying Google Keep’s Chrome extension
The fourth and final method of making the best of Keep on a Chromebook relies on the Chrome Web Store variant of the app. As it turns out, Keep exists in the form of an extension as well that you can add to your Chrome browser and benefit from near-effortless note-taking.
To begin, head over to the Keep on the Chrome Web Store app and click “Add to Chrome.” A pop-up will appear at the top of the page afterward, allowing you to confirm the installation of the app to Google Chrome.

Adding Keep to Chrome
As soon as Keep gets added to the Chrome browser, feel free to head over to your favorite website and note down anything that you want to. A dedicated icon for your site, Keep on, will also appear alongside the domain name. This will help you remember the context of your note afterward.
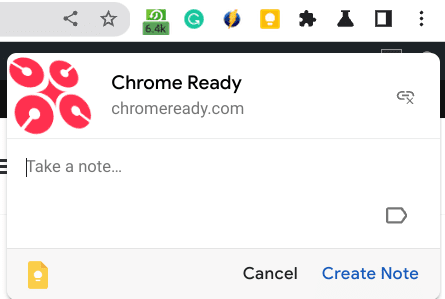
Google Keep extension on Chrome
We’ve now covered all the various ways you can install and use Keep on ChromeOS. Before we conclude the write-up, though, you can employ several helpful tips to revamp your user experience with the app in question.
Helpful Google Keep tips and tricks
The following is our round-up of the most useful tips and tricks that can help you boost your productivity when using Keep painlessly.
Change view type in Keep

Changing the view type in Keep
First and foremost, you should know how to tweak the primary view type in Keep so the whole application layout suits your preferences the most. When you’re on the app’s home page, click on the “List/Grid view” button in the top-right area to switch the arrangement of notes in the app.
Adjust your reminder timings
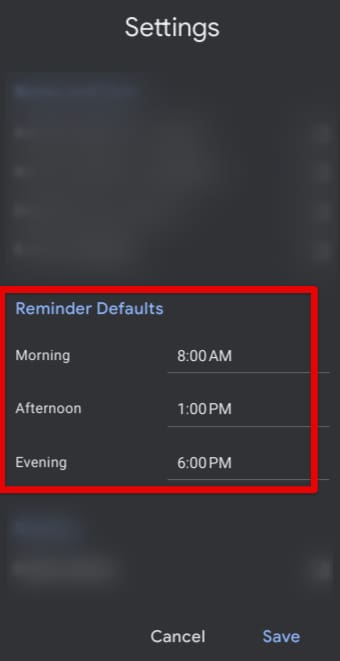
Specifying “Reminder Defaults”
It’s possible to change the timings of your reminder for each time of the day—morning, afternoon, and evening—so you’re reminded of completing a task or anything of the like at specific times. You can customize these timings relatively painlessly by clicking on the “Settings” button. Choose the most viable options and save your changes.
Toggle the dark theme
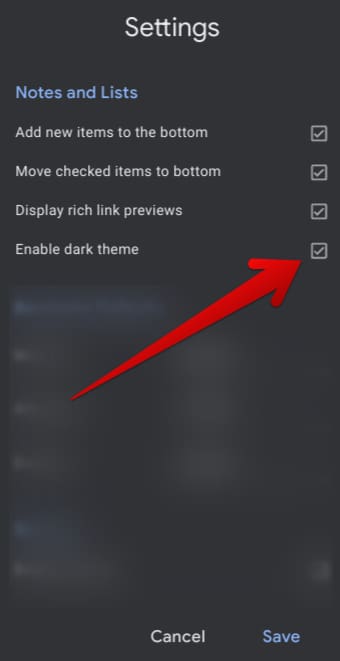
Toggling the dark theme
The dark mode has become an indispensable tool all across the internet. It’s easy on the eyes, saves our device’s battery life if employed on the operating system as a whole, and looks great.
On the other hand, Google Keep is no slowpoke in terms of keeping up with developing updates. It’s pretty easy to toggle on the dark theme in Keep and enjoy the subsequently appearing benefits, although, in some cases, you may not need to switch to the dark mode on your own if you have that theme already set across your operating system.
To verify that, get started by tapping on the “Settings” button, then clicking on “Settings” again. Next, choose the “Enable dark theme” button, and you’ll be ready. If you don’t like the new change, tap on the button again, and the dark mode will vanish immediately.
Customize the background of notes.
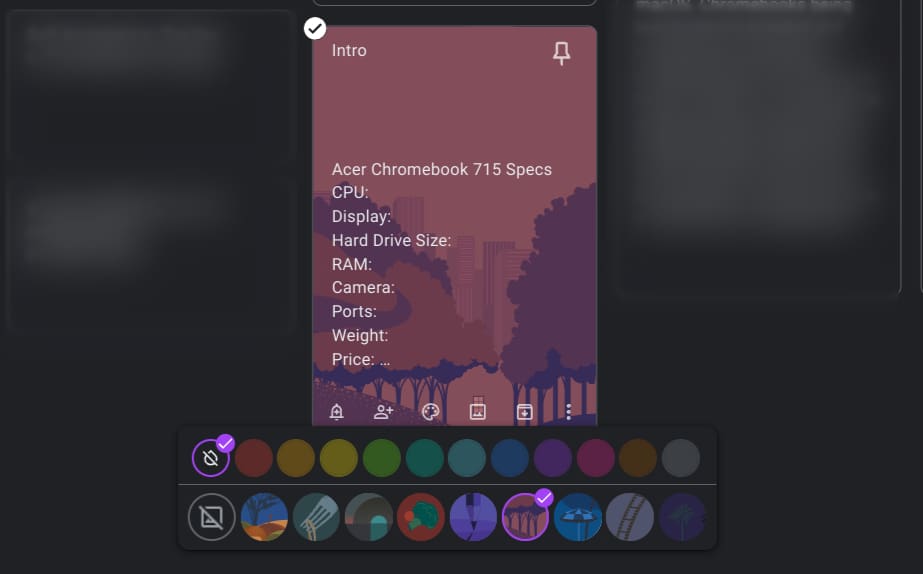
Choosing a new background
The background of your notes doesn’t have to stay monotonous. You can switch their background and opt for something more colorful and vibrant.
Hover over any note page and click the “Background options” button. Doing that will reveal a swath of additional background color options for you.
Keep now features both normal color and themed color backgrounds. Feel free to experiment with different color schemes to figure out the one that works best for you.
These simple tips and tricks should get you going with Google Keep immediately. It’s high time to conclude the article now.
Conclusion
Google Keep is a celebrated Google product known for its unflinching efficacy and a hefty array of features that help millions of people worldwide in both their personal and professional lives. Not only does it sync to all of your devices fast, so you never skip a beat, but it also opens people up to try other perks, such as voice transcription.
In this guide, we’ve gone over Keep and talked about some of its major features that millions of people enjoy. The best part is that there’s not just one way to utilize the diverse offerings of Keep on ChromeOS; instead, there are four, each sporting its advantages.
Let us know in the comments section whether you found this guide helpful. As always, Chrome Ready wishes you good luck!
