Set up Chromebook Remote Desktop
Chrome Remote Desktop
The Chrome Remote Desktop is a remote desktop application developed by Google to remotely access and control another computer. The app uses a Google proprietary protocol called ‘Chromoting.’ It enables the transmission of keyboard and mouse events on one PC to another and relaying back the graphical screen updates.
Set up your other computer for Remote Access
To get started with Chrome Remote Desktop, ensure your other computer has the Chrome browser installed and linked with your Chromebook’s same google account. Now, follow the steps below:
Step 1: On your remote PC, open the Google-Chrome browser. In my case, I want to access my Dell laptop running Ubuntu Desktop.

Launch Chrome
Step 2: Now, we need to add the Remote Desktop Access application. Follow this link to download the app (remotedesktop.google.com/).
Step 3: You will see a pop-up window that will prompt you to install the Chrome Remote Desktop on your computer. Click ‘Install.’
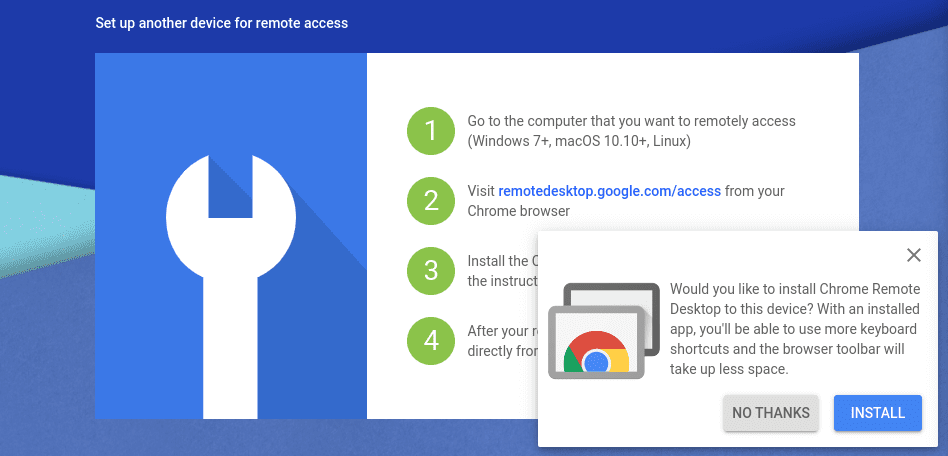
Install Chrome Remote Desktop
You should now be able to see the remote desktop application from Chrome apps. Type the URL, ‘chrome://apps’ on the address bar.
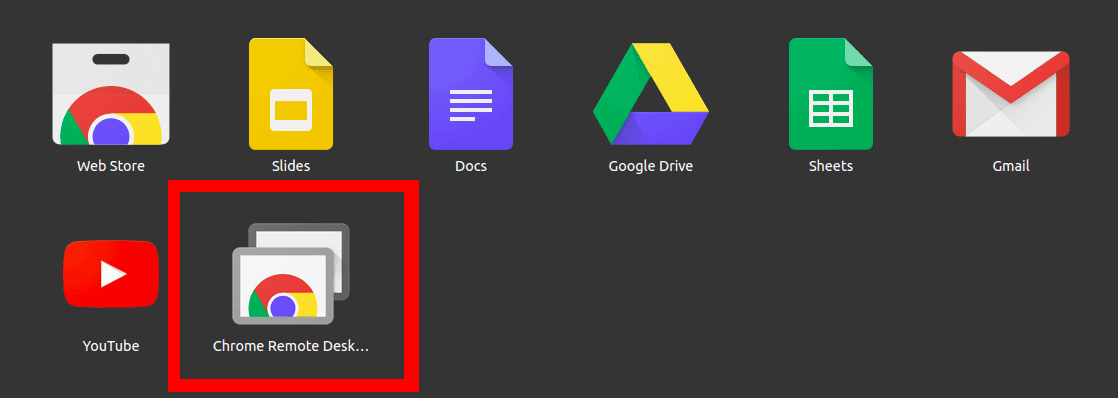
Remote Desktop access
Step 4: Click on the Remote Desktop Application to launch it. A new Chrome window will open, displaying two tabs – The Remote access and the Remote support tab. Click on the ‘Remote Support tab.’
Since we will be accessing this computer from our Chromebook, we need to generate a one-time access code that we will use to ensure a legit connection from our Chromebook. Click on the ‘Generate Code‘ button.
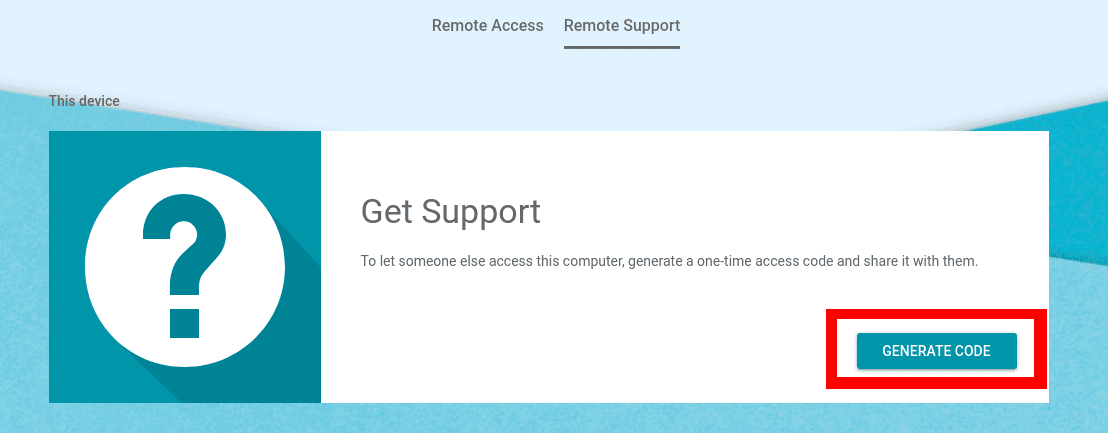
Generate Access Code
Note, this access code will expire in five minutes if it’s not used.
Set up Remote Desktop Access on Chromebook
Once you have Remote Desktop running on your other computer, we now need to set up our Chromebook.
Step 1: Launch Chrome on your Chromebook and type the following URL on the address bar; remotedesktop.google.com/
You will see a pop-up window prompting you to install the Remote Desktop application. Click ‘Install.’
Step 2: Unlike in other PCs, you don’t need to go to ‘chrome://apps’ to launch the Chrome Desktop Application, you can find it in the applications menu. Click on it to open.
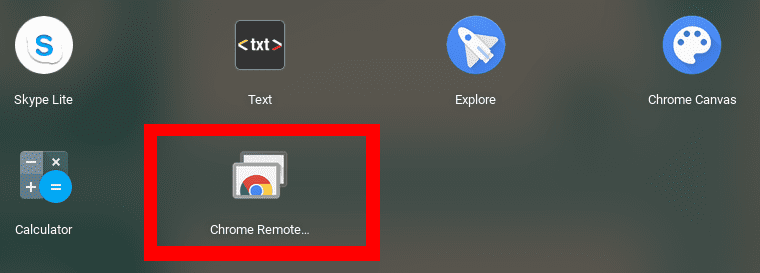
Launch Remote Desktop
Step 2: A window containing two tabs will open – The Remote access tab and the Remote support tab. Click on the ‘Remote support‘ tab.
Since you want to access your other PC from your Chromebook, enter the access code generated on the other PC on the ‘Give Support‘ section and click the ‘Connect‘ button.

Enter Access Code
A notification will pop-up on your remote computer requesting permission for access. Click on ‘Share.’

Share Screen
You should now see your remote computer screen open on your Chromebook. Additionally, you can also use your Mouse and Keyboard to control your remote PC.
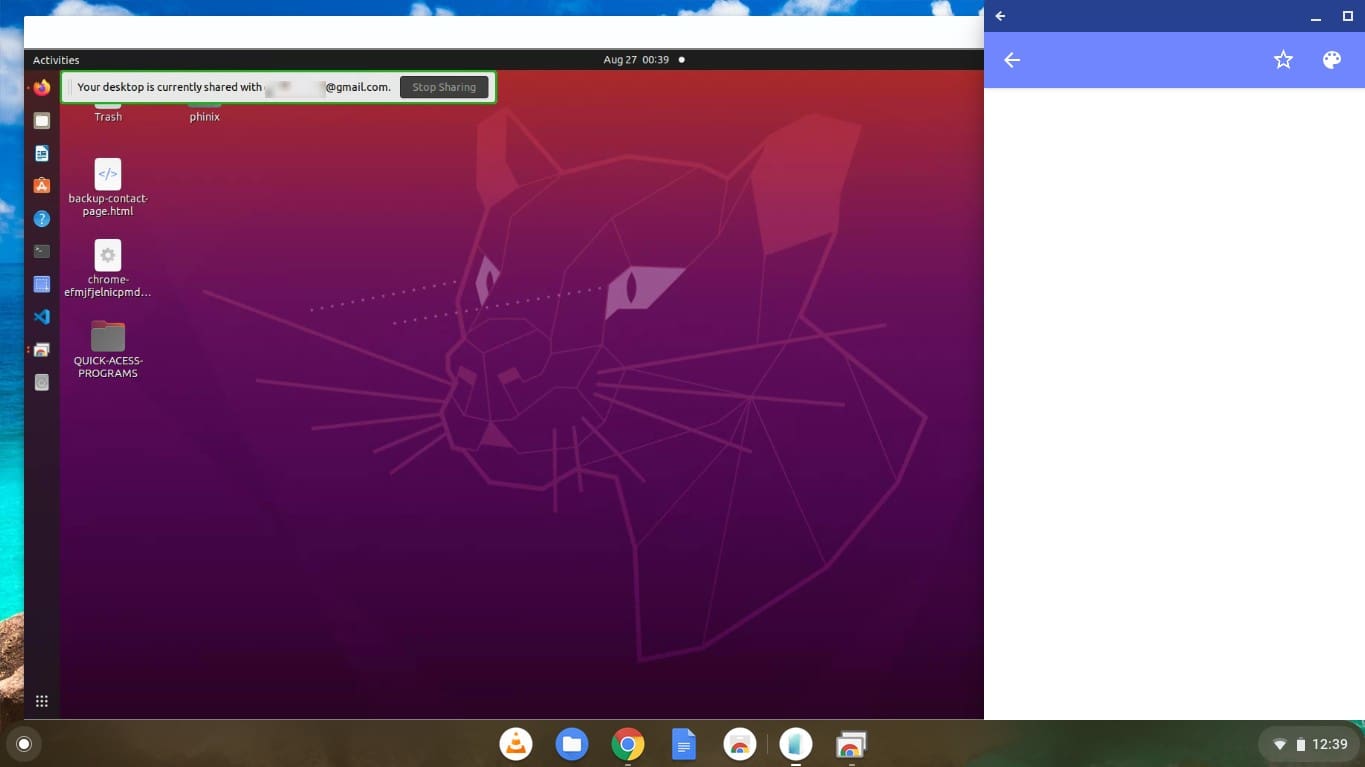
Remote Desktop Access
That’s it! You have successfully set up a Remote Desktop connection. To end the session, click on the ‘Stop Sharing’ button on the remote PC.
Conclusion
That was a step by step guide on how to setup Chromebook Remote Desktop. Be sure to ask any questions regarding the whole process and feel free to share any additional information with our readers in the comments below.
