Unlike most services that need a user account to start using the service, the invitees don’t need to have a Zoom account to join the conference. Being a cloud platform, it works seamlessly on Chromebooks, Linux, macOS, Windows, Android, and iOS without any issues.
Best Features of Zoom
- Cloud-based service: No need to install any app to use it.
- Virtual video and audio conferencing
- Webinars
- The free plan can allow up to 100 participants
- Whiteboarding
- Multi-share
- Secure Socket Layer (SSL) encryption with AES 256 bits encryption
- Group messaging and presence
- Co-annotation on the shared screen
If you are a host inviting others to join your meeting, you will need a user account so that you can log in and invite your friends or colleagues for collaboration. If you got invited to join a meeting, you only need a web browser to join the meeting, although installing a Zoom app will be useful for a better overall experience. Let’s look at the efficient way to use Zoom on your Chromebook.
Installing Zoom from Chrome Web Store
Step 1) Head over to the Google Web Store’s Zoom page.
Step 2) Click on the “Add to Chrome” button and confirm to add the extension.
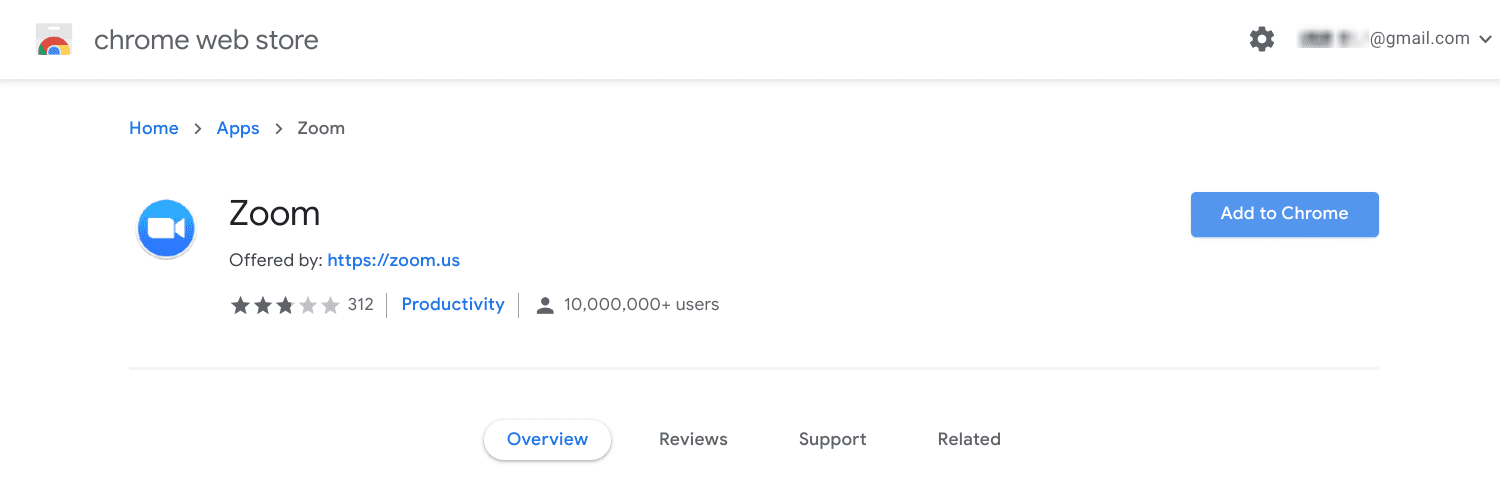
Zoom in Chrome Web Store
Step 4) Similarly, install the Zoom scheduler Chrome extension. It comes handy to set up a meeting quickly.
Step 3) After installation is complete, you should see the Zoom Scheduler icon on the top right corner. Click on it, and you can use your Google account to sign-in. Or you can go to Zoom’s signup page for a free user account.
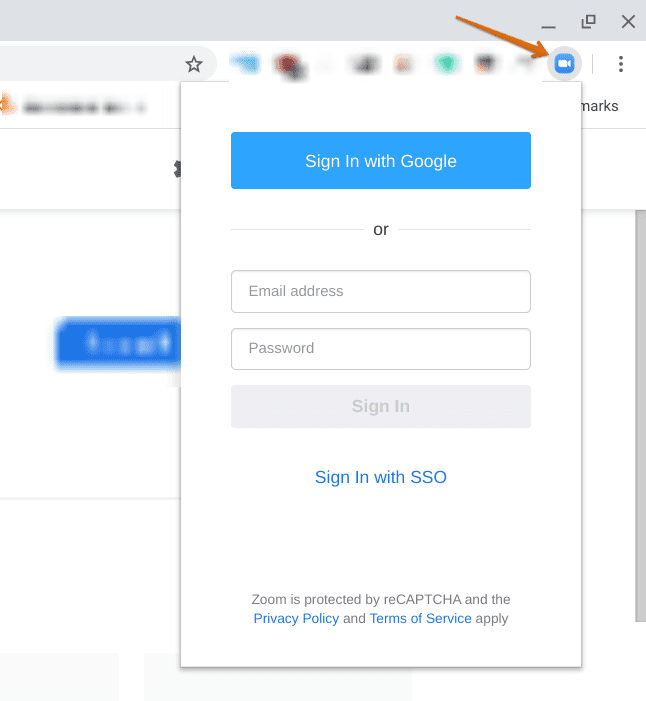
Zoom Scheduler
Step 4) After signing in, you got two options:
Start an Instant Meeting
You should be able to quickly start a meeting by clicking on the “Start a Meeting” button with options “With Video Off” and “With Video On.” Don’t worry, and you can switch ON video anytime during the meeting too.
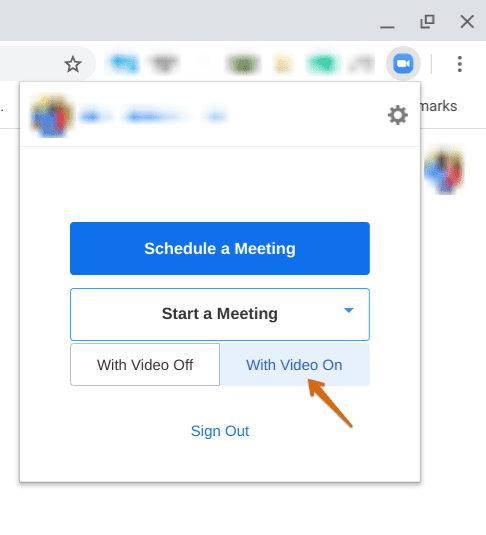
Start a zoom meeting
Step 5) Since this is an instant meeting, you will have to click on “Manage Participants,” followed by “Invite,” and you should be able to invite using Google or Yahoo account. Alternatively, you can simply “copy the URL” of the meeting or “Copy Invitation” and sent it over to your invitees manually. Below is an example of the Copy Invitation format.
Join Zoom Meeting
https://us04web.zoom.us/j/77667682013?pwd=ZGZRS0pHOmJeRWN5LzZMNGZiVHdpUT09

Meeting ID: 776 6768 2013
Password: 5S9fzn
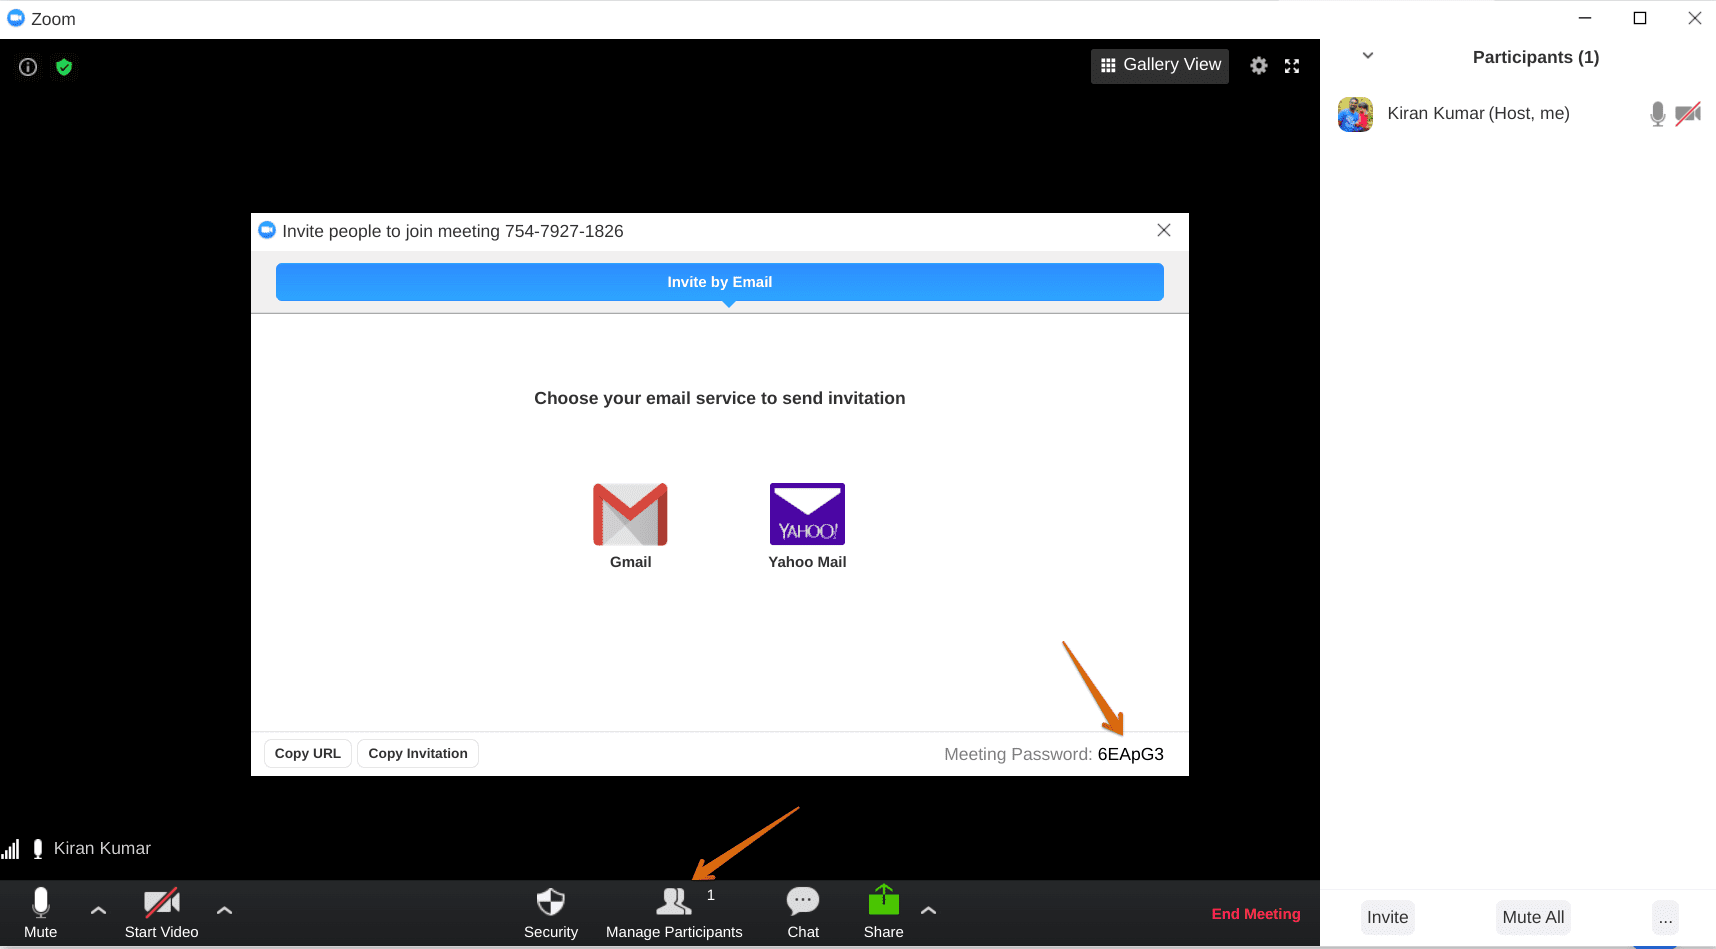
Zoom Meeting
Now, let’s take a look at the option of scheduling a meeting.
Schedule a meeting
Click on the “Zoom Scheduler” icon and click on the “Schedule a meeting” button.
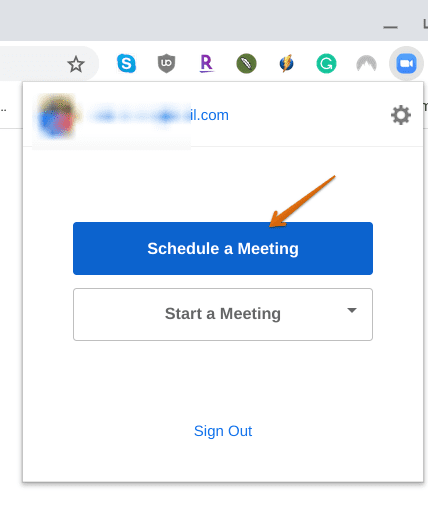
Schedule a meeting
On the next screen, you should see some suitable options for how you want to schedule the meeting. You can set things like Meeting ID, Password, Video and Audio options, and including an option to automatically mute all the participants upon entry. Select the options as per your need and then click “Save and Continue.”
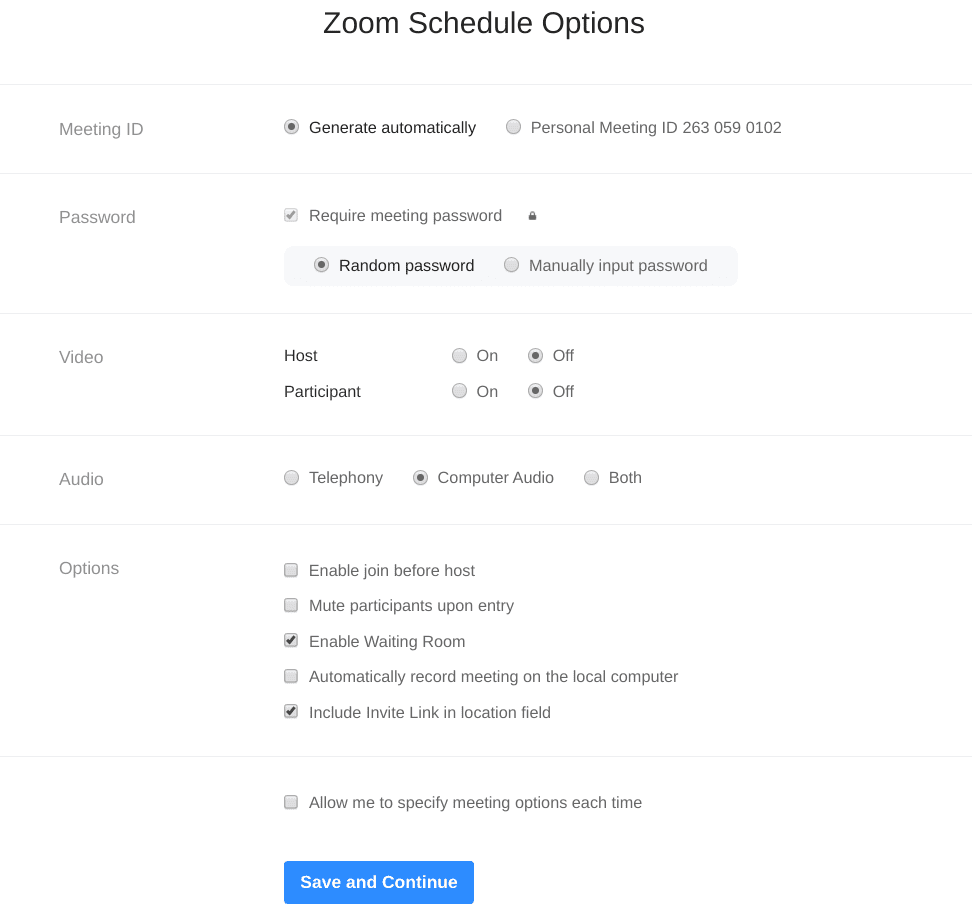
Zoom meeting scheduler
Finally, Zoom will take you to an email draft where you can add guests, edit title, subject, and things like that and send it over to your invitees.
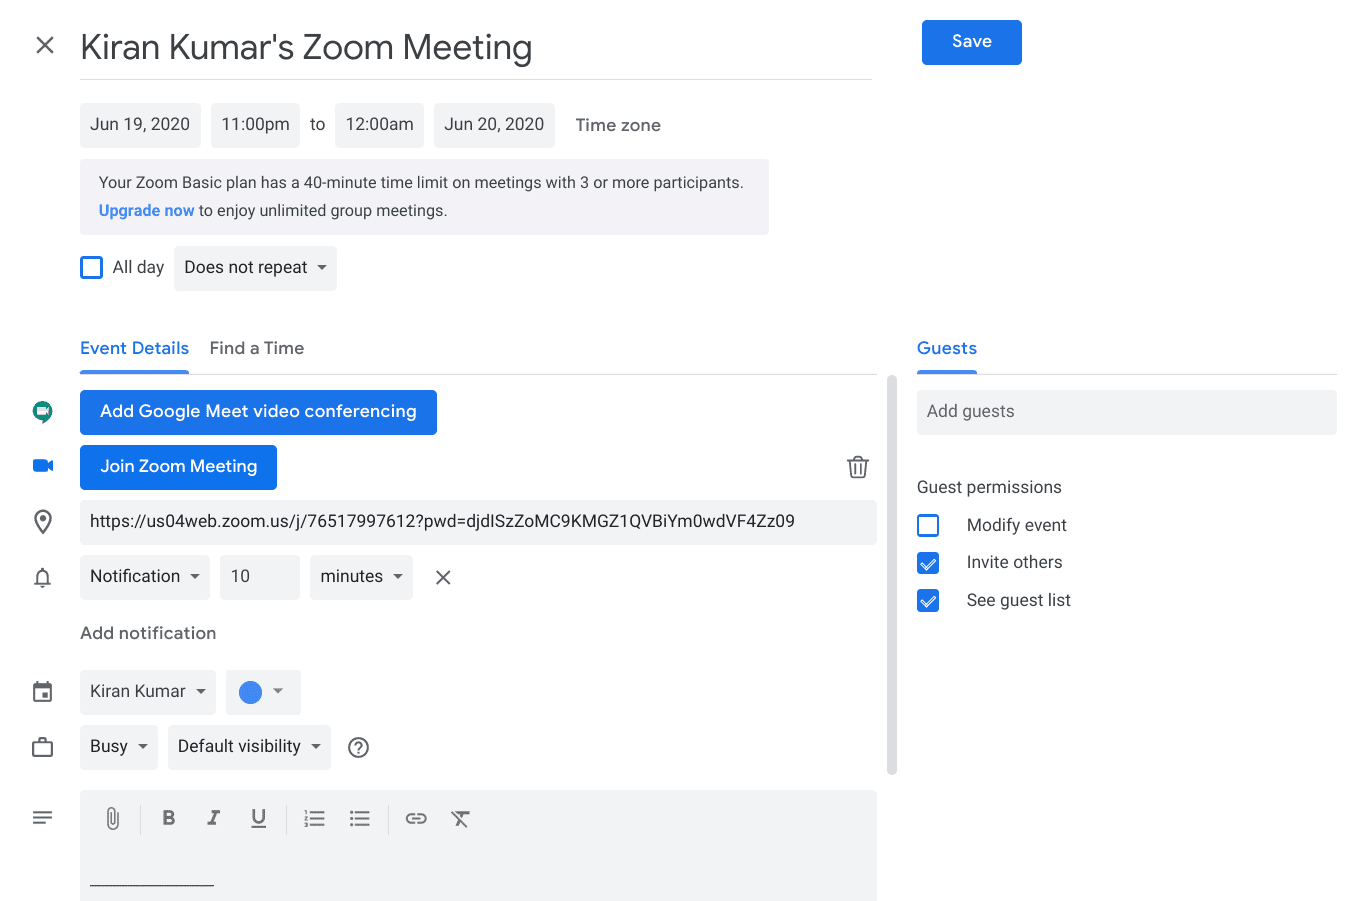
Schedule a Zoom Meeting
Bonus Tip: Add Zoom shortcut on the Launcher bar
When Zoom is open, right-click on the Zoom icon and select “Pin.” That way, you can simply click on the icon to instantly launch Zoom.
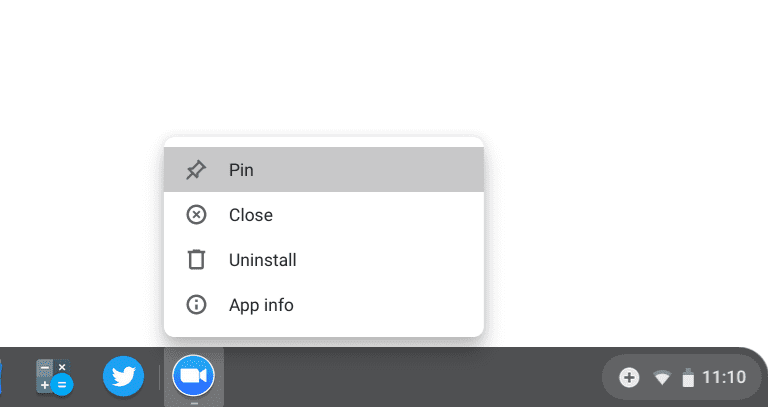
Zoom Shortcut
All you have to do is enter the meeting ID to join the meeting.
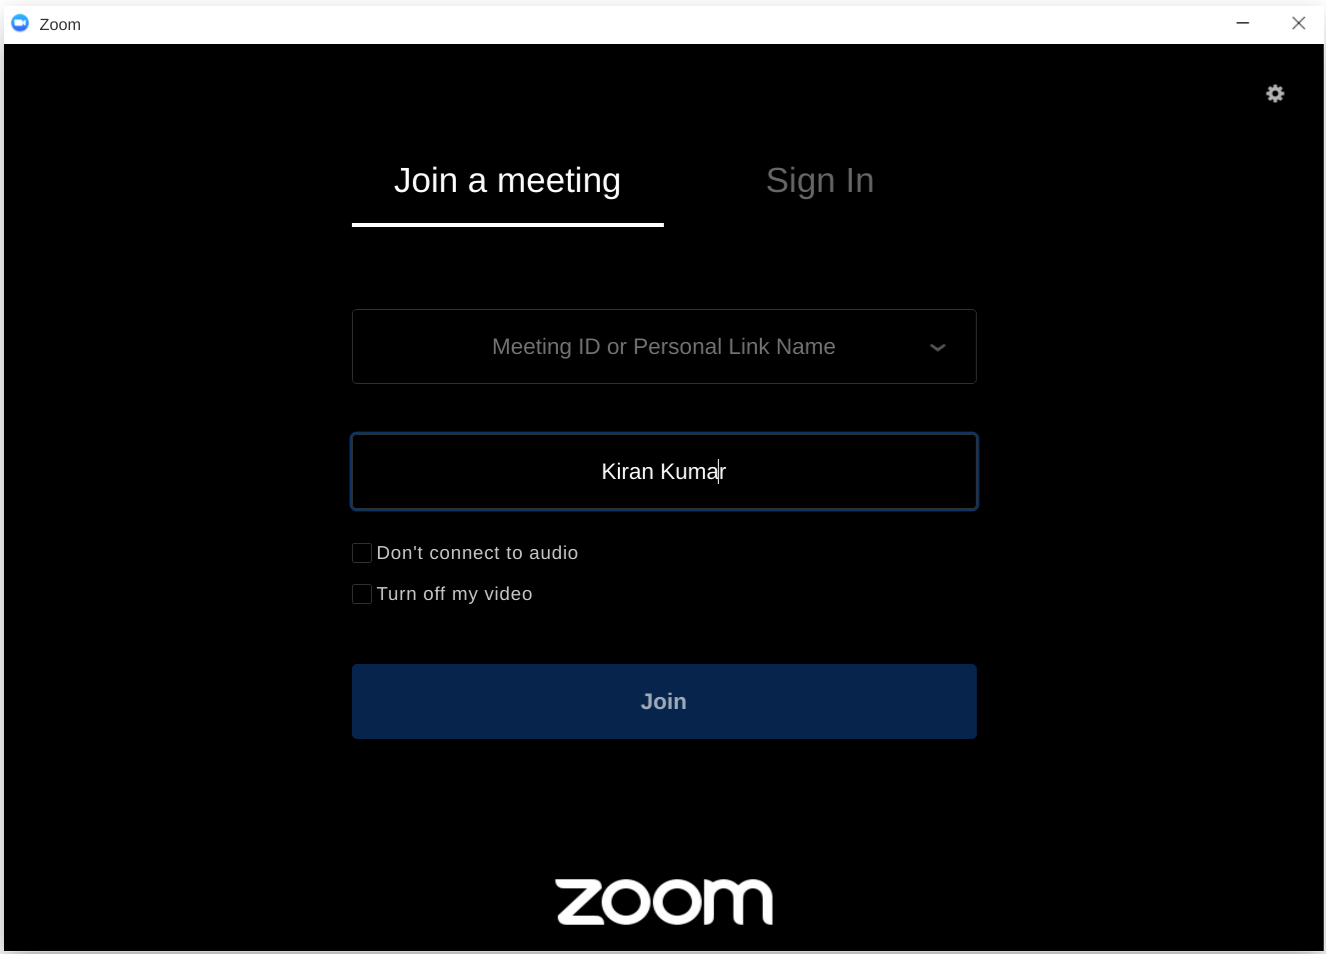
Zoom App
Conclusion
That’s all about how to efficiently use Zoom on your Chromebook. I hope you enjoyed this tutorial. Got any questions and suggestions on using Zoom? Feel free to say it in the comments below.
