If you often struggle with traveling uninterruptedly and are looking to learn the traffic pattern in your city, Google Maps has a feature in its skill set that can quickly help you out. The next time you’re trying to plan your trip, pop open the Maps app on your mobile phone or PC, where the web version can be utilized, and enable the relevant “Layer” to know what your area’s traffic is up to. Things become so easier just like that.
From allowing users to find hidden gems and location attractions to tracking and sharing their location via Maps with their loved ones, this web mapping platform is loaded to the brim with functionality, and there’s just no doubt about that. Maps has been around for a fair bit of time now, considering how it was first launched in 2004 and has only managed to see improvements and enhancements up until now.
Read along as we discover how to use Google Maps to get real-time traffic and transit updates to always plan ahead of your schedule.
- Read next: The top 10 Google Maps features you need to know.
Using Google Maps to get real-time traffic and transit updates
Users can easily employ Google Maps to enjoy traffic alerts and transit information. You need to know what functions to use in that regard. For this purpose, we will make things more convenient for you and break down these two Google Maps features into separate subheadings.
That way, you’ll quickly grasp the information required to duplicate great results. Let’s start with the real-time traffic updates and then move up to transit information. Make sure to read until the end if you plan never to commute in your city in the old, time-taking manner.
How to get real-time traffic updates on Google Maps
Although Maps has made it simple to make the best of real-time traffic and transit updates, it’s only fitting to start with the section that comes first in the “Layers” area within the Maps user interface. You need to switch to the “Traffic” layer in Maps to get real-time traffic updates. This can be done on mobile and the web version of the application. We’ll walk you through the PC variant of Maps ahead of this guide.
In case you’re unaware, “Layers” in Google Maps are different terrains that increase or change your viewing experience of the world map. Whether you’re looking for a different perspective to use Maps with or are just trying to plan ahead of your trip with the various helpful options in the “Layers” area of the app, Maps has you covered. Start by heading to this link and signing in with your Google account.
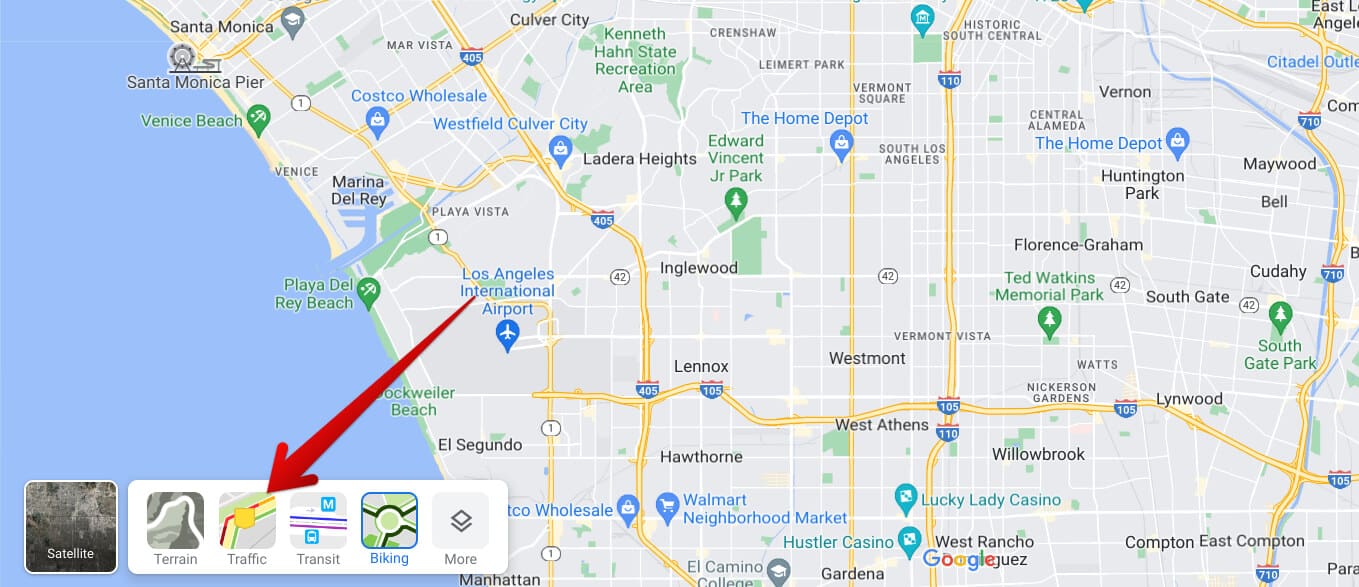
As soon as you’re within the Google Maps interface, hover your cursor on the “Layers” button in the screen’s bottom-left corner. That should present several different options of terrains in that area.

Accessing the “Layers” section in Maps
Choose the “Traffic” Layer from the list of options to move forward. You will shortly observe a heavy change in the overall layout of the map.

Choosing the “Traffic” Layer
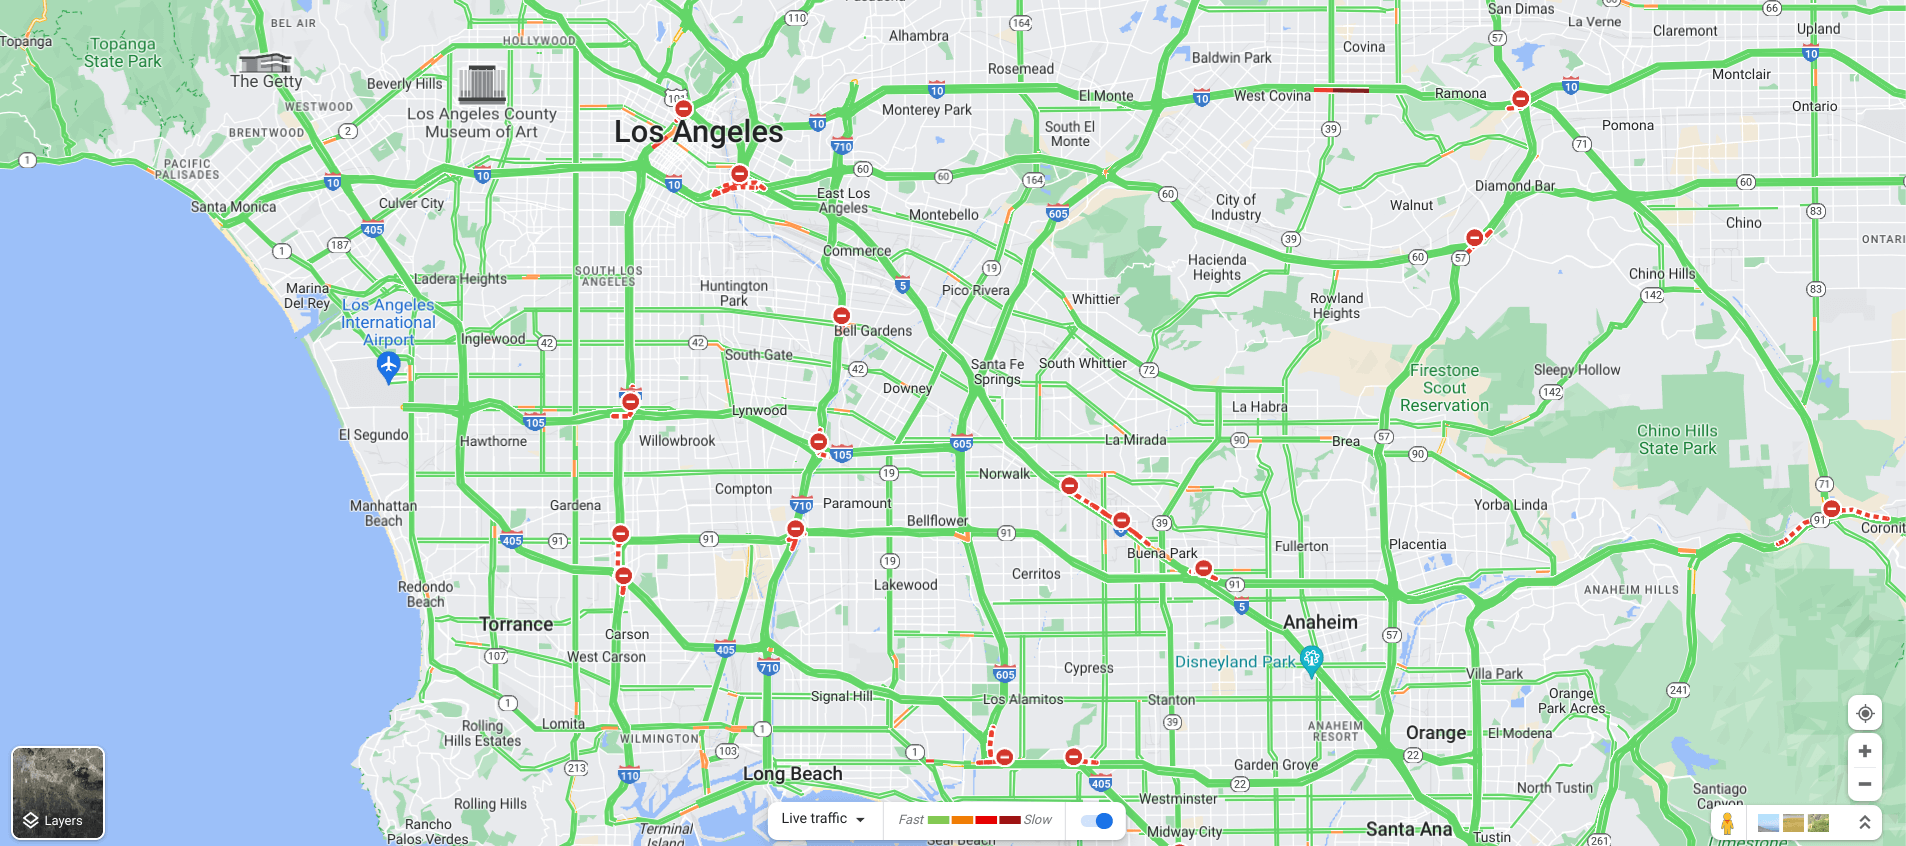
Clicking on the “Traffic” terrain will significantly switch up the Google Maps map interface for you. As the designated traffic-centric pop-up also appears at the bottom of the screen, you’ll need to learn to read the map layout to observe the real-time traffic. But before you get started on that front, please make sure that you’ve selected the “Live traffic” option from the dropdown menu and not “Typical traffic.” The latter is static and does not show real-time updates.
First, as soon as you click on “Traffic,” most of the lines in the world map will turn green, depending on where you live and the time of the day. These green lines suggest fast lanes, meaning that traffic is minimal here, and you’re clear to go through.
However, going further along the bar Maps indicates orange lines indicate slightly heavier traffic, where speed won’t be as optimal. A red line shows fully loaded traffic where you can expect a lot of rush. There’s also a level beyond that, namely maroon, loaded with traffic. It’s best to avoid those in any way you can. Undoubtedly not the best of routes to embark on whenever you spot them.

Real-time traffic updates in Google Maps
There’s a toggle as well in the “Live traffic” bar. You can click on it to toggle between real-time traffic updates on the go without repeatedly going to the “Layers” section. Or better yet, there’s the option to employ a shortcut keyboard key for even better results. Press “Ctrl,” “Shift,” and “2” together to make the “Live traffic” feature act as a toggle. That’s all that you should know about this functionality in Google Maps.
Now, let’s move on to the “Transit” portion of Maps’ overall functionality. It bears noticing that the “Transit” and “Live traffic” Layers won’t work together in tandem, nor does any other Layer in Google Maps. Therefore, you will need to utilize one feature at a time.
How to get transit information in Google Maps
Pulling up transit information that involves bus routes, train stations, routes of trains, and other public transport conveyances is another one of the front-running Google Maps features you should know about. To get started with it, ensure you’re within the Maps interface and signed into the service.
When you’re ready within Maps, look for the dedicated button to reveal transit information, which will be on the right side of the Maps search bar. Multiple options will be available, but you’ll need to select “Transit” to move forward.

Clicking on the “Transit” button
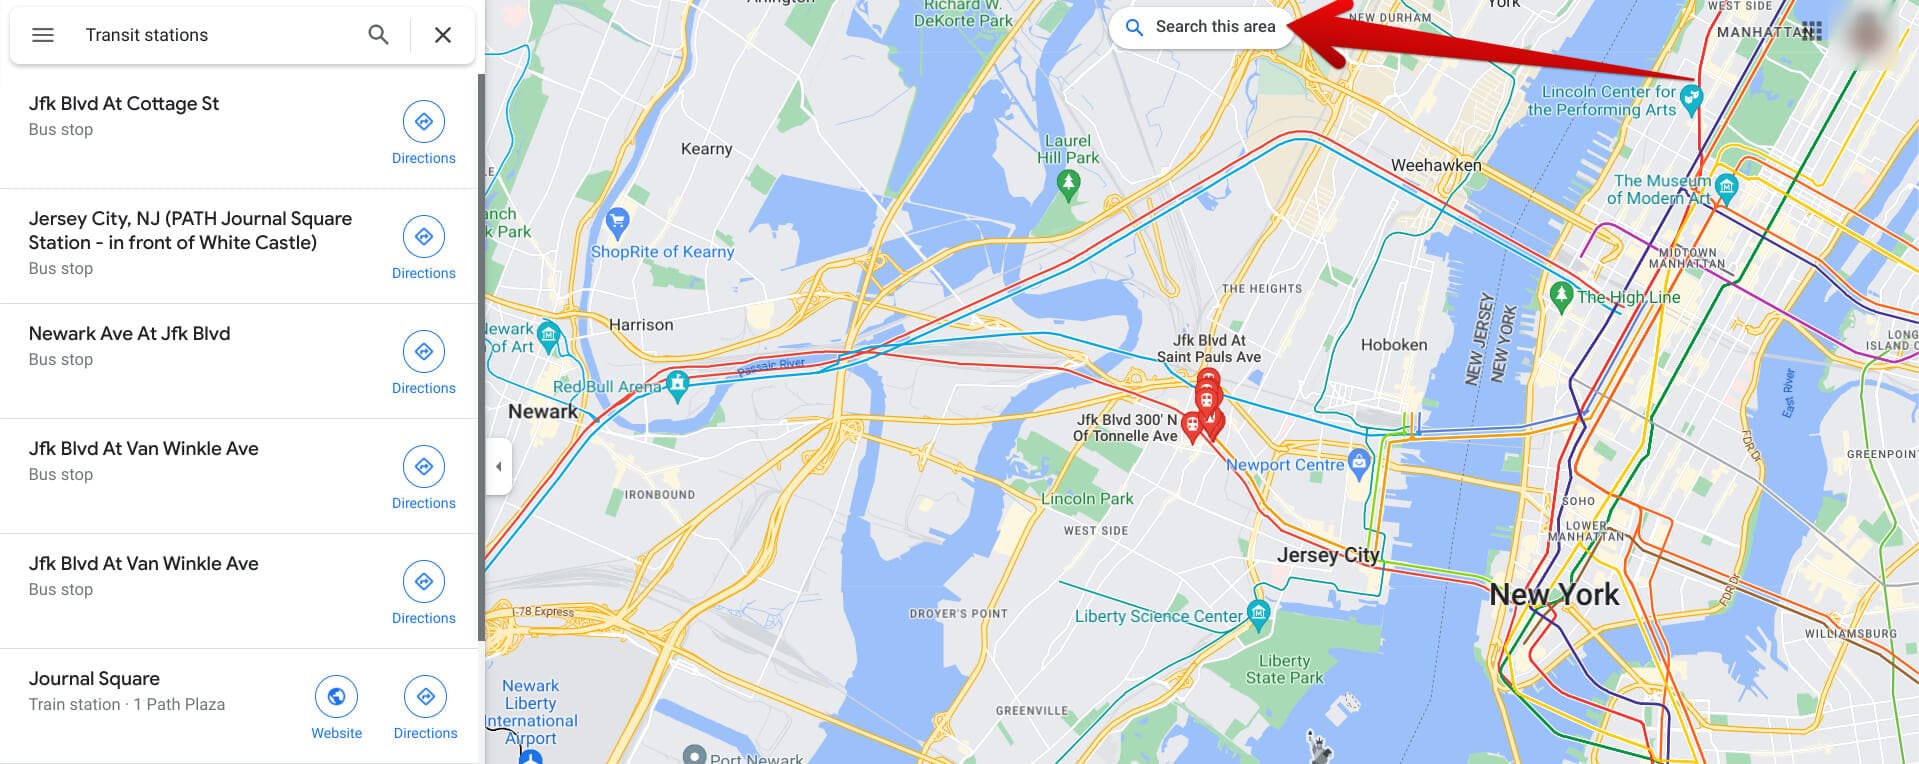
The Maps interface will now zoom into a specific area in your region and fetch you nearby transit stations right away. Do note that these are the results that have been pulled by the place that was searched. If you’d like to broaden the search results, you should zoom out using the “-” key on your keyboard and click the “Search this area” button when you’ve covered a wide enough zone.

Searching for a wider area for transit
The search results will pop up in no more than a moment, allowing you to view all relevant transit stations easily. You can tap on any station to view directions for it, share it with friends, and see relevant questions and answers. All the usual information related to an entry in Google Maps will be present for every transit station, which is a plus. Lastly, don’t forget to zoom in and locate any transit station of interest for a more general perspective.

Wider search results
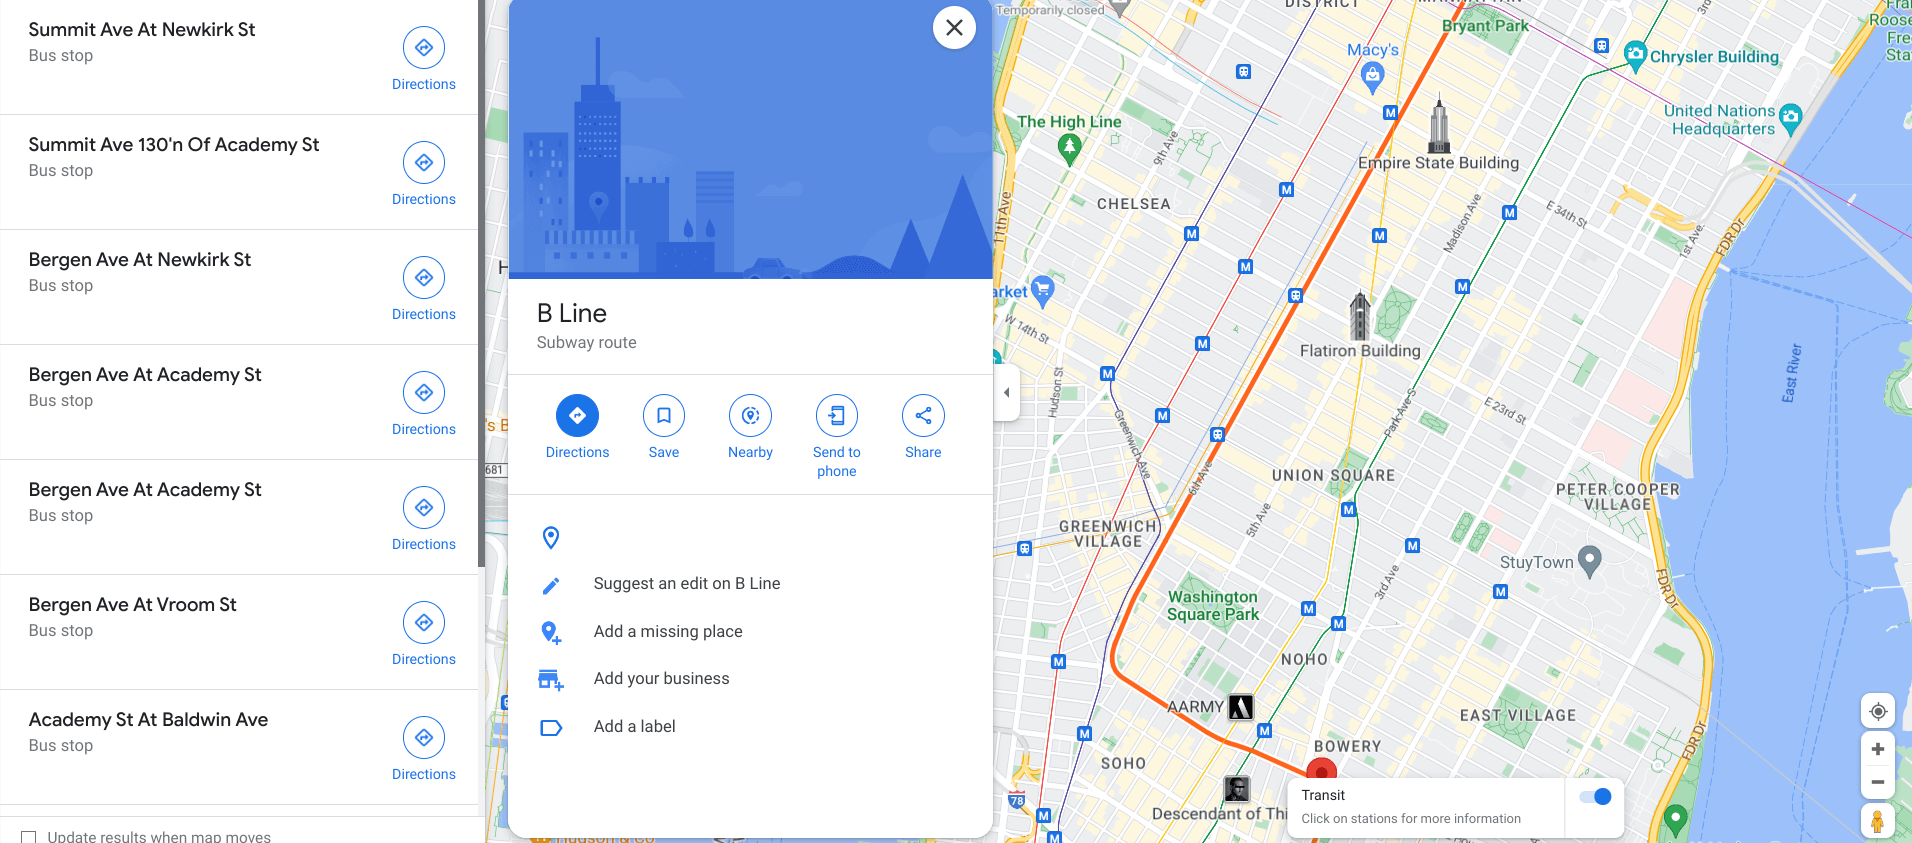
Google Maps also allows users to visualize route lines of buses and trains using one of the “Layers” entries in the application. Hover over the “Layer” button and select “Transit” afterward. You’ll start seeing dedicated route lines on the map right later.

Transit routes in Google Maps
That’s about it! You should now be able to use Google Maps for real-time traffic updates and transit easily. Thanks for reading!
Conclusion
Google Maps has established itself as the world’s most popular app for navigation and maneuvering, thanks to the consistent improvements the developers have brought toward it. It is available to use on a variety of different platforms, including Android, iOS, and the web. In addition, thanks to its presence on the internet, any device with a functional internet browser can access the diverse offerings of Maps, whether it’s a Windows PC, a Macbook, or ChromeOS.
In this guide, we’ve taken an up-close look at how you can employ one of Maps’ natural features to receive traffic updates and transit information. This way, Maps empower people to know when to head out, what routes to avoid, and ideal ways to reach their destination. Let us know in the comments section whether this tutorial helped your case. We would love to read your feedback!
- Another Chrome Ready article: How to link a form to a Google Sheet.
