Today, we are going to be learning all about how to use Google Chrome Tab Groups in the easiest possible way. However, before we begin with this tutorial, one thing to be kept in mind is that this feature is currently just a flag, which means that it can be buggy or cause other problems. So, if you’re not the type of person who likes taking risks, the best bet would be to wait for this feature to become a part of the Chrome browser officially. On the other hand, if the fact that this feature is still a flag doesn’t bother you, you can go ahead and follow this tutorial to make the best use of these tab groups.
Enabling Tab Groups
Before you can start using this feature, the first thing you’d have to do is enable it. For that, you would have to type in ‘chrome://flags’ in your address bar and press Enter.

Enabling Tab Groups 1
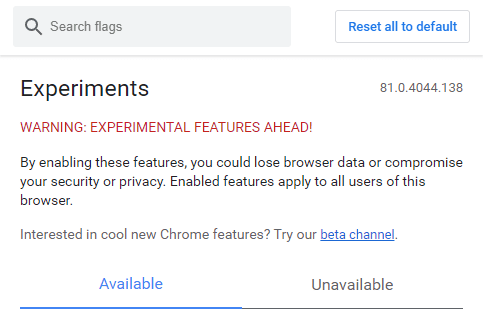
Then, you should be greeted by the following page.
Enabling Tab Groups 2
As the warning suggests, the features on the flags page are experimental, and the user will be exposed to several risks by enabling them.
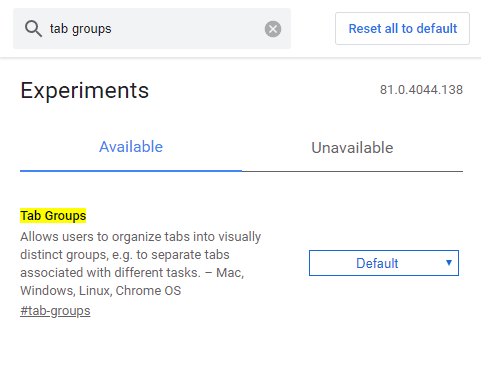
The next thing you’d have to do is type ‘tab groups’ in the search box and wait for this feature to appear.
Enabling Tab Groups 3
The Tab Groups feature will be currently set as ‘default,’ so you would have to opt for ‘Enabled’ from its dropdown options.

Enabling Tab Groups 4
Once you click ‘Enabled,’ Google Chrome should prompt you to restart the browser for the changes to take effect. You can either reopen the browser manually or click the ‘Relaunch’ button at the bottom of the screen.

Enabling Tab Groups 5
Once you’ve enabled the tab groups, you can move on to the next step, which is to learn how to use this flag feature.
Using Tab Groups
Just like you enabled the tab groups, using this feature is going to be pretty simple as well. Once the browser has opened again following the relaunch, you are now all ready to start using this feature.
We recommend firstly opening multiple tabs so that you can better understand how the tab groups feature works.

Using Tab Groups 1
Creating New Groups
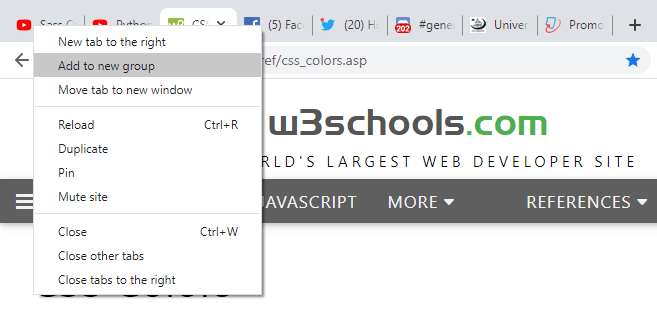
Now when you right-click on any of your open tabs, you will be presented with a new option titled ‘Add to new group.’ By clicking this option, you will create a new tab group and make the clicked tab a part of it.
Using Tab Groups 2
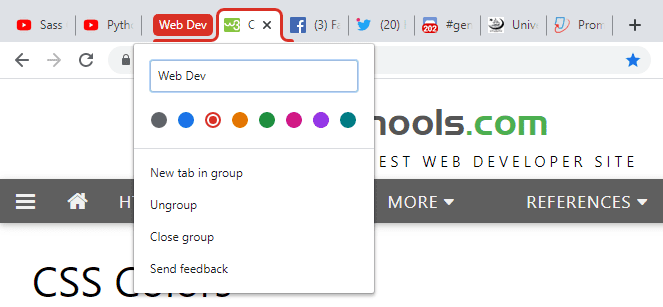
After clicking this option, a colored circle should appear before the tab for which you created the group. Now when you click on this circle, you will be able to name the tab group, select another color, ungroup, and close group.

Using Tab Groups 3
The name of the group will change as you write into the textbox.
Using Tab Groups 4
Adding Tabs to Groups
Once you’ve set appropriate names for your groups, you can now begin populating them with other tabs. Now when you right-click on any tab, you will be presented with a new option of ‘Add to existing group’ where you could click on the group you want to make your tab a part of.
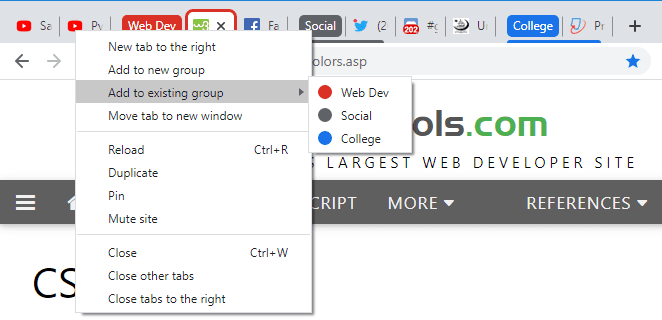
Using Tab Groups 5
In my case, I went for the ‘Web Dev’ group, so you can see that the tab now belongs to that group.
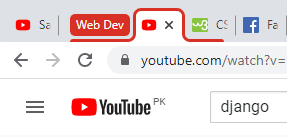
Using Tab Groups 6
Now similarly, you should start putting all the remaining tabs in their appropriate groups. Afterward, it should look something like this:

Using Tab Groups 7
An even more natural way to populate groups is just to simply click and drag the tab toward the group you want to make it a part of and then release it.

Using Tab Groups 8
Removing Tabs from Groups
Once you’ve made a tab a part of a group, you can right-click on it, and one of the options would include ‘Remove from group.’
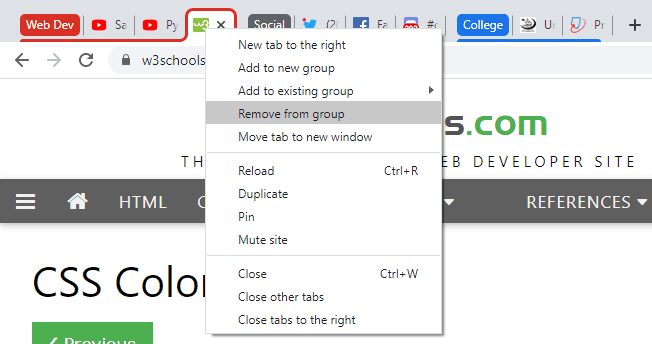
Using Tab Groups 9
You can simply just click on this option to individualize the tab.

Using Tab Groups 10
Similar to adding tabs to a group, there is also an easier click-and-drag way of removing tabs as well.

Using Tab Groups 11
Ungrouping and Closing Groups
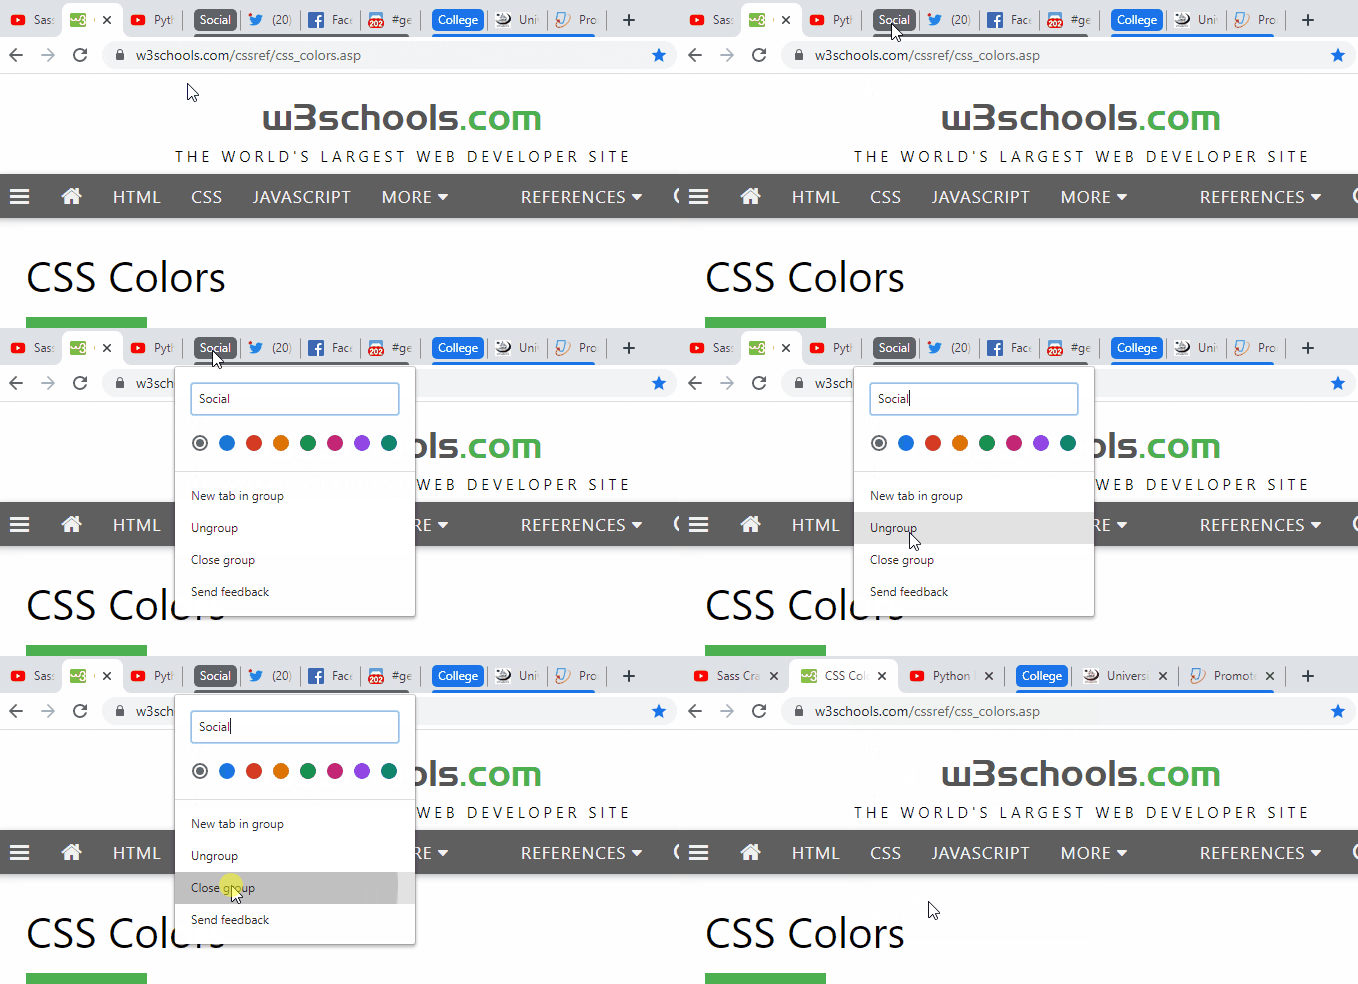
If you want to dissolve a group and individualize all its tabs completely, just right-click on the group and choose the ‘Ungroup’ option.
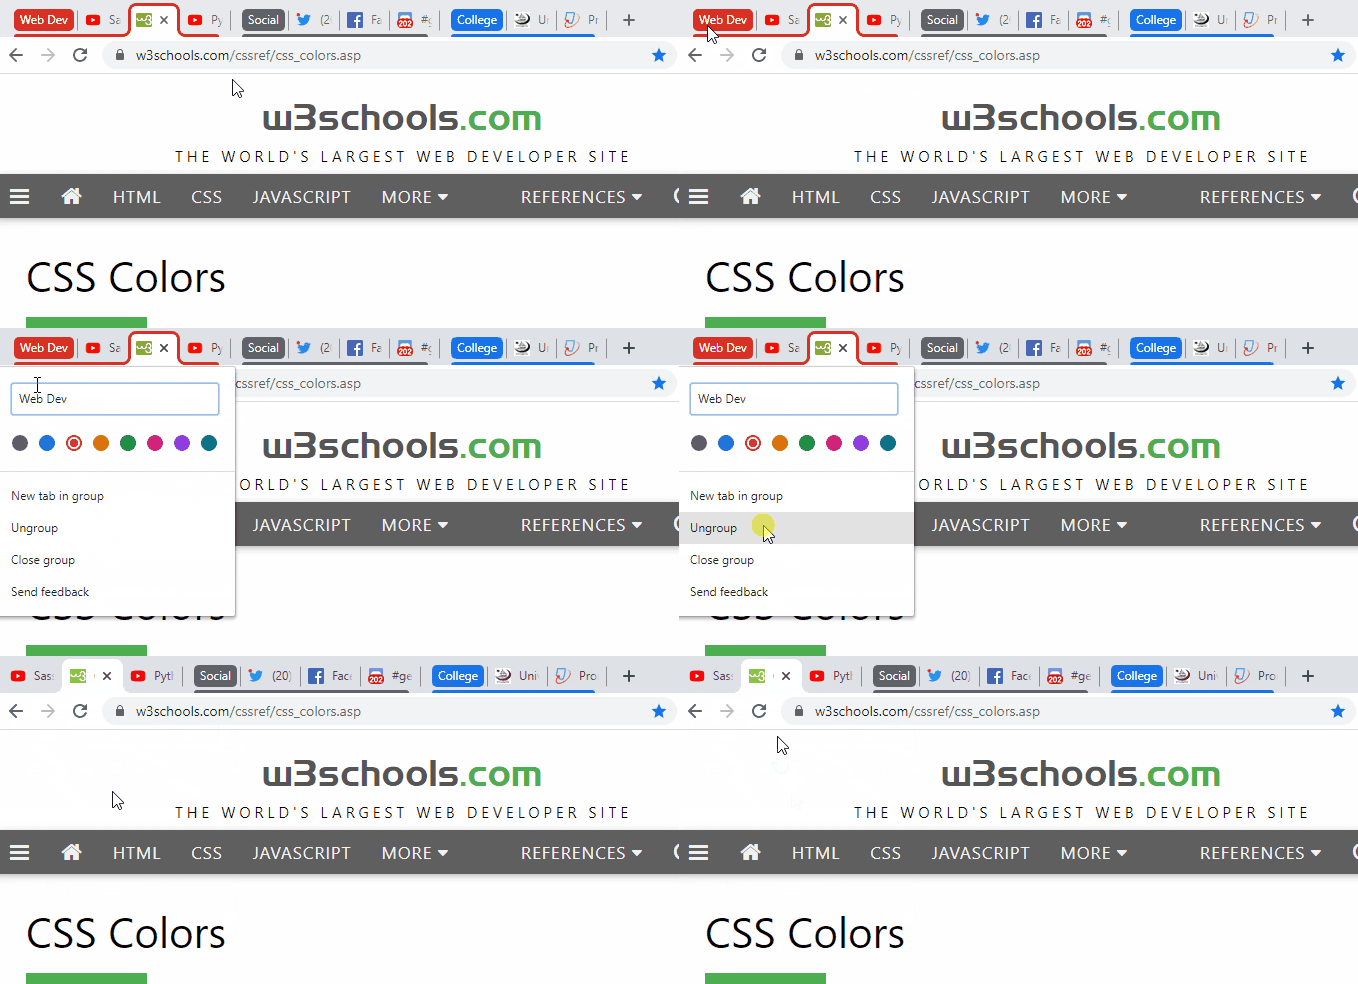
Using Tab Groups 12
Plus, users will have another option in the ‘Close group,’ which allows you to close all the tabs within a group.
Using Tab Groups 13
Conclusion
With this, our tutorial of the latest Google Chrome Tab Groups feature comes to an end. If you thoroughly read this article from start to finish, you shouldn’t encounter any issues by using this feature. However, if you do end up facing any trouble, make sure to tell us about them in the comment section below. Also, remember that this is just an experimental feature as of now, and it could cause different bugs, so use it at your own risk.
