Google Forms is an effective tool for creating quizzes and assessments, whether for the classroom, the workplace, or personal use. With its user-friendly interface and customizable options, Google Forms makes it easy to create engaging quizzes that can be shared and taken online. Want to take similar quizzes for different classes or respondent groups? Learn how to duplicate your Google Form in a step-by-step guide.
In this article, we’ll walk you through creating a quiz using Google Forms, from setting up the form to customizing quiz settings and adding feedback and grading options. Whether you’re a teacher looking to assess students, a manager looking to evaluate employee knowledge, or an individual looking to test your understanding of a subject, this guide will provide the tools you need to create effective and engaging quizzes using Google Forms.
Setting up a quiz in Google Forms
Setting up the quiz form is the first step in creating a quiz using Google Forms. This section will guide you through creating the form, adding questions and answer options, and organizing the quiz in a way that makes sense for your intended audience.
Step 1: To begin, go to forms.google.com and sign in to your Google account.
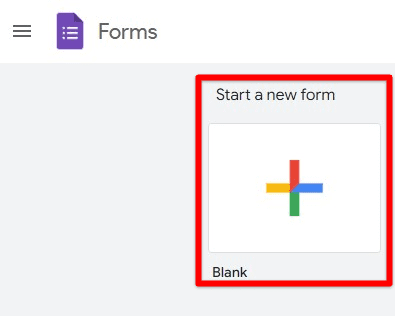
Step 2: Click the plus button to create a new form, and give it a name and description.

Starting a new form
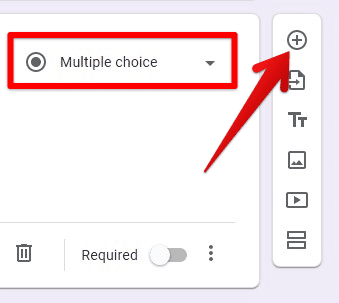
Step 3: To add a question, click on the “Question” button in the top menu. You can choose from several questions, including multiple-choice, checkboxes, short answers, and more.

Adding a new question
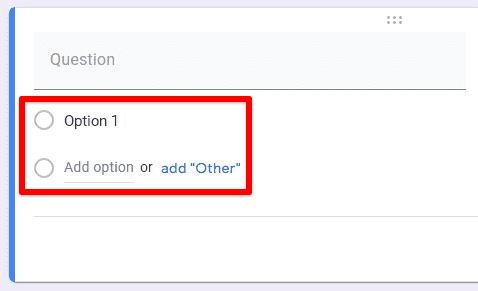
Step 4: Once you’ve added a question, you can add answer options. You can add as many options as possible for multiple-choice and checkbox questions. For short answer questions, there are no answer options.

Adding answer options
Step 5: If you want to add another question, click the “Add Question” button. Otherwise, you can click on the save button.
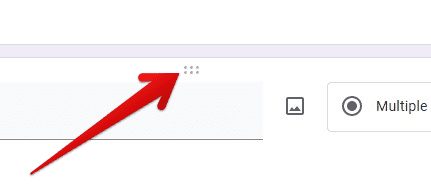
Step 6: You can also reorder the questions by dragging and dropping them into the desired position.

Holder for reordering questions
By following these simple steps, you’ll have set up the basic structure of your quiz form. Now you can move on to customizing the quiz setting and adding feedback or grading options to make your quiz more engaging and effective for your audience.
Customizing quiz settings
Customizing quiz settings is important in creating an effective and engaging quiz using Google Forms. This section will guide you through adjusting settings such as time limit, question shuffling, and more.
To access quiz settings, click on the “Settings” icon in the top menu of your Google Form. Under the “Form settings” tab, you can enable or disable the “Make this a quiz” option to turn your form into a quiz. You can set a time limit for the quiz by allowing the “Set a time limit” option and entering the desired duration in minutes. If you want to shuffle the order of options for each quiz taker, you can enable the “Shuffle options” switch. To prevent quiz takers from going back and changing their answers, you can enable the “Lock after submitting” option. You can also require that quiz takers sign in with their Google account to take the quiz by allowing the “Require sign-in to take the quiz” option.
By customizing these settings, you can ensure that your quiz is tailored to your audience and that quiz taker are given a fair and consistent experience. You can also set up a quiz key, grade scale, custom feedback, and many more settings to help you grade the quiz and give feedback to the quiz takers.
Adding feedback and grading options
Adding feedback and grading options is crucial in creating an effective quiz using Google Forms. These options allow quiz takers to receive immediate feedback on their performance and give them an idea of how they did on the quiz. Feedback and grading options are also helpful for the quiz creator, as they provide a way to evaluate the quiz takers’ performance and make any necessary adjustments.
You can use the “Answer key” and “Grade” feature in Google Forms to add feedback and grading options. With the “Answer key” option, you can set the correct answer for each question, and the quiz taker will receive feedback on whether their answer was right. You can also add custom feedback for each question, which will be shown to the quiz taker after they submit their answers. This can be particularly useful for providing additional information or guidance on the topic being quizzed.
The “Grade” feature in Google Forms allows you to assign a numerical value to each question, which can then be used to calculate the quiz taker’s overall score. You can also set up a grading scale, which can be used to assign letter grades or other labels to quiz takers based on their scores. This feature can be handy for educators who want to assign grades to student quizzes.
Tips and best practices
Creating an effective quiz using Google Forms requires more than just setting up the form and adding questions. Here are some tips and best practices to keep in mind as you design your quiz,
Keep it simple: Avoid overly complex or technical language in your questions and answer options. Instead, use clear and straightforward language that is easy for the quiz taker to understand.
Make it relevant: Ensure your quiz questions are relevant to the topic or subject being quizzed. This will help keep quiz takers engaged and motivated to complete the quiz.
Limit the number of questions: Avoid overwhelming quiz takers with too many questions. It’s best to keep the number of questions to a minimum and focus on quality over quantity.
Use images and multimedia: Adding images and other forms of multimedia can make your quiz more engaging and memorable for quiz takers.
Test your quiz: Before sharing it with others, take the time to test it yourself. This will help you identify any errors or issues and make necessary adjustments.
Provide feedback and allow retakes: As mentioned before, providing feedback and allowing retakes can be very helpful for quiz takers, mainly when the quiz is used for learning purposes.
Analyze the results: Once you’ve collected the quiz results, take the time to analyze them and make any necessary adjustments to the quiz. This will help you improve the effectiveness of your quiz over time.
Conclusion
Creating a quiz using Google Forms is a simple and effective way to assess knowledge, give feedback, and measure performance. By following the steps outlined in this article, you can set up a quiz form, customize quiz settings, and add feedback or grading options. Google Forms provide a wide range of features that make it easy to create and customize quizzes for various purposes. Always test your quiz, analyze the results, and make any necessary adjustments to remain effective over time. Are you a student looking to make the most out of your Chromebook? Here are the top 10 back-to-school applications for students using Chromebook.
