Whether you’re looking to make your document stand out more or just trying to approach a different layout, changing margins is an important Google Docs feature you should know about. At first, it may seem difficult to tweak the margins of your Google Docs pages, given that there’s no built-in tutorial, but the process is straightforward and takes about a minute or so to complete. So keep on reading to learn how to change margins in Google Docs step-by-step.
This profound Google Workspace app doesn’t let you work with margins only. Instead, there are multiple other operations to modify and customize to your heart’s extent, such as changing the page color in Google Docs or even checking the word count. There’s the added ability to utilize hanging indents in Docs, too, not to mention extensive file format support lets you open Office 365’s Word document with Google Docs.
Changing margins in Google Docs
Docs have made it quite effortless to change page margins on the fly. All you have to do is adjust some rulers at the top of the Docs interface, and you’ll be good to go. Moreover, another way can be approached to handle margins in Google Docs, and it’s more involved than the basic methodology, featuring advanced ways to help you get to grips with changing page margins in the Docs editor.
To start with the primary method of changing page margins, open the editor interface of Google Docs. If you haven’t opened up a document, visit the official Google Docs page link. Sign in using your Gmail account to continue. Once done, focus on the two rulers that rest directly above the middle section of the Docs editor. These two rulers will help you determine your margins in Google Docs.
Begin by clicking and holding down the cursor on the left side of the left ruler. If you let your cursor go free at that point, a descriptive pop-up will appear, stating “Left Margin.” Do not click and hold on the “Left Indent” or the “First Line Indent” since those two tools have a different effect on your Google Docs page than the adjustment of the margins, so it’s important not to confuse yourself with those.
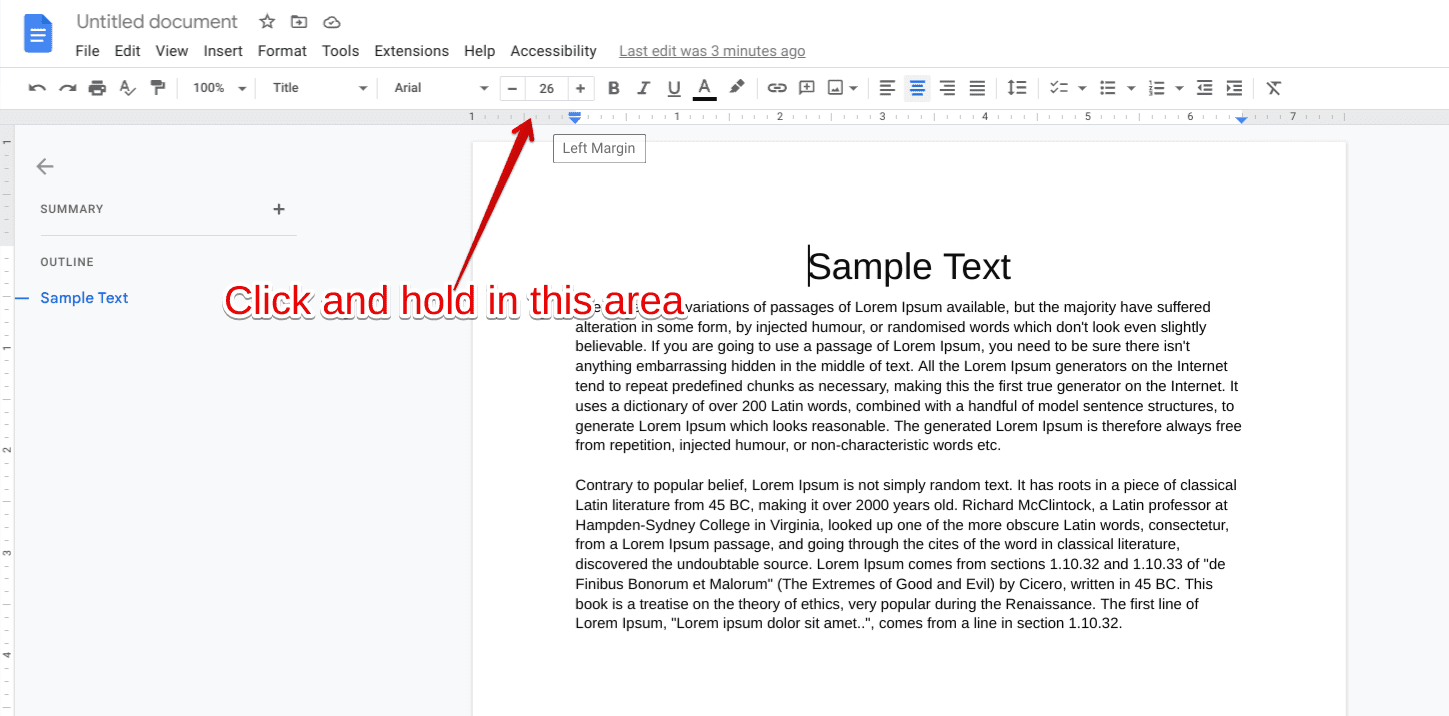
Clicking on the right area to change the page margin
By default, the Left Margin is set to 1.0 inches. We can drag it toward the left side a little more so the margin is changed per your requirement. It’s preferable to adjust your margins in variables of 0.50, so you can evaluate how much of a difference the result will make.
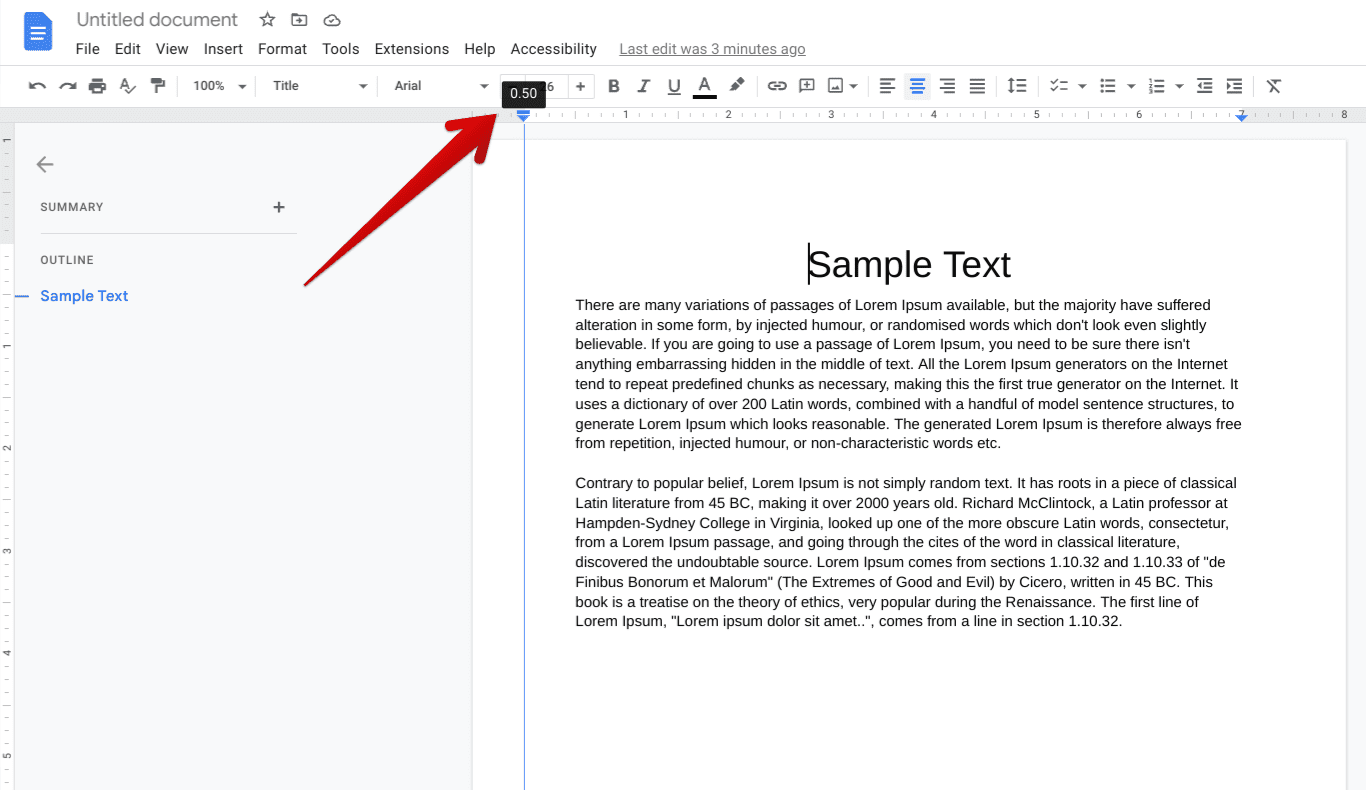
Changing the page left margin
After tweaking the page margin on the left side of the screen, you can continue to the right side to make the page appear in an equal proportion. For instance, if the margin on the left side has been set to 0.50 inches, you can use an equivalent value on the right margin to finalize things correctly. By default, the value of the right margin is 6.5 inches. To make the left and right margins equal, you can change the latter’s value to 7.0. That’ll do the trick for you right there.
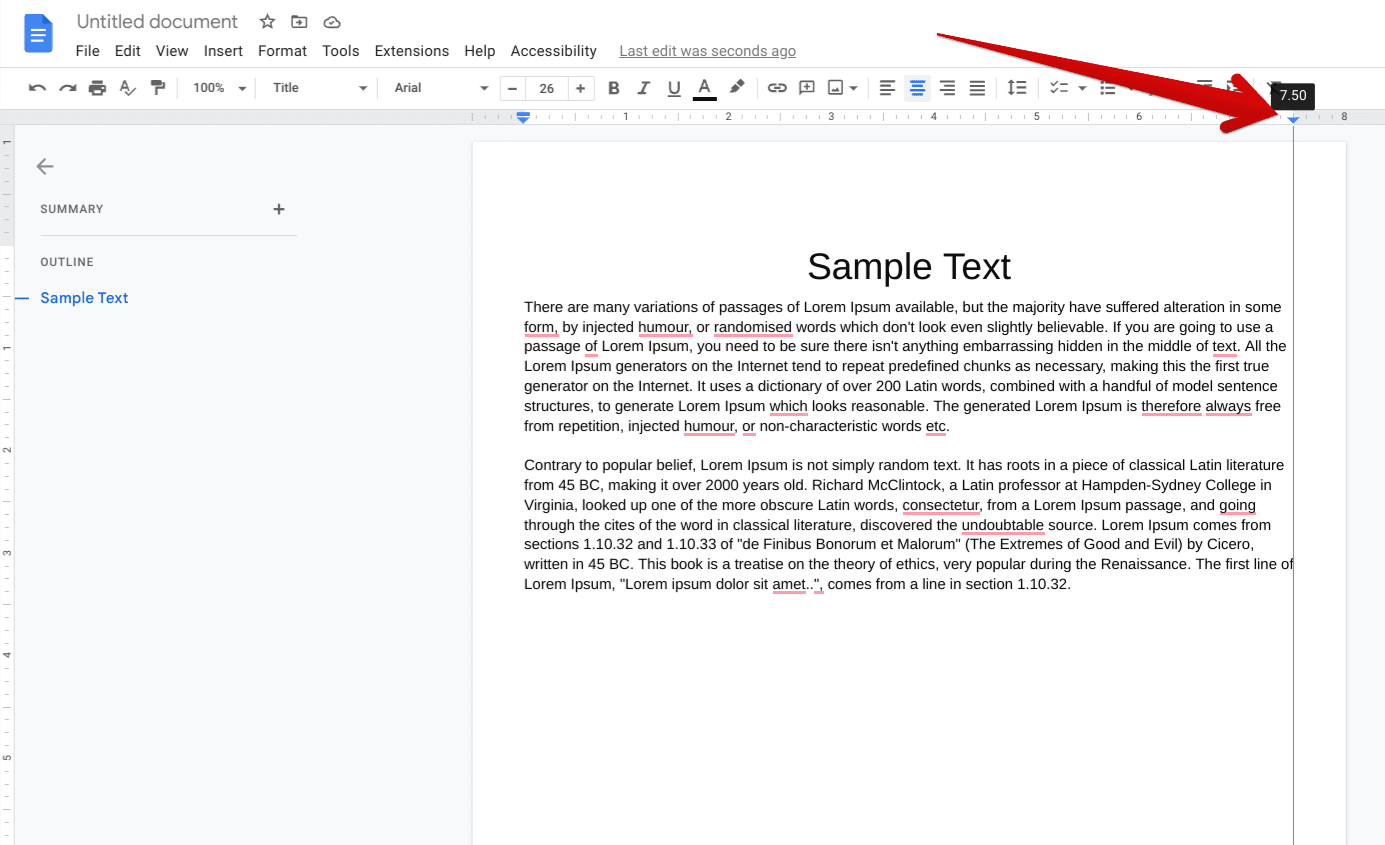
Changing the right margins of the Docs page
That’s about it as far as the most straightforward method of changing page margins in Google Docs is concerned. However, there’s another way you can approach here to step things up a notch, which revolves around relying on the “Page setup” section. Click on the “File” button on the toolbar at the top to reveal more options. After that, select “Page setup” to get to the next step.
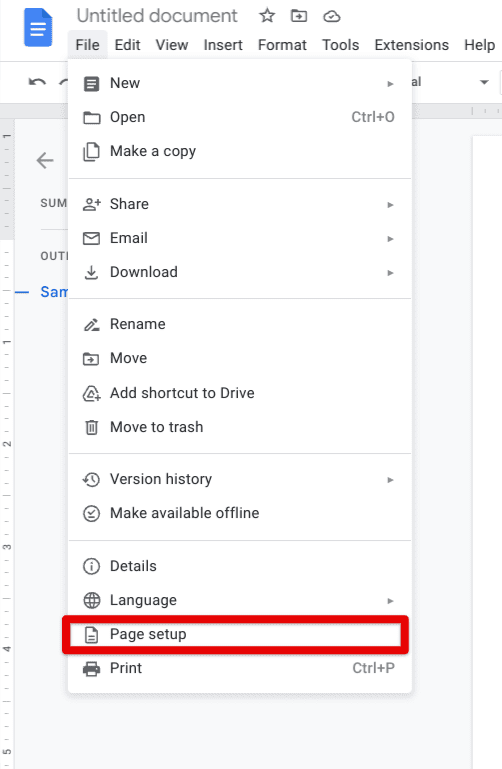
Clicking on the “Page Setup” option
A small window will now appear on the screen, allowing you to tweak all relevant settings related to the setup of your pages in Google Docs. Under the “Pages” tab, you can focus on the “Margins” area. It’s possible here to tweak the “Top,” “Bottom,” “Left,” and “Right” margins of your pages in Google Docs. The values you see in the screenshot below have been tweaked to a certain extent, so please feel free to add your iterations there.
In addition, just like the previous method we talked about, changing your margins in Google Docs in this way applies your selected settings to the whole document, not just a single page.
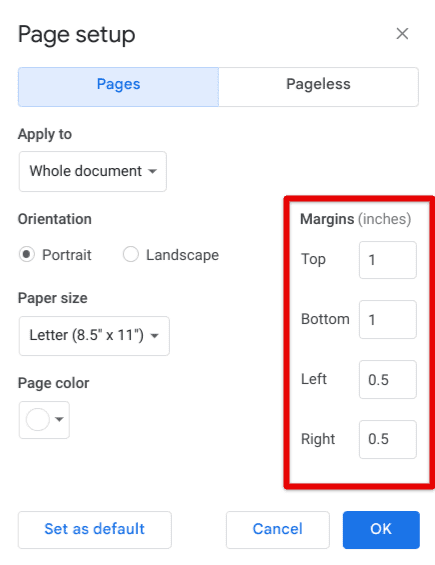
Changing page margins in Google Docs
We also recommend trying out the “Pageless” feature in Google Docs. It’s a high-quality, wide-reaching functionality that takes out pages from your document and provides the convenience of adding wide images and tables. This serves the purpose of letting users consume content without the added interruption of page breaks or anything similar. To start with the pageless page setup, click on the “Pageless” tab and choose “OK” after selecting a background color.
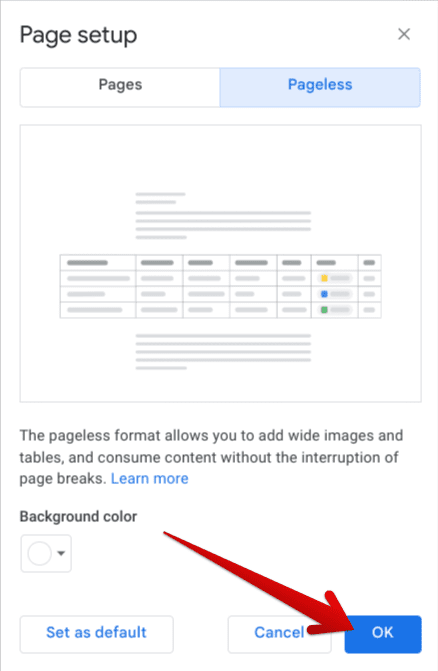
Setting up the “Pageless” feature in Google Docs
You’ve now successfully learned how to change page margins in Google Docs. Thanks for reading!
Conclusion
Google Docs is one of the world’s most popular word processors, featuring multiple functionalities and tools to help users create the perfect text document for themselves on the fly. It’s a multi-platform application that can be enjoyed on various systems, such as Android, iOS, PC, and ChromeOS. Given the browser-agnostic nature of the application, you’ll be delighted to run Docs on most platforms.
In this guide, we’ve learned how page margins in the Google Docs editor can be adjusted to our liking. As it turns out, two different ways can be approached here, whether you prefer using the provided rulers or the “Page setup” section to tweak your margins in a bit more depth. So do let us know in the comments section whether you found the guide helpful. We would love to read your feedback!
- An entertaining read: 30 must-play browser games to keep you entertained.
