Whether you prefer using Google Calendar to schedule your meetings and organize your workspace or like being reminded of things, this application has soared in popularity recently. Calendar boasts the same shareability features as the other components of Google Workspace, whether it’s Google Docs, Google Sheets, or Google Slides. Of course, sharing your file and letting others collaborate is one of the cornerstones of Workspace’s ideology.
Although you may already know about the rest of Calendar’s primary features, such as scheduling and integrating with other Google apps, sharing holds paramount importance in various workflows. In this guide, we’ll explain how you can share your Google Calendar with other people. The process is a little different compared to our other guide that showed the Outlook Calendar in Google Calendar, but rest assured since it’s easy to follow as well.
Sharing Google Calendar with other people
Google Calendar is a program meant to be shared with people to entertain the developer’s instilled collaborative features. That’s why you will find the software welcoming when it comes to getting it around with others. All you need to do is access the “Settings” of a specific calendar in the Google Calendar web application, then access the “Settings and sharing” section.
From there on out, you will find two different ways to share the calendar with others. We will detail what to do here in a step-by-step manner so that you can replicate the guidelines easily on your end. Follow the forthcoming instructions diligently for the web browser method of sharing Google Calendar for the best results.
1. The first step is to visit the Google Calendar app on your web browser. Feel free to use this direct link to get to Calendar right away. If you haven’t done it already, you will need to sign in with your Google account to proceed.
2. After arriving at the Google Calendar home page, look under the “My calendars” page on the side panel to the left of the screen. Your primary calendar going by your name will already be selected here. As you hover over it with your cursor, you’ll notice three vertical dots spaced together appearing in that area. This is the “Options” button. Click on it to reveal more, and then subsequently select “Settings and sharing” to get to the next step.
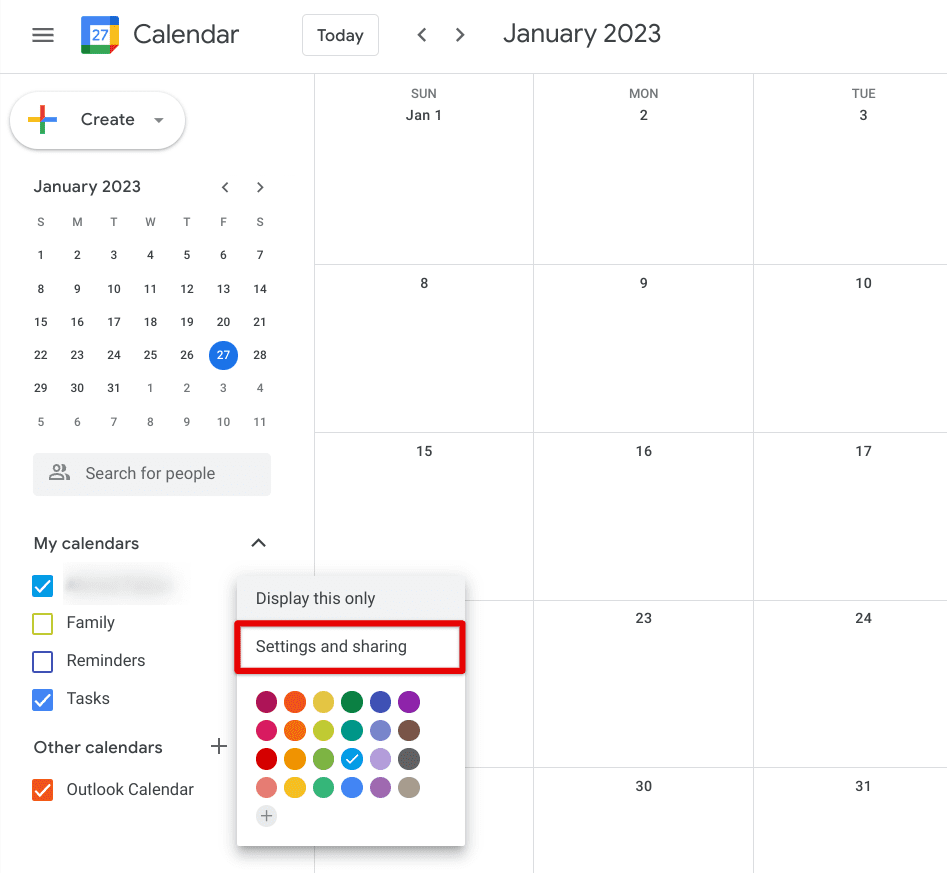
Clicking on the “Settings and sharing” button
3. You should now be taken to another page on the screen. As you are being shown the “Settings for my calendars” section, scroll down until you find the “Access permissions for events area.” Here, click on the check box beside “Make available to the public” if you want your Calendar to appear in searches and allow everyone with the link to access it. As soon as you’ve done that, the next step is to click on “Get shareable link.”

Getting the shareable link to the calendar
4. A pop-up will now appear, allowing you to copy the shareable link and send it to whoever you want to gain access to your calendar. Click on “Copy link,” and you’ll be done with the most part here.
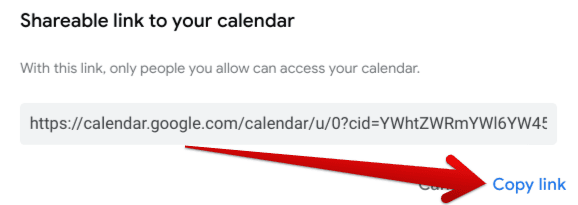
Copying the link to the Calendar
5. Generating a shareable link will allow you to send the link to any Google user, and they’ll be able to access your calendar. However, if you’d like more control over the process, you can scroll down the main “Settings for my calendars” section and find the “Share with specific people or groups” option.
Using this function, you will be able to add people to your Calendar for seamless access just with the help of their email addresses. Click the “Add people and groups” button to bring up a dedicated menu on the screen.

Adding people and groups to Google Calendar
6. You will now be required to enter the email address of the person you wish to share your Google Calendar with. Type it in, and click the “Send” button to get to the next step.
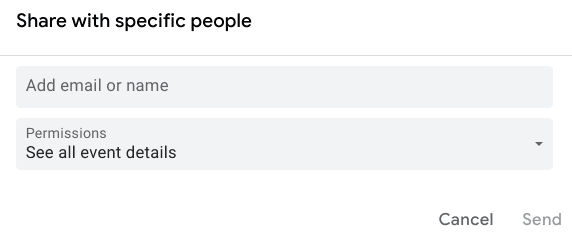
Adding a person or group to Google Calendar
7. Completing the previous step will automatically add the person in question to your Google Calendar. But there’s one more thing to be wary of here. It’s essential to tweak the privacy settings of the people you’re adding to the Calendar, so they can only access the information you want. For this purpose, click on the bar beside the email address of the person you’ve added.
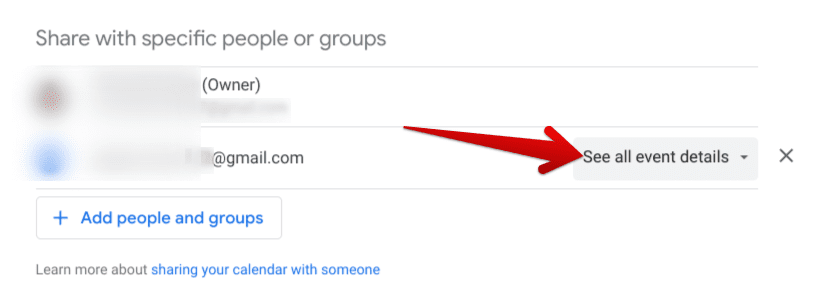
Tweaking the privacy controls
8. Multiple options will appear in the relevant section as soon as you click on the privacy bar. Here, your available settings include the following:
- See only free/busy (hide details)
- See all event details
- Make changes to events
- Make changes and manage to share
The access provision decreases in power from top to bottom. The first option won’t let the other person view anything of significance, but if you select “See all event details,” all the information in the Calendar will appear for them. However, “Make changes to events” provides some form of editorial access. In contrast, the last one, “Make changes and manage sharing,” provides the added person full-blown access to your Google Calendar.
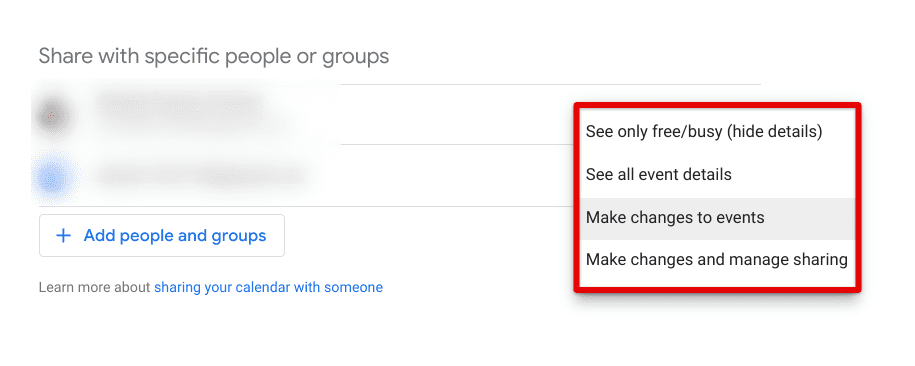
Assigning a role to the added person
That’s all you should know about sharing your Google Calendar with others. The app lets you enjoy two different ways to accomplish the task at hand, so you, as your Calendar owner, can follow through with either method easily.
Do note that if you’d like to remove a person from your Calendar, you will first need to untick the “Make available to public” option, followed by clicking on the X-shaped button beside the name of the person under the “Share with specific people groups area.” That should resolve the matter for you right away.
Conclusion
Google Calendar is a prominent constituent of the Google Workspace program, making it possible for users to become more organized as they indulge in a high-quality calendar loaded from top to bottom with features. It allows you to add events, set reminders, create locations, and schedule your meetings on the go, but when it comes down to it, sharing your Google Calendar with others is a significantly important feature that’s worth knowing about.
In this guide, we’ve talked about just that, explaining how one can get their Google Calendar around by sharing it with others. As you can comprehend, the developers make it easy for us to share the calendar, and only a handful of steps are required to get the job done. Do let us know in the comments section whether you found the write-up useful for your cause. Thanks for reading!
- Another helpful article: How to add an electronic signature in Google Forms.
