Google Forms is a free online survey and questionnaire tool offered by Google. It allows users to create and distribute forms for various purposes, such as gathering feedback, collecting data, and conducting surveys. Google Forms is a simple and user-friendly tool that individuals, businesses, and organizations of all sizes can use.
One key benefit of using Google Forms is its integration with other Google tools, such as Google Sheets and Google Drive. This allows users to easily collect and analyze data and share and collaborate on forms with others. Additionally, Google Forms is accessible on any device with an internet connection, making it a convenient option for conducting surveys and collecting data remotely.
Some of the features of Google Forms include creating multiple choice, short answer, and essay questions and adding images, videos, and other multimedia elements to forms. Forms can also be customized with different themes and templates and can be shared and distributed via a link or embedded on a website. It is a powerful and versatile tool that can be used for various purposes. Whether conducting a simple survey or collecting data for a research project, Google Forms makes gathering and analyzing information easy.
Making a Google Form
Setting up a Google account
Before you can start using Google Forms, you’ll need to set up a Google account. A Google account is free and gives you access to all of Google’s services, including Forms, Sheets, and Drive. Irritated by spam in your Google Drive? Here is how to block spam content for good. To set up a Google account, follow these steps,
Step 1: Go to the Google account creation page by visiting “https://accounts.google.com/signup”.
Step 2: Fill in your personal information, such as your first and last name, username, and password.
Step 3: Provide your phone number or recovery email address if you need to recover your account. Click “Next” to proceed.
Step 4: Review and accept the terms of service and privacy policy. Click “Next” to proceed.
Step 5: Complete the verification process by receiving a verification code via text message or phone call or clicking on a link sent to your recovery email. Once you have verified your account, you will be taken to your Google account dashboard.
You can also sign up for a Google account using an existing email address from other providers like Yahoo, Hotmail, etc. It’s also important to note that you may already have a Google account if you use other Google services like Gmail, Google Calendar, or YouTube. If you already have an account, you can use that account to access Google Forms.
Now that you have set up a Google account, you can start creating and using Google Forms. You can access Google Forms by visiting the Google Forms website or clicking on the “Google Forms” option in the Drive menu.
Creating a new Google Form
Once you set up a Google account, you are ready to create a new form.
Step 1: Go to the Google Forms website by visiting “https://docs.google.com/forms”.
Step 2: Click the “+” button to create a new form. A new form will be made, and you will be taken to the form editor.
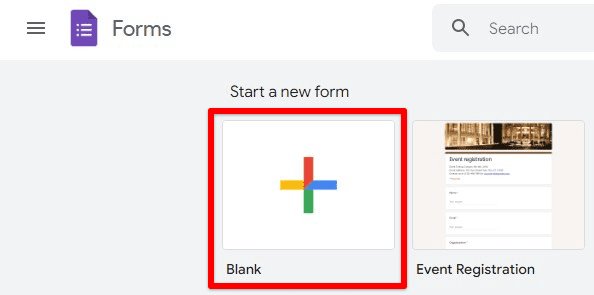
Starting a new form
Step 3: In the form editor, you can customize the form’s title and description by clicking on the “Untitled Form” text at the top of the page.
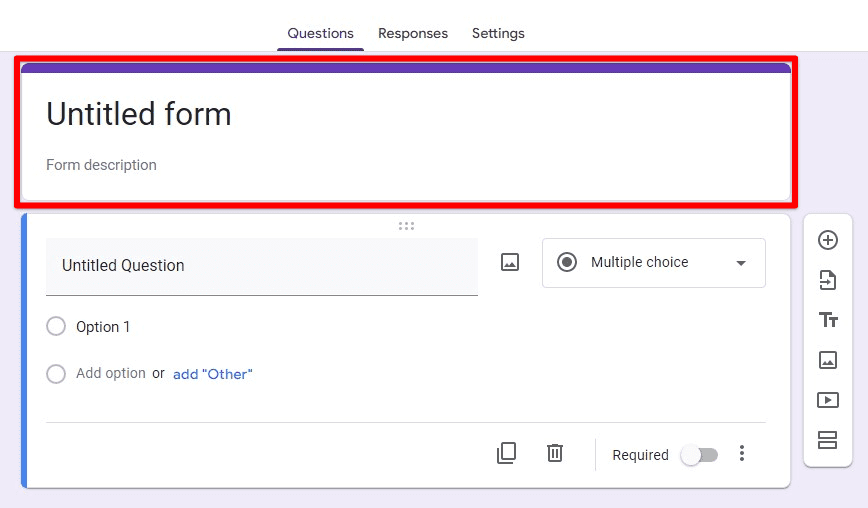
Customizing form title and description
Step 4: You can add new questions to your form by clicking on the “Add question” button. Google Forms offers several question types, such as multiple choice, short answer, and paragraph.
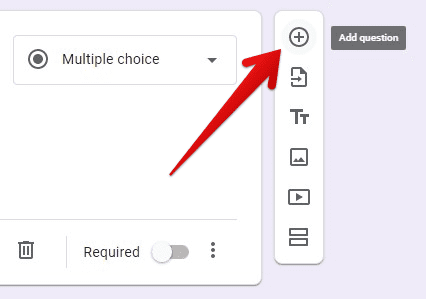
Add question button
Step 5: Once you have added a question, you can customize it by editing the question text, adding choices, and setting other options like required or allowing multiple selections. Using the toolbar options, you can add sections, images, and videos to your form.
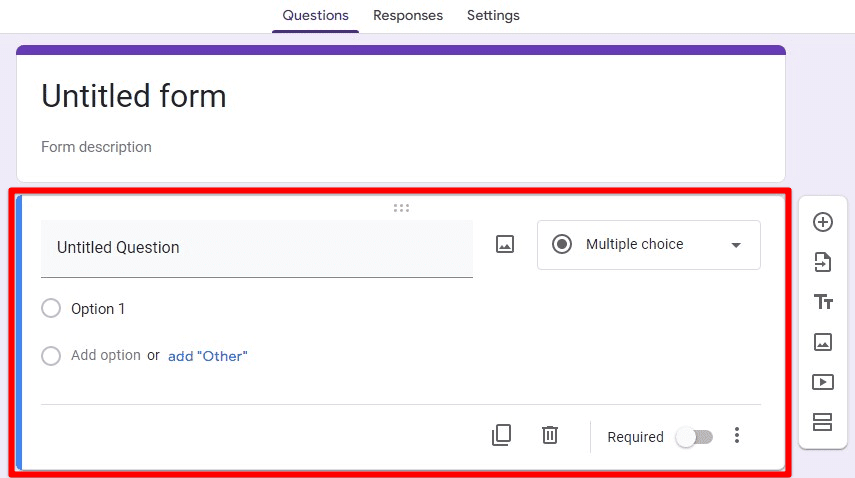
Customizing a question
Step 6: Once you have added all the questions and other elements to your form, you can preview it by clicking on the “Preview” button at the top of the page.
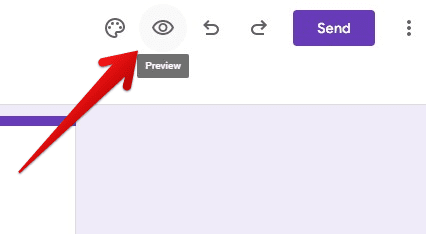
Preview button
Step 7: You can customize the form’s theme by clicking on the “Customize theme” button in the top right corner of the form editor.

Customize theme button
One may start with a pre-made template by clicking “Use a template” on the welcome page. It will give you a quick start for creating a form for a specific use case like event registration, survey, etc.
Once you have finished creating the form, save it or share it with others by clicking on the “Send” button. You can share the form through a link, embed it on a website, or send it via email. Form responses can be accessed by clicking on the “Responses” tab in the form editor.
Customizing the form layout
Google Forms offers several options for customizing the layout of your form, including the ability to add sections, images, and videos, as well as the ability to change the theme of the form.
Adding sections: You can add sections to your form by clicking on the “Add section” button in the toolbar. Sections can be used to group related questions and make the form easier to read and understand.
Adding images and videos: You can add images and videos to your form by clicking on the “Insert Image” or “Insert Video” button in the toolbar. This can help make your form more engaging and visually appealing.
Changing the theme: You can change your form’s theme by clicking on the “Change theme” button at the top of the form editor. Google Forms offers a variety of themes to choose from, including different colors and layouts. You can also create custom themes by adjusting the colors and fonts of your form.
Adjusting the form width: You can change the width of your form by clicking on the “Layout” button in the toolbar. You can choose from different width options, such as fixed or full width, to make your form look better on other devices.
Customizing the background: You can customize the background of your form by clicking on the “Background” button in the toolbar. You can choose from different background options, such as solid color or image.
By customizing the layout of your form, you can make it more visually appealing and easier to read & understand for respondents. This can help increase engagement and improve the overall effectiveness of the form.
Adding form fields and questions
One of the most critical aspects of creating a Google Form is adding form fields and questions. Form fields and questions are used to gather information from respondents and can include various types, such as multiple choice, short answer, and essay questions.
Click on the “Add question” button in the toolbar. Google Forms offers several question types. Select the type of question you want to add from the options provided. For multiple-choice questions, add answer choices by clicking on the “Add option” button. You can also specify if only one or multiple options can be selected. If you want to add a grid or scale question type, click on the “Grid” and “Scale” options. Add sections, images, and videos to your form using these toolbar options.
Once you have finished adding the question, you can add additional questions by clicking on the “Add question” button. You can reorder, copy, and delete the questions by using these buttons in the top right corner of each question. Questions may also be copied using the “Copy from another form” option. This can be useful if you have a question that you want to use in multiple forms or surveys.
By adding form fields and questions to your Google Form, you can gather the information you need from respondents. It’s essential to make sure that the questions are straightforward to understand and relevant to the overall purpose of the form.
Using form templates
Google Forms offers a variety of pre-made templates that can be used to create a form for a specific use case quickly. Using a template can save time and effort when creating a form, as many of the basic elements and questions have already been set up for you.
Step 1: Go to the Google Forms website by visiting “https://docs.google.com/forms”.
Step 2: Click the “Use a template” button on the welcome page.
Step 3: You will be presented with various templates to choose from, including templates for surveys, event registration, and feedback forms. Select the template that best fits the purpose of your form.
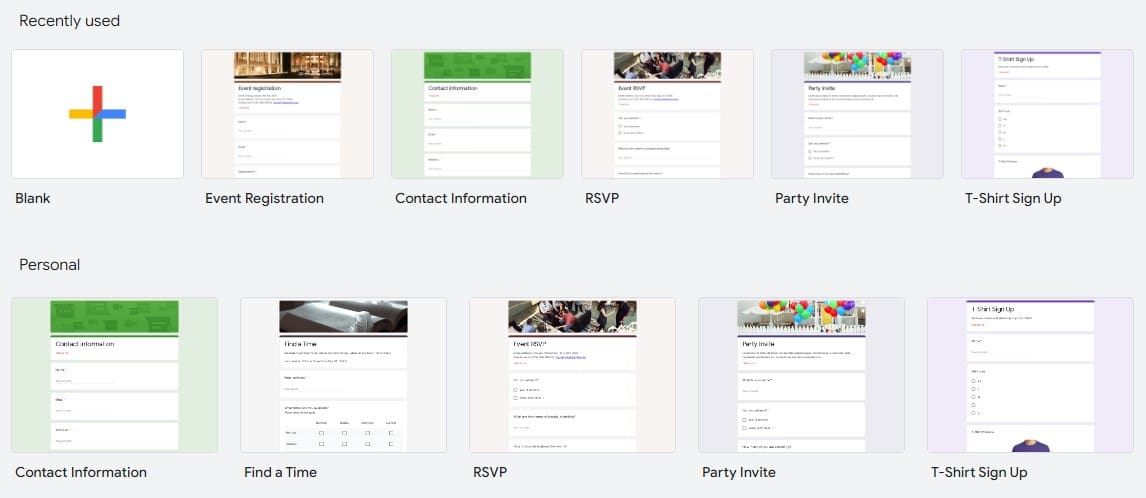
Template Gallery
Step 4: Once you have selected a template, you will be taken to the form editor, where you can customize the template to fit your needs. You can edit existing questions, add new ones, and customize the form layout.
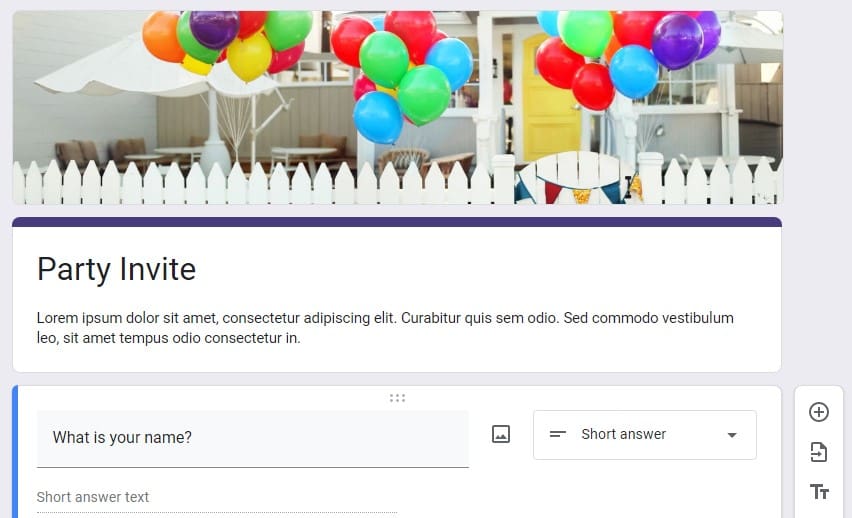
Customizing an existing template
Step 5: Once you have customized the template, you can save and share the form with others.
While using a template can save time, it’s still important to customize the template to fit the specific needs of your form. You can also create your own custom template by saving the form as a template after editing it.
Setting form options and preferences
Google Forms offers a variety of options and preferences that can be used to customize the behavior and functionality of your form. These options can be accessed by clicking on the “Settings” button in the toolbar. Here are some of the options and preferences that can be set when creating a form,
Form settings: This includes options such as the form title, description, and confirmation message displayed to respondents after submitting the form. You can also set the form to close automatically after a certain date, limit the number of responses, or require respondents to sign in to view the form.
Quiz settings: If you are creating a quiz form, you can enable quiz mode, which allows you to grade the responses, provide feedback, and set a passing score. You can also shuffle the question order, require a password to access the quiz, and set a time limit.
Collect email addresses: You can collect email addresses from respondents, which can be helpful for sending follow-up messages or tracking responses.
Presentation settings: You can open the form in a new window, hide the progress bar, and set the form to be mobile-friendly.
Response settings: You can allow respondents to edit their responses after they have been submitted and receive notifications when a new reply is received.
Limit to certain email domains: This allows you to limit the form to be filled only by the email addresses belonging to specific domains.
Permissions: You can set permissions to control who can view, edit, and share the form.
It is essential to take the time to review and set these options and preferences before sharing your form, as they can significantly impact the overall effectiveness.
Sharing and distributing the form
Once you have created and customized your Google Form, the next step is to share and distribute it to your intended audience. Google Forms offers several options for sharing and distributing forms.
Step 1: Click on the “Send” button at the top of the form editor. You will be presented with several options for sharing the form.
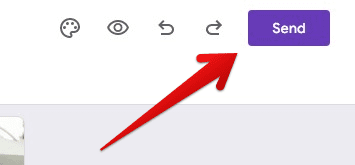
Send button
Step 2: The first option is to get a link to the form, which can be shared via email, social media, or any other method. You can also make “anyone with the link” access or restrict it to specific people with their email addresses.
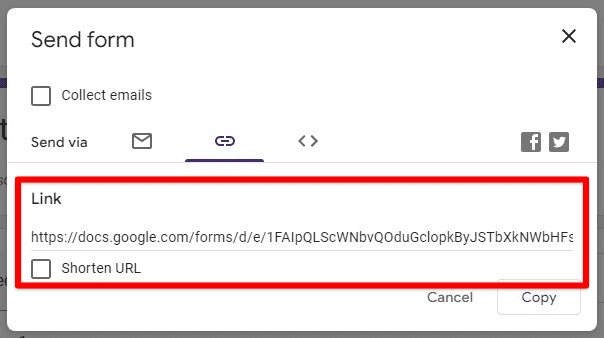
Sending form via the link
Step 3: The second option is to embed the form on a website. This allows you to add the form to a website or blog post. You might also want to know how to set up and use the SSH extension on Google Chrome.
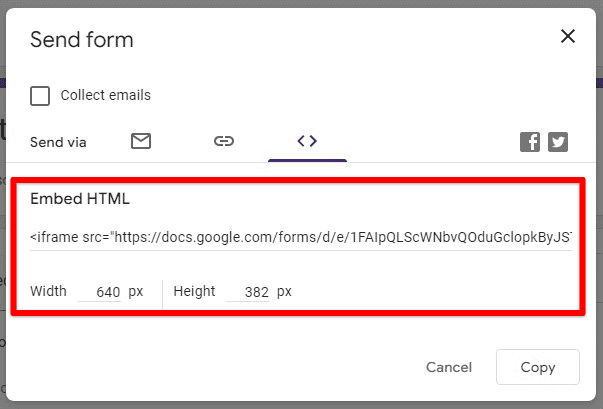
Embedding form HTML
Step 4: The third option is to send the form via email. Enter the recipient’s email addresses, add a message, and send the form.
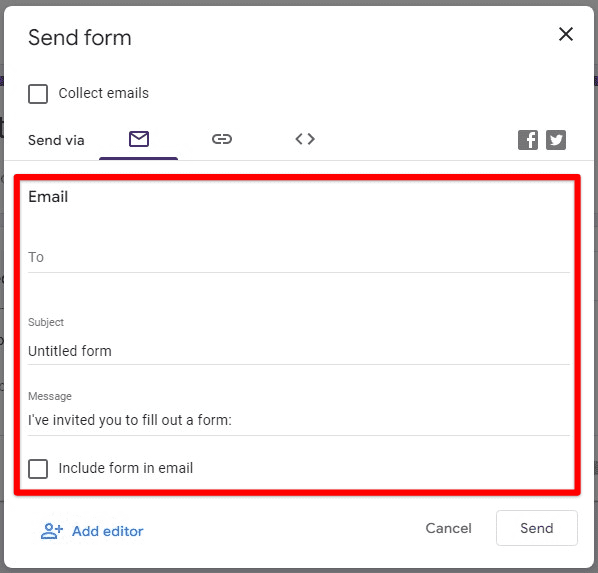
Sending form via email
Step 5: Enable the “Collect emails” option in the form settings, allowing you to track the form responses by email address.
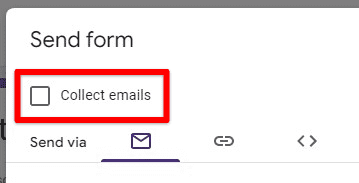
Collect emails checkbox
A form can be shared with specific people by giving them “can edit” or “can view” permissions. This is done by clicking on the “Share” button in the top right corner of the form editor and entering the email addresses of the people you want to share the form with.
Conclusion
The key to creating an effective form is ensuring the questions are clear and relevant. Following the steps outlined in this article, you can create an effective Google Form to help you gather the necessary information. In conclusion, Google Forms is the go-to service whether you’re conducting a simple survey or collecting data for a research project. Do you have a lot of content to be converted into Forms? Read through this article on automatically converting PDFs, Docs, and Slides to Google Forms.
