Gmail is one of the world’s most well-established email service providers, having its roots dug deep in the confines of Google Workspace. It’s fast, effective, lightweight, and capable of servicing billions of customers around the globe with utmost ease. However, little do we realize it, a program like Gmail is chock full of features, and we don’t take the time to explore them all and, in turn, improve our user experience, which is easily doable due to Gmail’s ease of use.
One of these features that don’t get as much attention as it deserves is Gmail labels. The latter can help you improve your visibility while scrolling your Gmail “Inbox,” so you can realize at a glance which emails are the ones that need to be prioritized and which ones can be seemingly ignored for now. This guide will serve as a one-stop shop and an ultimate guide to Gmail labels, so let’s dive right into this write-up immediately.
- A helpful article: How do get email links in Google Chrome to open with your Gmail.
What are labels in Gmail?
A label is any material you can write on in the context of providing information. Labels are usually attached to objects, hence the reason for their information-containing nature. Labels can be classified by coloring them and not just by writing text on them. For instance, assume that there is a set of spice jars, and you need to distinguish between each jar of spice.
You can label each jar with a colored piece of paper or write the name of the spice on the label and then put it on the jar. Forgive the differently-natured analogy, but Gmail labels have the same fundamental ideology to their name. This in-app interface feature powers you to label emails with a colored symbol, so you can realize at a glance whether an email is essential or not.
It’s one of the best ways to tame a Gmail inbox that has gone amiss in terms of staying organized. Labeling different types of emails makes it possible to arrange an inbox and make it stand out in terms of being neat and sorted. It can often be hard to locate specific emails in Gmail, especially when the inbox gets cluttered with all types of promotional emails and others of significantly less importance.
Thankfully, Google has implemented the labels feature for free, and it can change things moving forward for aspiring users. Labels in Gmail are easy to utilize and can even be created, personalized, and disabled — if need be — effectively. Let’s now waste no further time and talk about how one can use Gmail labels in the best possible manner.
How to use Gmail labels
Using labels in Gmail is quite a simple task. All you need to do is right-click on any email within your Gmail inbox and select the “Label as” option. You can then choose the appropriate option and the email will be labeled accordingly. You can create your labels too, if none of the default ones are up to the mark for you. That is just the gist of what we’re trying to accomplish here. Let’s break the process down step by step for heightened clarity about Gmail labels.
The instructions given below are going to take it from here.
1. The first step after opening your Gmail account is to right-click on any email to bring up more options.

Selecting an email
2. Once done, hover over the “Label as” option and select any corresponding category to finalize the process. This is the easiest way to use labels in Gmail.
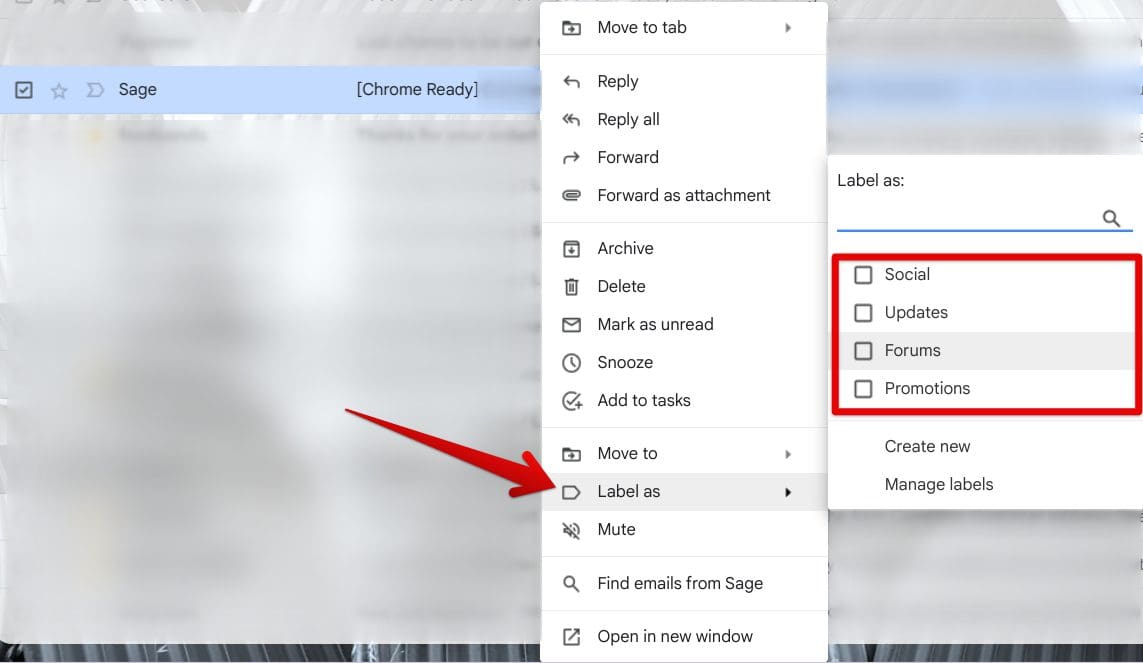
Using a Gmail label
With the simple two-step process outlined above, we’re not entirely done yet with exploring Gmail labels. After all, this is an ultimate guide, so it’s worth reading the following sections to realize the extent of this feature’s working capacity fully.
How to create and customize Gmail labels
The labels you can see in the screenshot above are rudimentary at best, created to grip users in and make them create their labels for higher Gmail productivity. In this section, we will learn how to create and customize our labels, so it’s easier to tame the Gmail inbox and make everything more sorted out and arranged. A dedicated section called “Labels” in Gmail’s “Settings” will allow you to tweak everything related to this noteworthy in-app feature.
To access the “Labels” section, click on the vividly apparent “Settings” cog-shaped button in the top-right corner of the screen. Doing so should take you to the next step.

Accessing Gmail’s settings section
Clicking on the “Settings” button will load up a whole new section on the screen for you on the side. However, it’s still not what we’re after at the moment. So click on “See all settings” to get to the next step.
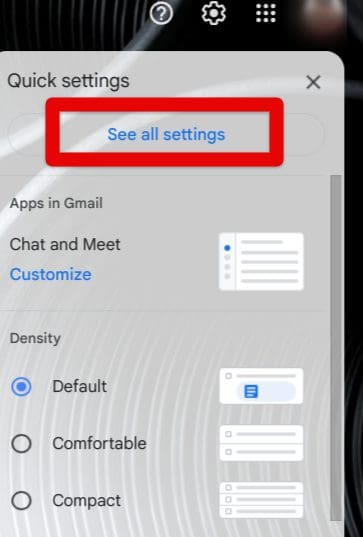
Selecting the “See all settings” option
After completing the previous step, you will be taken straight to Gmail’s main “Settings” portion. Here, it’s possible to click on the “Labels” tab on the upper section of the page to get oriented in the right direction. Doing that will open up the “Labels” section for you, where it’s going to be made easy to create and customize new labels.

Selecting the “Labels” option
Under the “Labels” area, you’ll discover that system labels are also included in the section. These are a tad bit different from what this article is oriented toward. System labels are major constituents of your Gmail account that cover fundamental in-app features, such as Inbox, Starred, Snoozed, Important, Sent, and others.
You’ll find these to be enabled by default, and unless you’re looking to make your Gmail appear clutter-free and neat, it’s not functional to disable these labels. However, coming back to the topic, what you need to concern yourself with resides under the “Categories” space. These are the Gmail labels that you should focus on to increase your overall efficiency.
You’ll find the option to create a new label at the bottom of the “Categories” area. Click on the relevant option to bring up a menu where you will add a name to your label.

Creating a new label in Gmail
You now need to name the label. Use anything that you know will come in handy to you. As soon as you’ve typed in the name, press the “Enter” key, and you’ll be done. Since this will be your first time creating a label, you must skip the “Nest label under” option. There isn’t anything you can do about it for now because there are no parent labels to add the nest labels to. We’ll explain this later when you set up a label first.
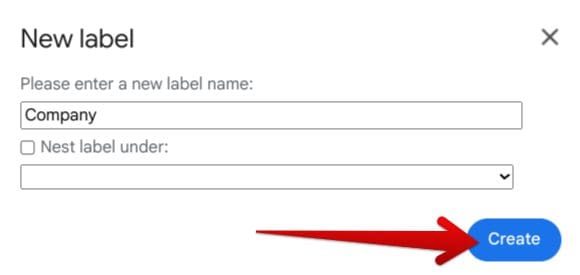
Confirming the creation of the new label
After clicking on “Create,” you will have created your first-ever Gmail label, so good on you! In our case, we named the label “Company,” so it should appear in the side panel to the left of the Gmail user interface right beneath the “Labels” area.
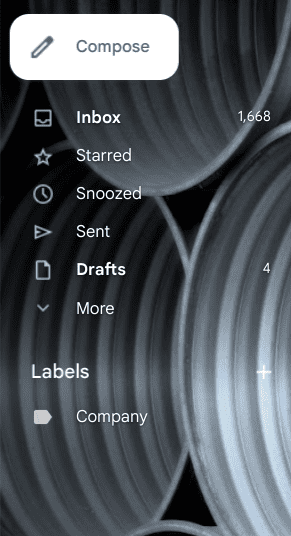
New label created in Gmail
As iterated earlier, it’s possible to personalize your labels to some extent in Gmail. To get started with this, click on the “Options” button beside your label to bring up more options on the screen.
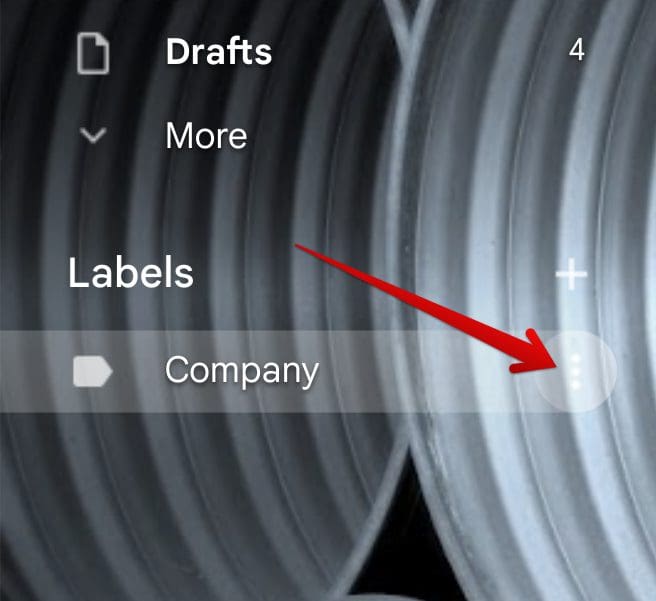
Clicking on the “Options” button for the created label
After clicking the “Options” button, a couple of different customizable features will surface on the screen. Hover over the “Label color” to bring up selectable colors to adorn your label with. Select anything that you feel will pop off. There’s even an option to add a “Custom color” to your label if the default preset of colors is not quite cutting it for you. In addition to that, you can also choose if you want the label to appear under the “Labels” section within Gmail’s side panel.
If you’d like to keep things hidden, click on the “Hide” button below the “In label list” option to move forward. There’s also the “In message list” feature that can help you hide your created label in your inbox when a new message appears.
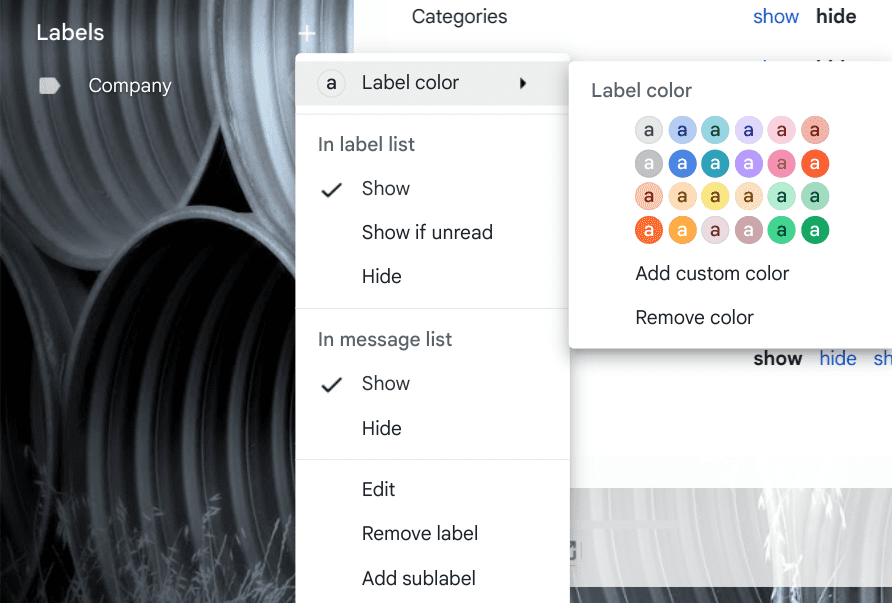
Customizing a label
That’s all there is to creating and customizing a label in Gmail. The process is quite simple and doesn’t warrant you to delve into any complications, unlike what most people misunderstand Gmail labels for. We’ll now further this guide with the “Nest label” feature that we talked about earlier. It’s a highly thoughtful piece of functionality in Gmail that can help you take your account organization to an even better level.
How to use the “Nest label” feature in Gmail
The “Nest label” feature in Gmail is also known as a sublabel. It always appears right underneath the parent label where you have the latter branching out to other facets of your workspace, so things can stay organized and everyone acknowledges their roles and responsibilities. To clear this scenario up with the help of an example, we’ve created a label called “Company” in Gmail.
The labels that we’ll nest under the parent “Company” label can be the names of the employees that have their tasks assigned to them. That way, the managerial person involved will be better able to organize the ins and outs of the workspace moving forward, and make sure that no element is missed. Now, creating a sublabel is an effortless procedure and something that can be done in multiple ways and not just one.
The primary way of utilizing the “Nest label” functionality warrants you to head over to the “Settings” area of your Gmail account again, just like we illustrated in the previous section. Once you’re there, select the “Labels” tab and scroll down to the very bottom of the page. There, click on “Create new label” to further the process.

Creating a new label in Gmail
After clicking on “Create new label,” the same menu as before will pop up, allowing you to click on the “Nest label under” checkmark and then follow things up by selecting the parent label, which in our case, is “Company” as we created earlier.
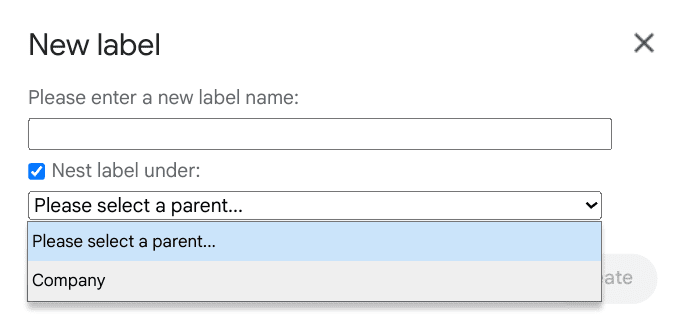
Selecting “Nest label under” and specifying the parent label
Finally, add the name of the sublabel and click on the “Create” button. We’ve used the name of an employee as an example to explain the purpose of a sublabel. What we have in mind is to sublabel all emails relating to “Adam” in that particular category, so things come across as better organized.
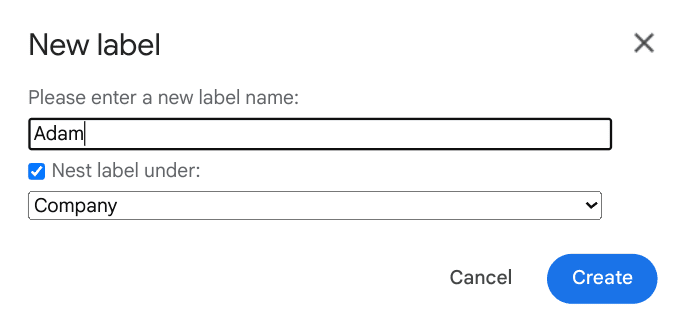
Adding a sublabel
That’s about it! You can painlessly create a new sublabel and utilize the “Nest label under” functionality using the method illustrated. Once you’re done, you’ll find it easy to notice that the sublabel gets added to the parent label in the side panel to the left of Gmail’s graphical user interface. In a similar manner, you can add as many sublabels as you want.
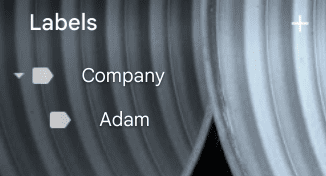
New sublabel created
Alternatively, you can click on the options button beside the parent label and click on “Add sublabel” to create a new sublabel instantly. The latter is an option that you should bear in mind regarding the “Nest label” feature.
How to enable or disable Gmail labels
One last piece of information that you should know about is how to enable or disable Gmail labels. Removing self-created labels will also be important in acknowledging the full scale of the Gmail labels functionality. To get started, make way to the “Settings” area and land on the “Labels” tab. There, you’ll find the options of “Show and hide” right alongside every label, whether that’s system-related or self-created. You can disable labels by clicking on the “Hide” button.
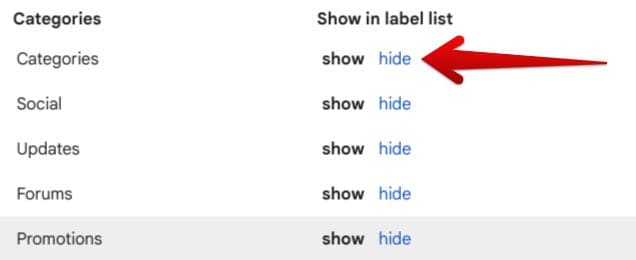
Disabling a category label in Gmail
After clicking on “Hide,” you’ll note that the label you removed will disappear from the toolbar side panel in Gmail. Next up is how to remove a self-created label altogether. Scroll down to the bottom of the page and find the “Remove” button under “Actions.” You should be looking under the “Actions” space. Click on the aforementioned button for the desired effect.

Removing a label in Gmail
- It’s safe to remove a label when you already have multiple emails associated with it. That’s because removing a label does not delete the messages that come with it, so please feel free to proceed.
That’s all there is to know about labels in Gmail! You’ve done a good job reading up until the conclusion of the write-up.
Conclusion
We’ve taken a good look at what Gmail is capable of by highlighting one of its interface-related features. Labels are tags that you can use to associate your emails and make your inbox appear more organized. It’s an effective way to sort things out if you manage a company and receive hundreds of emails per day. Do let us know in the comments section if the guide turned out to be useful for your cause.
We would love to read your feedback!

1 comment
This was hardly an “ultimate guide” but more of an “intro” to Gmail Labels! You didn’t even mention one of the basic uses of Labels, that of Searching!!