Have you been meaning to learn how to enable GPU acceleration for your Chromebook’s Linux? You’ve certainly landed on the right web page. This functionality can help you tap into the full potential of your device and make the operating system’s Linux department perform much better than ever. Keep on reading to understand how it’s done.
Chromebooks have come a long way from their humble beginnings, and there’s just no doubting that. With the standard being upheld by these sleek devices, such as the HP Elite Dragonfly Chromebook and the Asus Chromebook CX9, it may not take long to ascertain the remarkable growth of ChromeOS in various aspects of gaming, business, or education.
For now, though, we’ll dive into toggling on GPU acceleration for Linux on a Chromebook with easy-to-follow instructions. So let’s dive right in with no further ado.
- Recommended read by Chrome Ready: Guide to choosing the best Chromebook for Kali Linux.
What is GPU acceleration?
GPU acceleration is a broad term that can be considered for various applications and not just your Chromebook’s Crostini Linux. For instance, an effective way to toggle on hardware or GPU acceleration on Google Chrome seemingly boosts the internet crawler’s performance and makes it more capable of dealing with different tasks at once.
So what happens is that when you enable a feature like GPU acceleration, your device, a Chromebook, brings in your graphics processor to accompany the CPU in performing some system-centric tasks. That way, the job of your central processing unit is divided, and the device in question is more capable of performing better.
GPU acceleration is offloading tasks to the GPU for enhanced system performance. By computing various software algorithms profoundly with the help of the graphics processor, you’re lending a hand to your CPU in performing basic tasks.
This is a reliable method to follow through with if you realize your Chromebook’s specifications are not entirely up to the mark for specific tasks and processes, such as downloading the best Linux apps and facilitating your core ChromeOS experience.
Now that you know what GPU acceleration is let’s enable it on your Chromebook. The following section is going to take it from here.
Enabling GPU acceleration for Linux on a Chromebook
Like how one would allow the microphone for your Linux apps, kicking things into motion with the GPU acceleration feature isn’t straightforward either. Before you can get into that, though, it’s worth mentioning that you can increase or decrease storage for Linux on your Chromebook anytime you want.
The latter tends to bode well regarding the device’s overall performance, should you choose to check it out. With that said, the following steps will explain how you can toggle on the functionality in question for the coming days. \
1. The first step after opening the Chrome browser is to type the following into your address bar and press the “Enter” key accordingly. You’ll shortly be redirected to the
chrome://flags/#crostini-gpu-support
2. Doing so will open a new window called “Flags” on your Chromebook outside the Chrome browser and highlight the flag you’re looking for. Then, press the toggle beside it and select “Enable” to get to the next step.

Enabling the Crostini GPU Support flag
3. The final step is to confirm the prompt that instructs you to restart your Chromebook so the changes can take effect. Then, simply the “Restart” button at the bottom of the “Flags” window after toggling the “Crostini GPU Support” flag to finalize the process.

Restarting the device
That’s all there is to know about enabling GPU acceleration on your Chromebook! After the device boots back on, the feature should be up and running on your end. First, check out the following section to confirm whether the feature has been toggled on to ascertain whether that is the case.
Confirming the active running of GPU acceleration on your Chromebook
The following steps explain how you can check your Chromebook for active GPU acceleration functionality. Do follow the guidelines until the end for the best results.
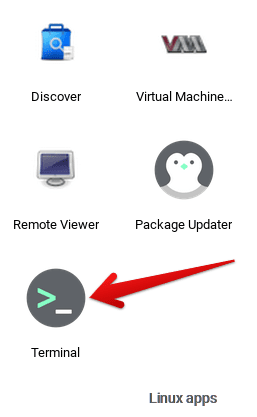
1. The first step is to open up the Linux terminal on your Chromebook.

Opening the Linux Terminal
2. Once done, your primary concern should be to check the terminal for updates. Use the following command to verify that your Linux terminal is updated and upgraded to the latest version.
sudo apt-get update && sudo apt-get dist-upgrade
Updating and upgrading Linux on ChromeOS
3. You now need to install a specific tool on your Chromebook’s Linux that will help us confirm the availability of the GPU acceleration feature on the device. That tool is called Mesa. The following command can be used to install this software painlessly.
sudo apt-get install mesa-utils -y

Installing the relevant utility in Linux
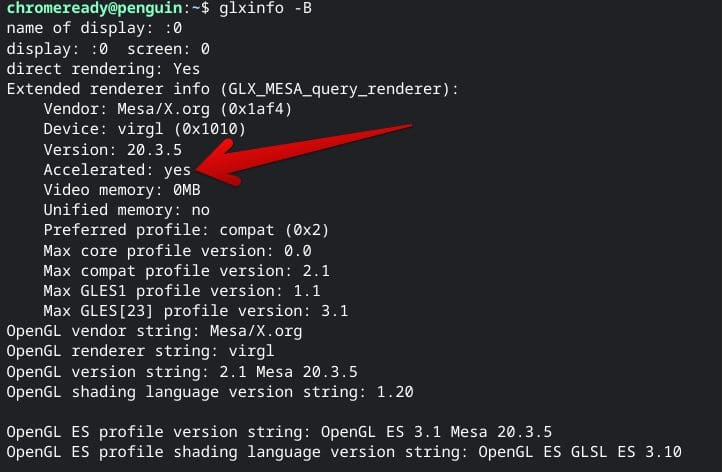
4. Right after that, you will need to input a specific command, and a list of information will be fetched on your Linux terminal. The idea now is to look for the “Accelerated” entry and confirm whether it says “Yes” or “No” beside it.
If you followed the steps described in the previous section successfully, the entry should affirm that GPU acceleration is up and running on your Chromebook.
glxinfo -B

GPU acceleration in Linux enabled
That’s all there is to learn about enabling GPU acceleration for your Chromebook’s Linux. We genuinely hope that you were able to impart helpful information from this guide. It’s high time to conclude the write-up.
Conclusion
Chromebooks consistently offer state-of-the-art convenience and simplicity to their user base, not to mention being utterly speedy machines that greatly benefit from the Linux terminal for expanding their working capacity. Without Linux, one would never have brought apps like WordPress, Scrivener, and LumaFusion to ChromeOS.
In this guide, we’ve talked about a quick and straightforward way of enabling GPU acceleration on Chromebooks for the Linux terminal. As it turns out, the feature resides behind a Chrome flag called Crostini GPU Support, but it’s pretty easy to get to. Do let us know if everything turned out perfectly on your end in the wake of the tutorial.
Chrome Ready wishes you good luck!
- Trending at present: Top 6 Blender alternatives for Chromebook.
