Google Chrome is the world’s most famous internet browser for all that it does excellent for end-users on a reliable basis. The developers have polished it immensely over the years it’s been active, so it’s no wonder how Chrome has outclassed its competition in 2022. However, newcomers such as Brave Browser are also worth looking into. Since Google Chrome accumulates complicated different processes, especially over time, it’s often prone to slow down in terms of performance.
This guide will be an all-inclusive tutorial for making Google Chrome faster on Windows 10. We will ensure that you implement the right tips, tricks, and techniques that let Chrome perform better than ever. We will also discuss various common mistakes to avoid that bog down the Chrome browser and hinder it from reaching ultimate levels of performance.
Making Google Chrome faster on Windows 10/11
If you have noticed that your Chrome browser has been slacking off in terms of performance lately or it’s just not feeling the way it did before, there are some measures that you can take to get things back on track. In this section, we’ll discuss all the different tricks and tips to help you make Google Chrome faster on Windows 10. Just follow the forthcoming techniques carefully for the changes to take effect.
1. Always keep Chrome updated to the latest version
One of the best ways to ensure that Google Chrome remains at the top of its game is by keeping it consistently up-to-date. Chrome releases come out every month, and it’s your job to ensure all updates are fully installed and good to go. Delaying Google Chrome updates never bodes well for Windows 10 PCs, no matter how good your hardware is from the inside. Besides, keeping Chrome up to speed with the latest official version of the browser is really simple.
First, Google Chrome automatically downloads its updates, so you don’t have to check it for this purpose manually. However, Chrome will often prompt you to restart the browser to apply the update. That way, the changes are made system-wide. However, if you repeatedly ignore that pop-up while browsing with Chrome and haven’t shut down the browser in ages, the update will never get applied to Google Chrome.
To make sure this is not the case, head over to the “Settings” section of the application by clicking on the “Customize and control Google Chrome” button in the top-right corner of the screen and then clicking on “Settings.”
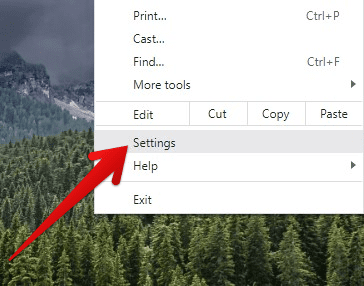
Opening Google Chrome’s settings
As soon as the “Settings” section is all opened up, click on the “About Chrome” section in the sidebar to the left side of the screen.
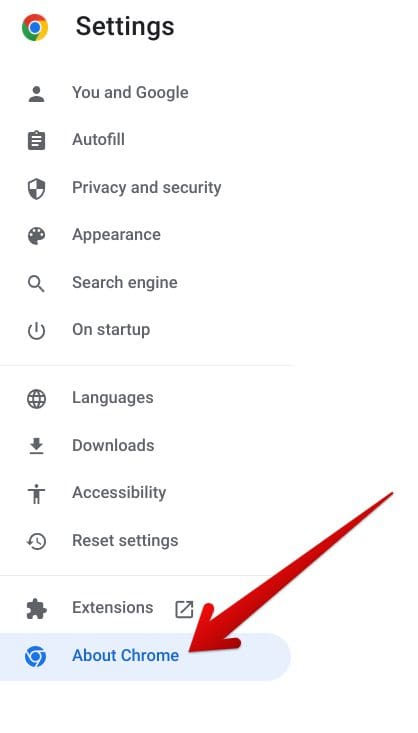
Clicking on “About Chrome”
Once you complete the previous step, click the “Check for updates” button to help Chrome detect any upcoming updates. Again, make sure to let the browser complete the scan before closing down the window. If there’s something available for you, Google Chrome will automatically begin downloading the update. In other cases, you will be shown that it’s required to restart Chrome for the changes to take effect.
2. Utilize the Task Manager
The Task Manager is one of Google Chrome’s superpowers, making it possible for the browser to monitor all apps and processes running off it so that the performance metrics can be analyzed, such as CPU, RAM, and GPU. If you wish to make Chrome faster on your Windows 10 PC, you have to fire up the Task Manager utility and search for any processes that might be using up a lot of RAM or exhibiting unusual CPU usage.
To open Chrome’s Task Manager, click on the “Customize and control Google Chrome” button in the top-right corner of Chrome’s interface and then continue to move your cursor over the “More tools” button. You should be able to see the “Task manager” option right afterward.
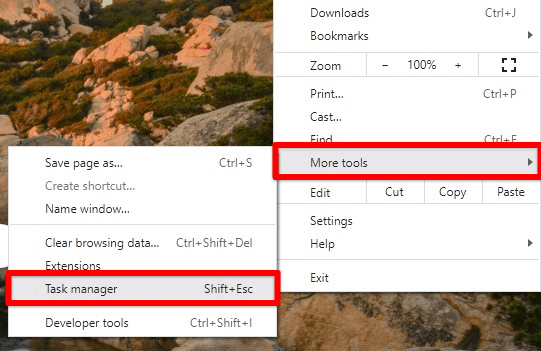
Accessing the Chrome task manager
Launch it on your device and then look for any process using many system resources. Search for unusual happenings. Doing so should narrow down your overall search. Once you find the culprit, select it once and then click on the “End Process” button, as seen in the screenshot below, to finalize the process. Repeat the operation as often as needed, and you’ll soon observe an immediate bump in Chrome’s performance.
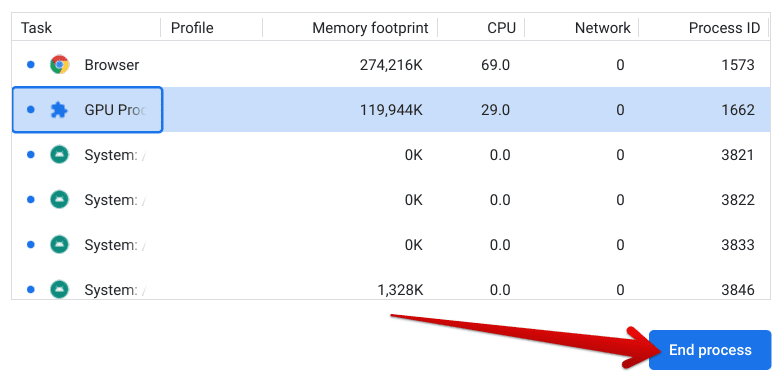
Ending the process in the Chrome Task Manager
3. Uninstall malfunctioning or useless Chrome extensions
If you notice some of your downloaded Chrome extensions repeatedly stopping or crashing by themselves, you probably need to go ahead and uninstall the affected add-ons. That way, you can speed up the Chrome browser on your Windows PC by eliminating an extension slowing your system down. Go to the “Extension manager” section on your Chrome browser and click the “Remove” button to move ahead.
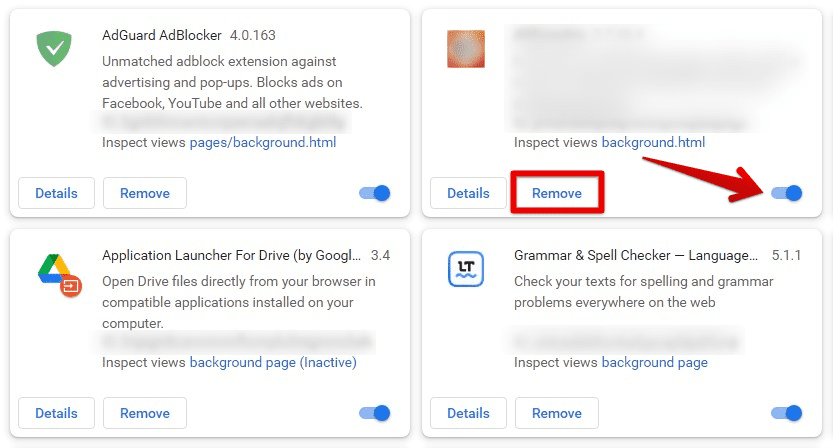
Removing suspicious or harmful extensions
The same goes for extensions that you no longer need. People often download many Chrome extensions but end up using only a few. If you find yourself doing the same, we highly recommend evaluating all the add-ons installed on your browser and removing the unwanted ones accordingly.
4. Enable the “Preload pages” feature in Chrome
There’s a unique feature in the Google Chrome of Windows PCs that can effectively make the browser speedier and more convenient to use daily. The functionality in question is called “Preload pages for faster browsing and searching.” It’s found within the “Cookies and other site data” section of Chrome’s “Settings.” Open this part of the Chrome browser up, therefore, and type in “Preload pages” in the search bar provided there.
You’ll be led to this particular functionality from there as soon as you do that. You’ll first need to click on the “Cookies and other site data” tab and then scroll down to find “Preload pages for faster browsing and searching.” Here’s what the feature looks like on your end. There’s going to be a toggle right beside the setting. Click on it to enable the function and enjoy a faster Chrome that works better than ever.
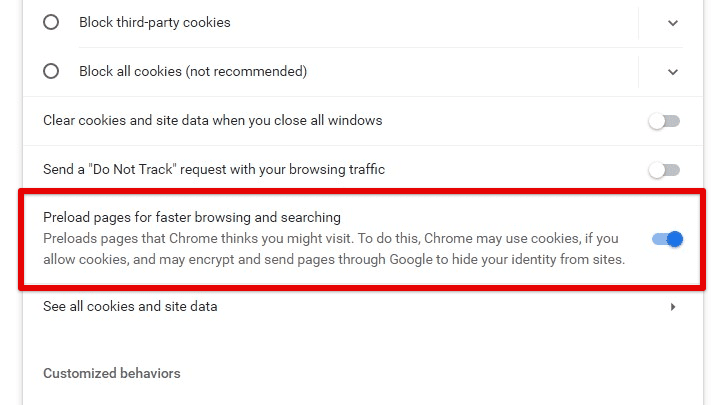
Enabling the preload feature
5. Use the “Clean up” feature in the Chrome browser
Your Google Chrome browser can use some freshening up, and the best way to get that done is by removing bloatware, ads, and other nonsense software on the browser. That is where the “Clean up computer” feature on Chrome lets you do just that. This functionality can be accessed by first opening the “Settings” area, which should be easy to do now that we’ve gone past it a couple of times, and then clicking on “Reset settings” in the sidebar to the left.
Doing so should take you straight to the “Reset settings” portion of the Chrome browser. Next, click the “Clean up computer” button, as shown in the screenshot below, and you should be ready to go. Follow the instructions laid out ahead, and you should be able to begin Chrome’s clean-up in no time.
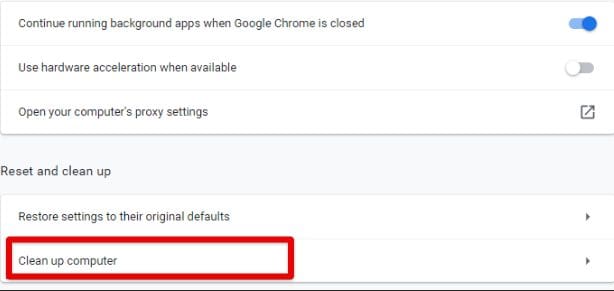
The “Clean up computer” feature on Windows
Using the clean-up feature in Chrome is one of the better ways of speeding up the browser on Windows that you shouldn’t skip no matter what. With that said, let’s move on to the final way you can make Google Chrome perform better than ever on the operating system of your choice.
6. Clear your browsing history and cache
Last but not least, clearing your browsing history and cache in Google Chrome is a tried and tested way of speeding the browser up in terms of its performance. Moreover, it’s straightforward; all it takes is to head to the “Customize and control Google Chrome” area and select the “History” section. In other words, the shortcut keys of “Ctrl” and “H” for opening the “History” page on Chrome also work.
As soon as you’re there, you can click on the “Clear browsing data” button in the sidebar to the left. The screenshot below should guide you on how to make that happen. Clicking “Clear browsing data” will load a new page for you. This is where we’ll be jumping right into the action.
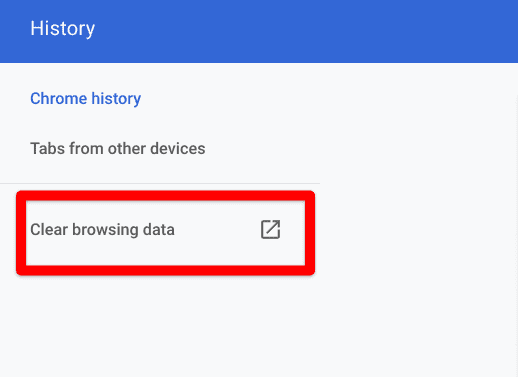
Clicking on “Clear browsing data.”
After the previous step, a menu will appear and make it possible to clear the browsing data of your Google Chrome. Make sure to select the “Advanced” section in the menu and set the “Time range” to “All time.” That way, you can choose the various elements of your browsing data to delete, such as “Cookies and other site data” and “Cached images and files.” Make sure to check off these entries for the best results.
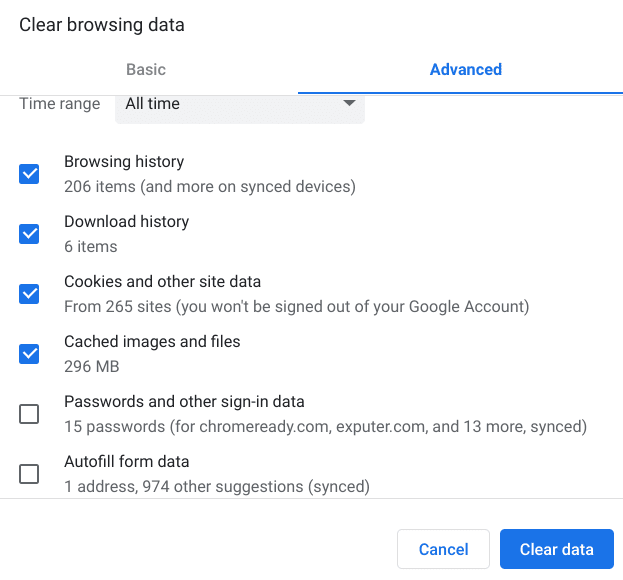
Advanced browser history clearing settings
After that, you can click on “Clear data,” and the process will be finalized in a minute. That’s all there is to know about making Google Chrome faster on Windows 10. We will now be concluding the article. Thanks for reading!
- Related read for more detail: How to check and clear your browsing history on Google Chrome.
Conclusion
We’ve discussed some of the most workable techniques that allow Google Chrome to perform better than ever before. If you pay a little attention, you’ll notice that some are wary of not letting unnecessary stuff run rampant in Chrome. That way, you’ll effectively be taking care of most of the job here, but putting in that extra effort of using RAM-saving extensions will bring you excellent results.
