The cloud-based storage of Google Drive allows you to save photos, videos, and all other types of media files. Instead of going through these files individually, you can choose to upload them in bulk. Google Drive is an ideal all-in-one solution for storing, viewing, sharing, and backing up your photos. To use Google Drive regularly, one must understand multiple ways of uploading files. Like other cloud storage services, you can upload images to Google Drive in several ways. Each one of these methods is specifically useful in varying applications.
The following article will look at different methods for uploading bulk photos to Google Drive. Some of these procedures are automated, while others require you to pick each file separately. Once you have uploaded the images, they can be saved as a backup or shared with your contacts through albums and other utilities.
Why upload photos to Google Drive?
One of the most crucial aspects of any cloud-based storage is its backup capabilities. When you keep an entire gallery in a single location, it becomes prone to data loss or any other form of compromise. Remote storage such as Google Drive works perfectly fine to keep these pictures safe. It saves your photos and videos and gives quick and easy access whenever you want. You will not find any difference to locally stored images other than that you need an active internet connection to make modifications.
Other benefits include never losing your pictures, even if the storage gets corrupted with viruses or malware. The photos you upload to Google Drive are kept safe with high-grade security protocols that cannot be easily breached. Moreover, doing so will also remove a considerable chunk of the burden from your device’s storage. Any files set to be automatically uploaded to Google Drive will take away little to no space on your hard drive or memory card.
Besides, in more cases than not, you won’t have to upload these photos manually. When you set up Google Drive for desktop, all files are synced on their own without any need for individual alterations. Any edits made to that folder after the initial transfer are also mirrored in Google Drive. You also get to enjoy a range of sharing and compatibility features. None of these options are available on any local operating system.
Checklist for uploading bulk photos to Google Drive
Before you start uploading photos in bulk, have a speedy internet connection. It becomes increasingly important if your gallery contains a significant number of files. Also, make sure that all photos are within reasonable size limits. Pictures that are larger than 150 megapixels cannot be uploaded as quickly. Though such files are relatively uncommon, you will probably never have to deal with them.
Another crucial thing to consider is that all photos on your device conform to the allowed file types. These include .jpg, .png, .webp, .gif, .heic, and RAW images. Any file that does not fall into one of these categories might get omitted during the upload process. Lastly, keep checking that you have enough storage available on Google Drive. Remember that this account storage is shared across multiple products such as Photos, Drive, and Gmail. If you have consumed all storage, more files cannot be uploaded without purchasing a new package.
Uploading bulk photos manually
If the photos you want to upload are relatively less in number, then a better option would be to upload them manually. However, that does not mean you must upload them individually. All you need is to create a zip file on your system and then compress all photos inside that file. That way, you get to choose between different types of files, which usually saves considerable effort on all ends. Remember that if there are numerous photos, you are better off with an automated alternative discussed in the next section.
Step 1: Move all photos to be uploaded to a single folder on your PC.
Step 2: Right-click on that folder icon to open file options. Click on “Add to folder_name.rar” from the drop-down menu. Doing so creates a zipped folder containing all photos in that location.
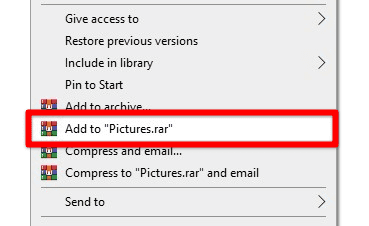
Compressing the pictures folder
Step 3: Launch your preferred internet browser and go to “Google Drive.” Log in with your account.
Step 4: On the “Google Drive” homepage, notice the options on your screen’s left-hand side. Click on the “New” button.
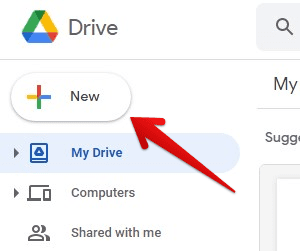
Uploading a new file
Step 5: Select “File upload” from the drop-down menu. A file selection window will pop up on your screen. Browse to the zipped file you created in Step 2 and click “Open.”
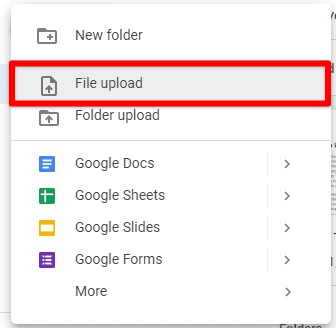
Selecting the file upload option
Google Drive will start uploading that file at once. You can check the process progress from a tab in the bottom right corner. Once the upload is completed, you can relocate those photos to any other folder inside Google Drive.
Depending upon the combined size of those photos, it may take a few minutes to several hours for the entire process to finish. If your device loses the connection midway, the upload progress is saved and resumes as soon as the connection is restored.
Uploading bulk photos via Google Drive for desktop
For those with thousands of photos, uploading them through Google Drive for desktop seems far more reasonable. When installed, the setup for Google Drive enables you to mirror any file or folder on your system with the online storage. Interestingly, your Google Drive account also links with Google Photos, so you won’t have to install any separate software. Google Drive for desktop contains inherent filters that can send all media files directly to their respective service.
Step 1: Launch your preferred internet browser and go to this link. Download Google Drive for desktop. This setup is compatible with all versions of Windows 7 and onwards.
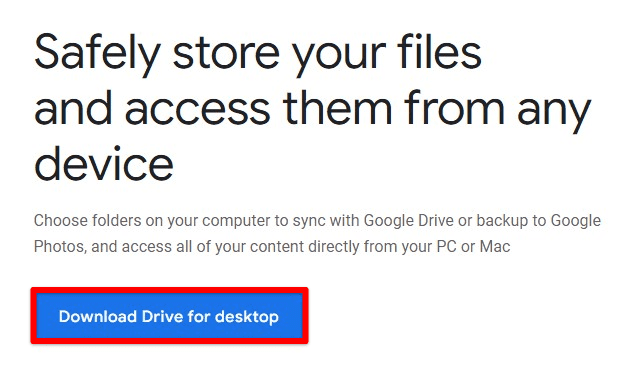
Downloading Google Drive for desktop
Step 2: Run the .exe file as an administrator and allow it to make changes to your device. When the installation finishes, a Google Drive icon will appear in the Windows taskbar.
Google Drive icon in Windows taskbar
Step 3: A small window will pop up next to the icon. Click on the gear icon in the top right corner and go to “Preferences” from the drop-down menu.
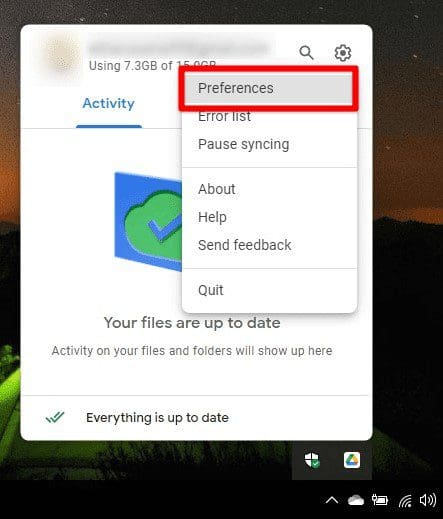
Opening Google Drive preferences
Step 4: This will open the “Google Drive Preferences” window. Make sure that you are on the “My Laptop” tab. Next, click on the “Add folder” button.
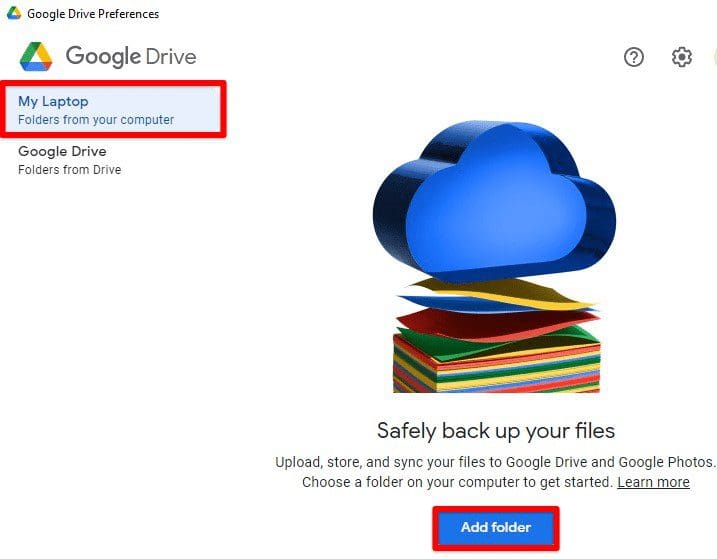
Adding a folder from your computer
Step 5: Go to the folder where all photos are located, select it, and click “Select folder.”
All files within that folder will start syncing with Google Drive automatically. If the folder only contains pictures and images, these contents are uploaded to Google Photos on their own. Moreover, you can upload more photos in the future by just copying them to this location.
Uploading bulk photos through third-party applications
It is possible that the photos you want to upload already exist in another cloud storage. In that case, you will have to link that service with Google Drive so the contents can be transferred in a single step. A third-party application can be used for such purposes. One of the most reliable and secure platforms for doing so is MultCloud. It lets you integrate multiple cloud storage accounts under the same interface. With these accounts linked, you can transfer files between any two of them.
What’s great is that MultCloud has no local storage involved, as it can upload the photos directly from one cloud to another. It can be automated to a degree where transfer patterns are stored and activated whenever a new media file is uploaded to that library. It keeps both storages perfectly synced with each other.
Step 1: Go to this link and click on “Sign Up for Free.” On the sign-up page, fill in the details for your account.
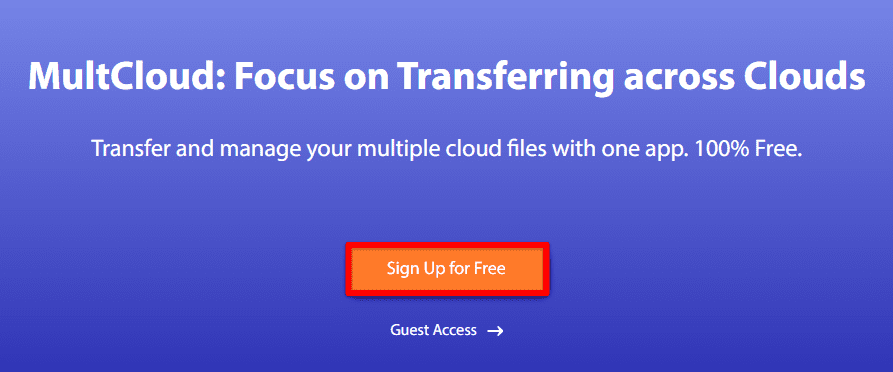
Signing up for MultCloud
Note: You need a valid email address to create an account on MultCloud. It may also be signed in with Facebook or Google. Besides, you can also check out their service as a guest without linking any account.
Step 2: After signing in, go to the “Add Cloud” tab in the left pane. Here, you will see a list of cloud storage services.
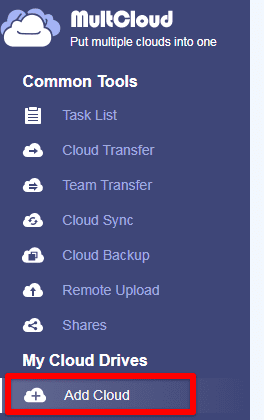
Add cloud tab
Step 3: Add “Google Drive” and the other cloud from which the photos are to be uploaded.
Step 4: Once both accounts have been added successfully, click on the “Cloud Transfer” tab under “Common Tools.”
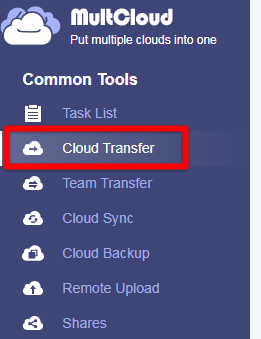
Cloud transfer under common tools
Step 5: MultCloud will now ask you to select a source and destination. Select “Google Drive” as the destination and the other storage as the source. Next, click the “Transfer Now” button in the bottom right corner.
After the transfer finishes, all photos in your online photo library will now be in Google Photos. Since the transfer takes place entirely over the internet, the time it takes to complete may vary. For that reason, rather than transferring the files right then, you may want to schedule it after working hours. You may also choose to delete the photos from the source account afterward.
Conclusion
Google Drive provides fully equipped file storage across all of your devices. There are three different processes for uploading pictures to Google Drive in bulk. Firstly, you can compress all photos into a zipped folder and upload them as a single file. Another method is to sync a local folder via Google Drive for desktop. Also, if your photos are already on the cloud, they can be uploaded in bulk through MultCloud or other third-party applications. Would you like to explore Google Drive functionality even further? Learn how to embed audio in Google Drive.
