Chromebooks are exceptional when it boils down to accessibility features. From using a secure DNS to switching up the different ChromeOS release channels, this unique operating system has a ton of depth. Making novel discoveries within a Chromebook always turns out to be rewarding.
From enabling experimental features like Calendar View to revamping how your device looks with the help of changing your wallpaper, the sky is the limit when it boils down to ChromeOS. Even the world’s famous game launcher—Steam—is making headlines on a select number of Chromebooks. You truly have to hand it to the operating system here.
Anyhow, were you aware of the fact before that it is possible to hide your files in a Chromebook? You can indeed camouflage your data in plain sight with the help of the “Files” system utility that’s present prevalently in ChromeOS.
There’s a nifty feature that lets you conceal your files from others whenever the situation warrants it. We’ve put together this article to show you how to do just that. Keep on reading, therefore, until the very end for the best results.
- Recommended from Chrome Ready: How to close all browser windows at once on a Chromebook.
The best way to hide files on ChromeOS
Unbeknownst to many, the following steps will discuss the exact process you can use to hide files on the fly in ChromeOS. You have to be wary of a neat renaming trick to get the job done. We’ll go over that in extra detail, so don’t fret.
With that said, let’s get the ball rolling with this tutorial.
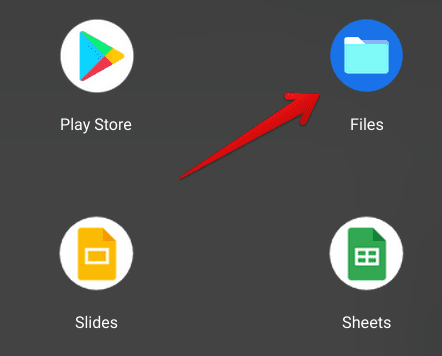
1. The first step is to open the “Files” system app on your Chromebook. This can be done quickly from the Chromebook Launcher or the ChromeOS shelf if you have it pinned there.

Opening the “Files” system app
2. You’ll be taken straight to the “Files” app’s window as soon as you’re done there. Now, click on the “More” button shaped like three vertical dots in the top-right corner of the section. Doing so should disclose several options for you.

Revealing more options in the Files app
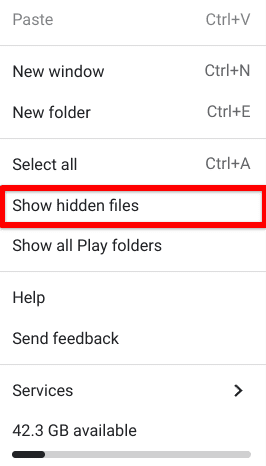
3. Right after that, a list of options will appear on the screen for you. You’ll need to click on “Show hidden files” of all the different variables” to get to the next step.

Showing hidden files
4. This might seem quite the opposite of what we’ve set out to do, but bear with us for a little more. You now have to select any file you want to hide from the common eye and rename it. When doing the deed, add a period or dot at the beginning of the file’s name and press the “Enter” key. Repeat the process with as many files as you’d like before you can continue to the next step.

Renaming the file to hide it
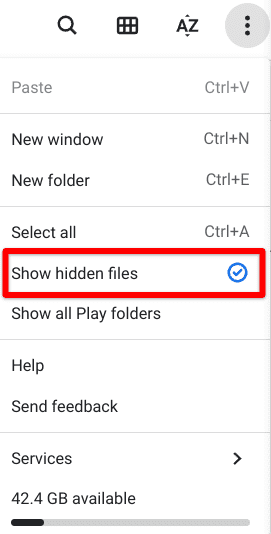
5. After successfully renaming the file with a period at its start, click on the three vertical dots button once more and find the “Show hidden files” button. You’ll need to click on it again to unselect the feature. Check out the screenshot below for information on getting this done.

Toggling off “Show hidden files”
That’s about it! You’ve successfully learned how to hide files on ChromeOS. It’s one of the better features you’ve got to learn with your Chromebook by your side, apart from a dozen others.
If you’re after more like-minded functionalities to improve the way you use your device, check out our curated guide on the best Chromebook features to try in 2022. For now, the time is nigh to conclude the article.
Conclusion
Chromebooks are utterly capable machines that many different domains have started to pick up in 2022. ChromeOS remains the dominant operating system in most schools in the United States, and it’s easy to see why. A wide variety of educational applications combined with the mechanical durability of these devices is nothing but awe-inspiring.
In addition, Chromebooks are machines that have never been hit with ransomware. They’re as secure as a system software can get, with many features accommodating their robust build-up. If you’re privacy-oriented and frequently have to lend others your Chromebook, you must know how to hide files on ChromeOS.
It’s either that or learn how to use your Chromebook as a guest, so it’s possible to apply the same formula to others and prevent privacy invasions drastically. If you’ve found this helpful write-up for your cause, please let us know in the comments section. Chrome Ready wishes you good luck!
