Google Photos is nothing less than a blessing for someone who uses cloud storage regularly. It works as an all-in-one storage space for your media files such as pictures, videos, and more. Besides that, Photos’ in-house editing tools have also been highly praised. Since its launch, Google Photos has been enriched with regular updates, resulting in several unique features.
It is a multimedia space that can handle most of your on-the-go needs. With the release of photo books and slideshows, it is now also stepping into the presentation domain. If you did not know this before, Google Photos allows you to create a thrilling slideshow from the pictures stored on your account. These renderings are a great way to display many images that can narrate a store or depict an event. If you are new to using Photos, learn to set up and use shared libraries.
Slideshow on Google Photos
It turns out that many users are still unaware of the fact that they can draft such slideshows on Photos. That is what this article is here for. We are going to detail how to make them on desktop as well as mobile devices. Even though they are not that customizable, you can still use them with other third-party integrations. That enables these slideshows to be displayed with background music or transition effects. However, no such support is available within Photos as of now.
When creating a slideshow on Google Photos, you can either select an entire album or hand-pick specific pictures within a folder. These photos are then displayed in a loop, one after another. Please note that if you want to take things up a notch, one option is to export your picture to Google Slides. There, you can chip in as much customization as you want. For the sake of this article, however, we will stick with creating a slideshow within the Google Photos interface.
There is no option to change the amount of time a specific photo is displayed. It is a much-needed slideshow option that is undoubtedly lacking in its current form. When you put all pictures from an album into a slideshow, the photos will be presented chronologically. Google has made it possible for you to cast such slideshows on external devices which support Chromecast. Also, do not worry about them occupying your cloud storage space. These slideshows are played directly from the source folder/album, and no additional copies are created. Have you noticed some duplicates in your Photos gallery? Follow our article, which details four ways to delete duplicates from Google Photos.
Making a slideshow in Google Photos on desktop
As described earlier, you can create these slideshows on desktop and mobile devices. You must access Photos from a browser when making one on your PC. They cannot be drafted from Google Drive for desktop or cloud linking services. There are local slideshow features on many operating systems as well. If you want to include photos stored on your hard drive, make sure that they are being synced with Google Photos. Otherwise, you won’t be able to select them for the slideshow on your browser.
From the entire gallery
One option is to include all of your photos in the slideshow. For doing so, there is no need to create any albums. The transition can be started directly from the Google Photos homepage.
Step 1: Launch your preferred internet browser and open “Google Photos.” Log in with your account.
Step 2: Make sure that you are on the homepage. This page displays all of your photos currently stored on Google Photos. Click on any picture to open it up. That picture is maximized onto your screen with a black background.
Step 3: Click on the three-dot icon in the top right corner. It drops a list of options, including slideshow, download, add to album, archive, and more.
Three-dot icon on the desktop
Step 4: As soon as you click on the “Slideshow” tab, it takes you into the display mode and starts transitioning from one picture to another.
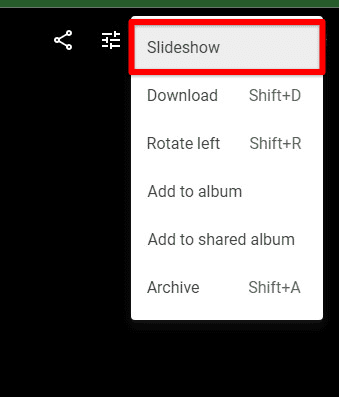
Starting slideshow on desktop
There is a gray menu in the bottom left corner. It has the controls for next and previous pictures or pausing the slideshow entirely.

Slideshow controls
Note: You can press the “Esc” key to exit the display mode at once.
From a specific album
The second method is to choose specific photos from the gallery. A neat trick is to have an album that contains all pictures you want to include. Just head over to that album and start the slideshow from combined options.
Step 1: Launch your preferred internet browser and open “Google Photos.” Log in with your account.
Step 2: Make sure that you are on the homepage. On the left-hand side, you will see a menu pane. Click on the “Albums” tab. It displays all albums created till now.
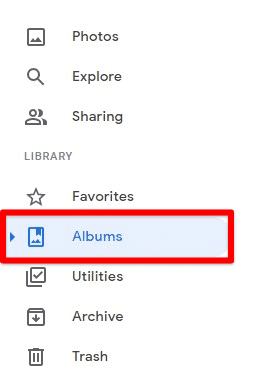
Albums tab
Step 3: Click on a particular album preview to open it.
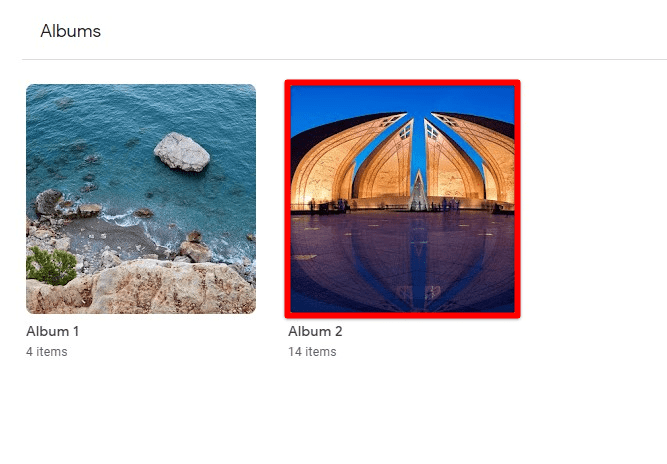
Opening an album
Step 4: Move to the top right corner of your screen and click on the three-dot icon. It drops a list of options which include slideshow, download all, edit album, set album cover, and more.
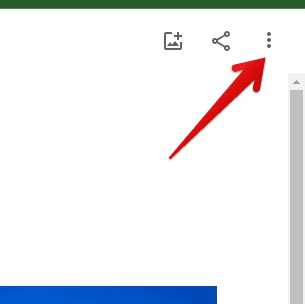
Opening album settings
Step 5: As soon as you click on the “Slideshow” tab, it takes you into the display mode and starts transitioning from one picture to another. There is a gray menu in the bottom left corner. It has the controls for next and previous pictures or pausing the slideshow entirely.
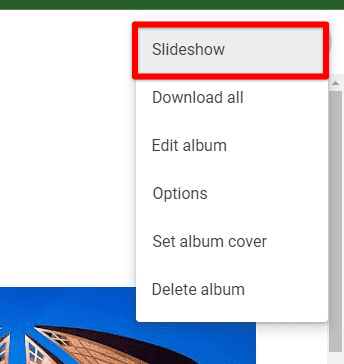
Starting slideshow on album
Note: You can press the “Esc” key to exit the display mode at once.
Making a slideshow in Google Photos on Android
When it comes to creating a slideshow on Android or mobile devices in general, there are again two options. You can either create it from the official mobile application or do so from the browser installed on your phone. There is not much difference in both of these methods. All it depends on is which interface you are more comfortable with. As long as you have the pictures already synced with Google Photos, you can create a slideshow on any rendition.
From mobile application
Firstly, we will look at the method involving the Google Photo mobile app. Here, it is important to note that if you are not using an Android device, the application will most probably not be present on your mobile. In that case, you need to download it from the app store. On the other hand, in all Android devices, the Google Photo application comes pre-installed by the manufacturer.
Step 1: Open the “Google Photos” application on your mobile. Log in with your account.
Step 2: Make sure that you are on the homepage. At the bottom, you will see four different tabs. Tap on the “Library” tab present on the far right side.
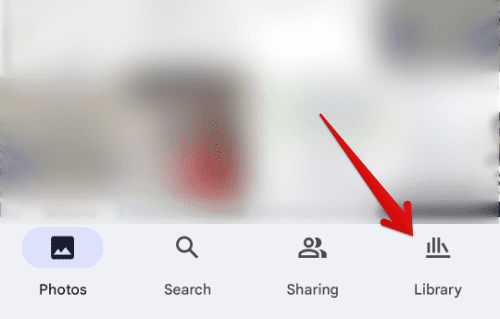
Library tab
Step 3: Scroll down to find the “Albums” section. Tap on a particular album to open it.
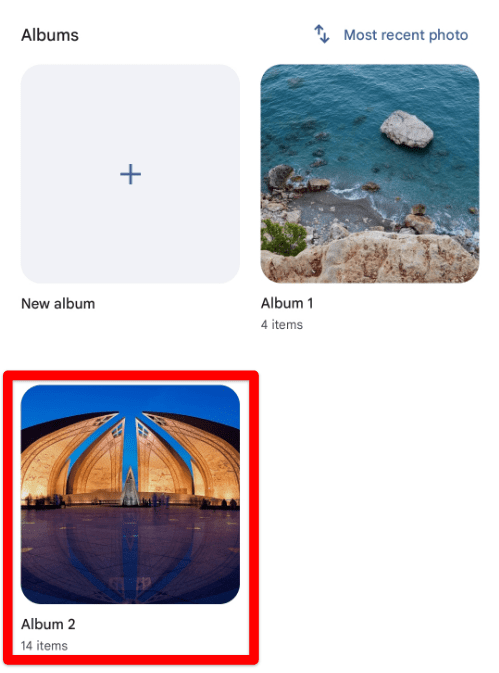
Opening an album on the mobile app
Step 4: Select the first picture preview and tap on the three-dot icon in the top right corner. It opens up a menu pane that slides up from the bottom of your screen.
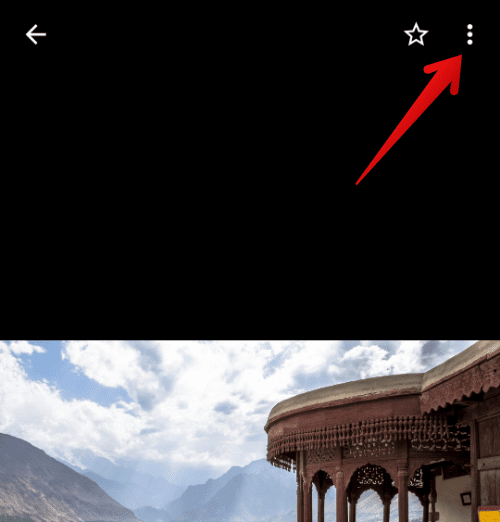
Opening album settings on the mobile app
Step 5: There is a horizontally arranged list at the top of this menu. Slide it towards the right and find the slideshow icon. Tap on it to start the slideshow at once.
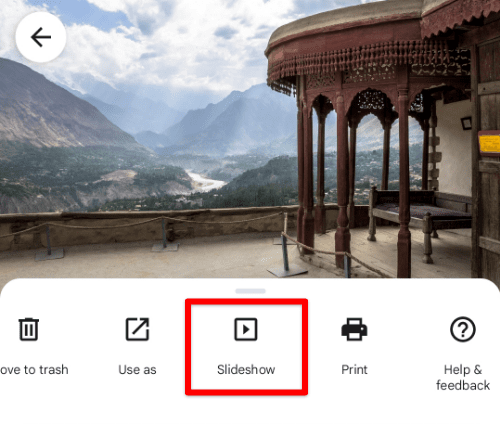
Starting slideshow on the mobile app
Note: You can tap anywhere on the screen to exit the slideshow.
From browser
The second method involves the internet browser installed on your mobile. Sometimes, the applications do not support as many features as on the desktop version. Besides, whenever you plan on some customization through a third-party app, you will need to create the slideshow from the browser instead of the app.
Step 1: Launch the preferred internet browser on your mobile phone and go to “Google Photos.” Log in with your account.
Step 2: Make sure that you are on the homepage. In the top left corner, you will see a hamburger menu icon. Tap on it to open a menu pane that slides in from the right side.
Hamburger menu icon
Step 3: Scroll down to the “Library” section and tap on “Albums.”
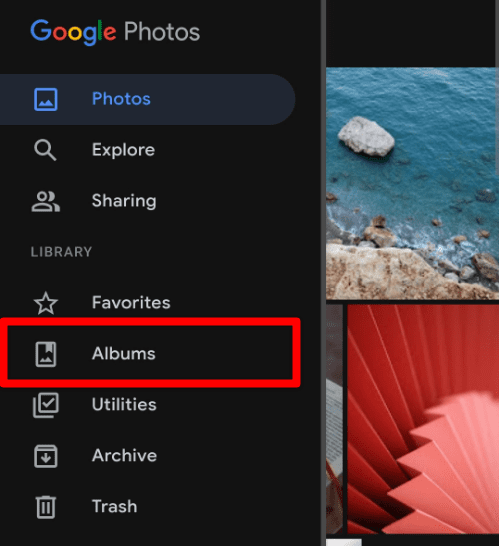
Albums tab on the browser
Step 4: The “Albums” page display all albums created till now. Tap on a particular album preview to open it.
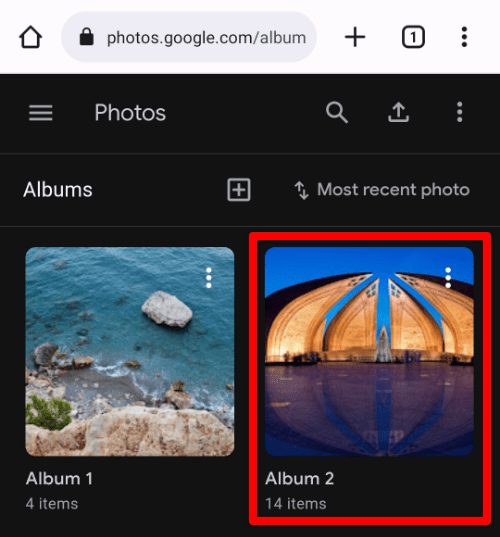
Opening an album on the browser
Step 5: Tap on the three-dot icon in the top right corner of your screen. It drops a list of options which include slideshow, download all, edit album, set album cover, and more.
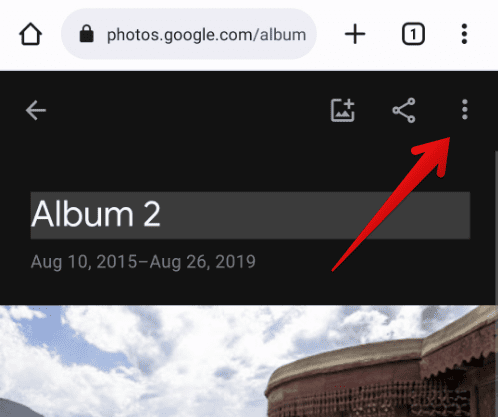
Opening album settings on the browser
Step 6: As soon as you tap on the “Slideshow” tab, it takes you into the display mode and starts transitioning from one picture to another.
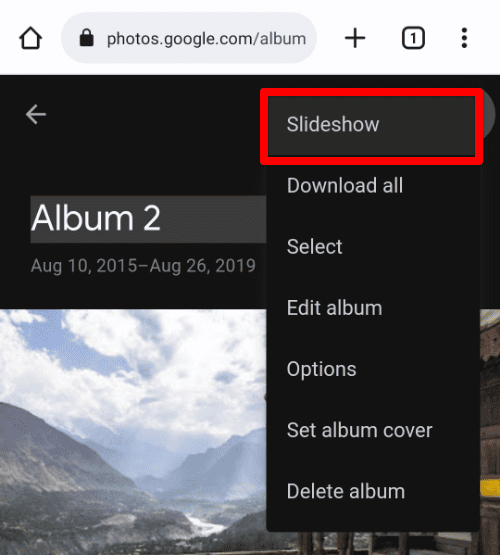
Starting slideshow on browser
Note: You can tap anywhere on the screen to exit the slideshow.
Conclusion
Google Photos lets you display all photos in your gallery or album in a slideshow. These slideshows cannot be modified much but are a great way to go through your pictures. You might also want to cast the screen onto a more prominent display to relive these memories with friends and family. That can be done through Chromecast or screen sharing in a virtual meeting. Never shared your screen before through casting? Here is a detailed guide on screencasting from Chromebook.
