Have you just come across an image that you’re trying quite hard to remember where it’s from but to no avail? Several users have been in the same position as you and still are with no potential solution in mind. However, Google hasn’t achieved its status as the world’s best search engine for nothing. Over the years, the developers of the program have added a neat feature that lets you trace the source of any photo you want as long as it exists on the internet.
This functionality has allowed several to get down to the bottom of things and discover the origin of the whole mystery. In this guide, we’ll discuss how to reverse search with an image on Google and quickly get into a sea of information regarding your query. Without wasting any further time then, let us begin this guide.
What is Google image reverse searching?
Google has been subject to a tremendous amount of improvement as a search engine. As opposed to using words and strings of text to input in the popular program, the famous web crawler makes it possible to use images and do searches accordingly. That way, if you don’t have quite the words for what you’re trying to look for, you can easily insert an image to do the handiwork instead.
This is one of the easiest ways of getting what you need from Google, especially regarding search results. The veteran algorithm of the well-established search engine makes sure nothing escapes from its diligent eyes, so you’re pretty much set with searching online using an image. The latter, therefore, is precisely what’s known as reverse searching an image. Or in other words, it’s all about digging out the source of a JPEG, PNG, or any other image format from the internet.
Now that you have a brief idea regarding Google reverse image search let’s look at how you can pull off the technique efficiently. Time to get going.
Reverse searching with an image on Google easily
Reverse searching with an image on Google is pretty straightforward, no matter your platform. Whether it is a PC you’re running or a smartphone with a mobile operating system — even a Chromebook, perhaps — nothing will bar you from implementing this curious technique on your end efficiently. For this purpose, the following steps explain what you need to do to get the ball rolling.
1. The first step is to visit the official Google Images search engine. Click on the “Search by image” icon in the screenshot below.
Clicking on the “Search by image” icon
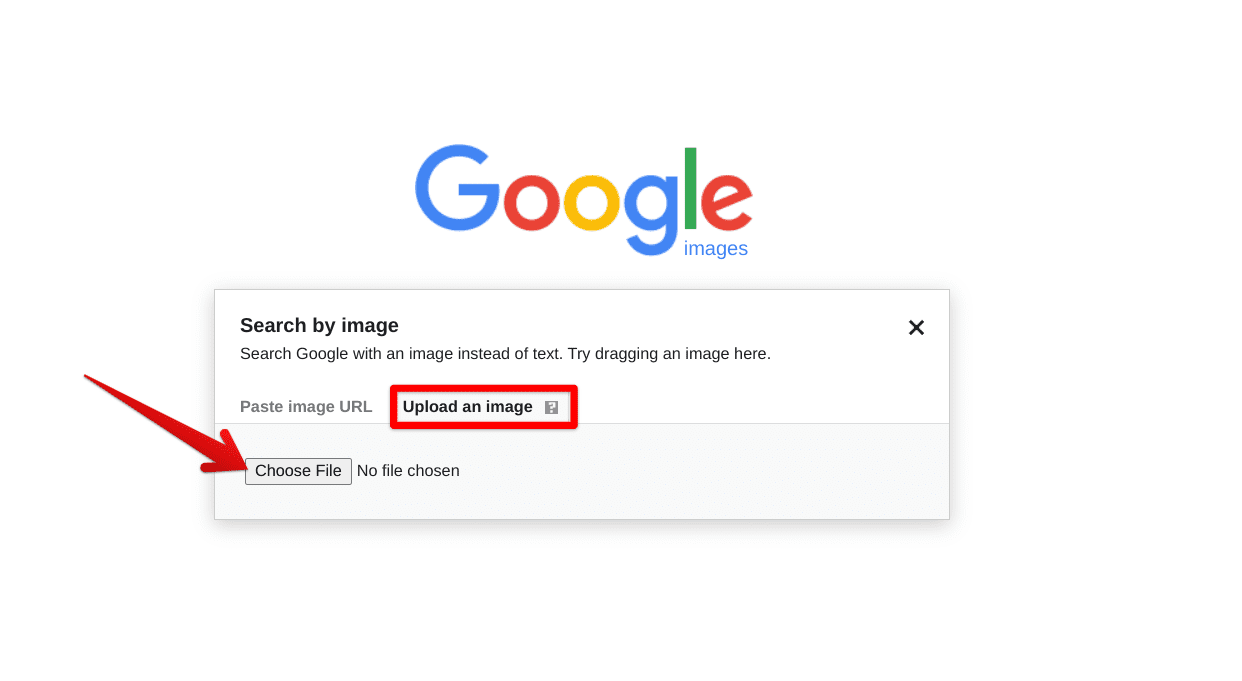
2. You will observe the contents of the screen changing. Now, searching for the desired image will be possible using a URL that is short for Uniform Resource Locator or your uploaded image. In case you’re not aware, a URL is also known as a link, and each photo on the internet has a link that can be copied.
Since the photo is sitting on your computer in local storage, use the second option to upload the image. Click “Upload an image” and select “Choose File” to bring up your PC’s menu. Select a photo afterward to finalize the process.

Uploading an image to reverse search
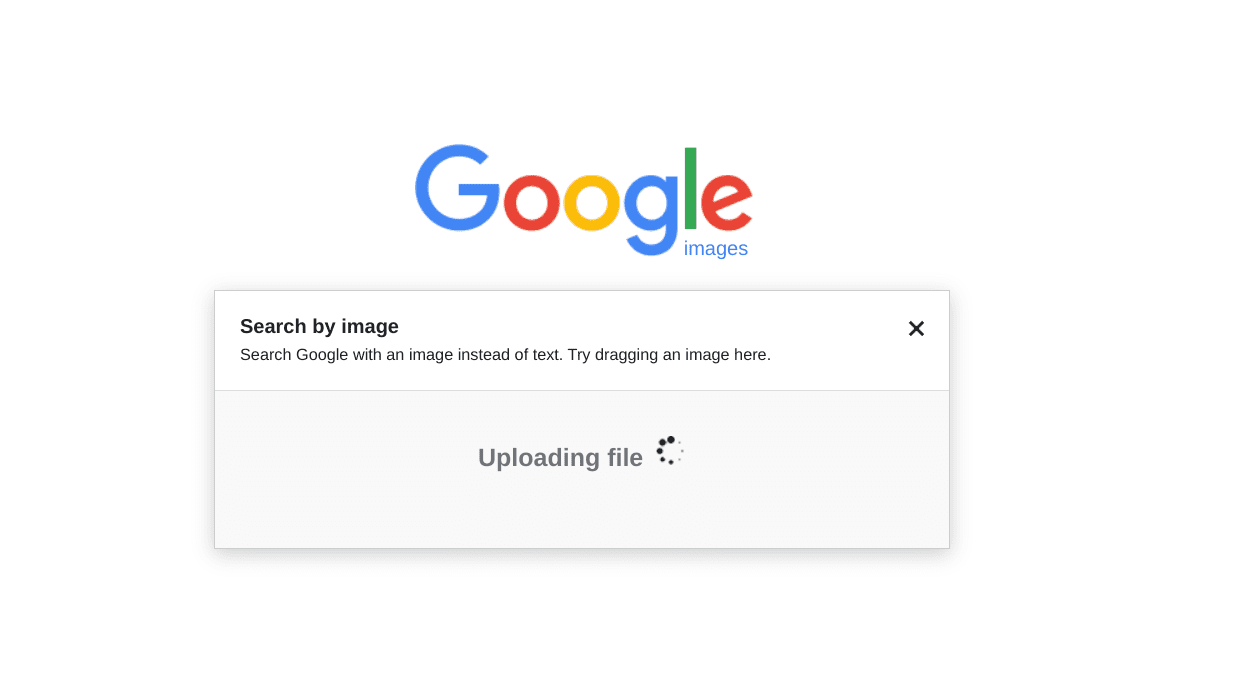
3. The search engine will take a moment to finish the upload process. So wait it out until the latter clears up.

Uploading started
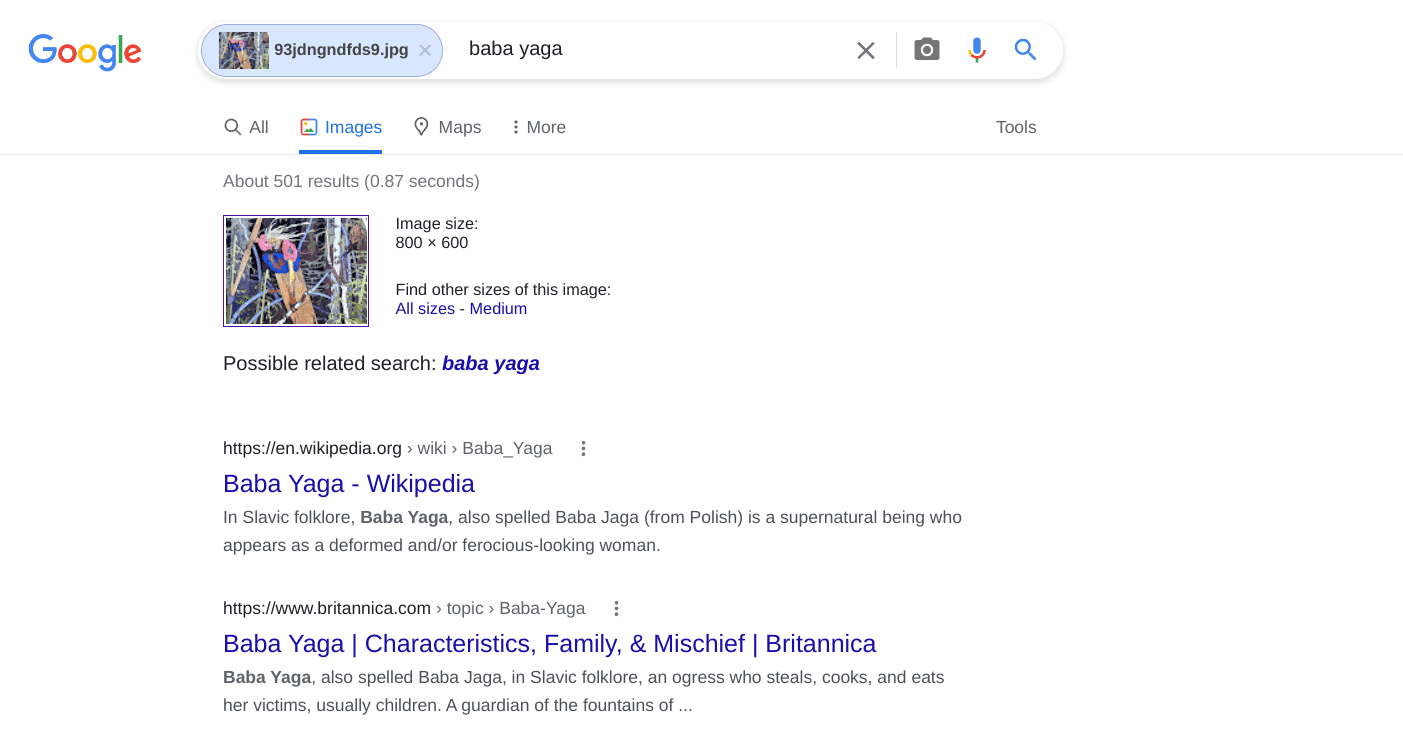
4. In our example here, we tried to look on Google using the reverse image search technique about a photo of an old, creepy woman. We saw the figure somewhere before but couldn’t get our heads to pinpoint the exact origin. To our surprise, Google image search came to the rescue and got us our answer within seconds. It turns out that the lady we were pondering so hard about is Baba Yaga.
That’s the plainest and simple way to reverse search with an image on Google. As you can see below, things have been pretty great in our case, and the story is similar in most cases.

Successful search results
An alternative way to reverse search with an image on Google
While we’d urge you to go for the method outlined above, there’s another way to reverse search using an image on Google, and we have to tell you about it now that the topic is relative. Instead of shooting for the official image search engine distinctively, you can double tap on any image you see and click on “Search image with Google Lens.” That way, you’ll be able to haul the same results without breaking a sweat.
Let us shed more light on this with the help of the following example. If you ever encounter any obscure image with no precise details regarding its whereabouts or source, double-tap on it to get started. In our case, we’ll pick an image from Google. After double-tapping or right-clicking on the image, the following option should appear on your end.

Searching image with the Google Lens feature
Click on it and let the search engine do the trick for you. Although this time, a panel will appear on the screen’s right side, allowing you to explore the scenario in detail. You should be able to discover the source of the image painlessly from there onward, so Google Lens is an option you have to bear in mind while learning reverse searching with an image on Google. With that being said, let’s conclude the article now.
Conclusion
In this comprehensive guide, we’ve talked about some of the best ways you can use to reverse search an image, which is digging up the origin of an image.
Whether you choose to upload a photo on Google Images yourself, paste a URL, or employ the functionality of Google Lens to achieve the task, the famous search engine is there to accommodate your requirements on the fly. Please let us know down in the comments section if this article proved to be handy to you. We’d love to read your feedback!
